
Machame vs Lemosho: Which Route Is Better?-Kili Quests

Choose the Right Route for Your Climb

Compare routes and get expert advice before your climb.

Kilimanjaro Planning Guides

Prepare for your climb:

OUR CATEGORIES

Machame vs Lemosho: Which Kilimanjaro Route Is Better?

Choosing between the Machame Route and the Lemosho Route is one of the most common decisions climbers face when planning a Kilimanjaro trek. Both routes are among the most popular on the mountain, and both offer beautiful scenery, strong trekking experiences, and good summit potential when properly paced.

However, they are not the same. The differences between Machame and Lemosho can affect how well you acclimatize, how crowded the trail feels, how much time you need, how much the climb costs, and how comfortable the overall experience feels.

Lemosho is known for its longer itinerary, quieter western approach, and strong acclimatization profile. Machame is popular for its balance of scenery, challenge, accessibility, and cost.

Still comparing routes? See our Kilimanjaro routes comparison guide or explore the full Machame Route guide and Lemosho Route guide for detailed breakdowns.

Quick Answer: Is Machame or Lemosho Better?

Lemosho is usually the better choice if you want more time to acclimatize, a quieter start, and a more gradual overall experience. It is especially strong for climbers who want a longer itinerary and a better summit profile.
 
Machame is usually better if you want a shorter, more affordable, and well-established Kilimanjaro route with excellent scenery and a classic trail experience. The 7-day Machame itinerary is much stronger than the 6-day version because it gives your body more time to adjust to altitude.
 
In simple terms: choose Lemosho for better acclimatization and a quieter start. Choose Machame for strong scenery, lower cost, and a shorter classic route.
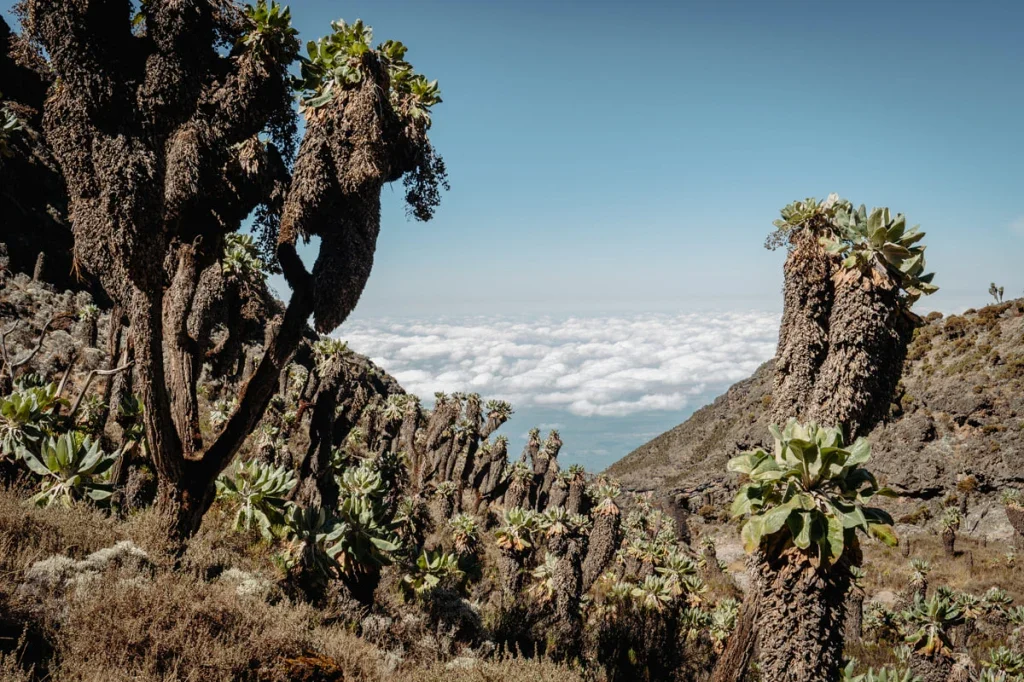
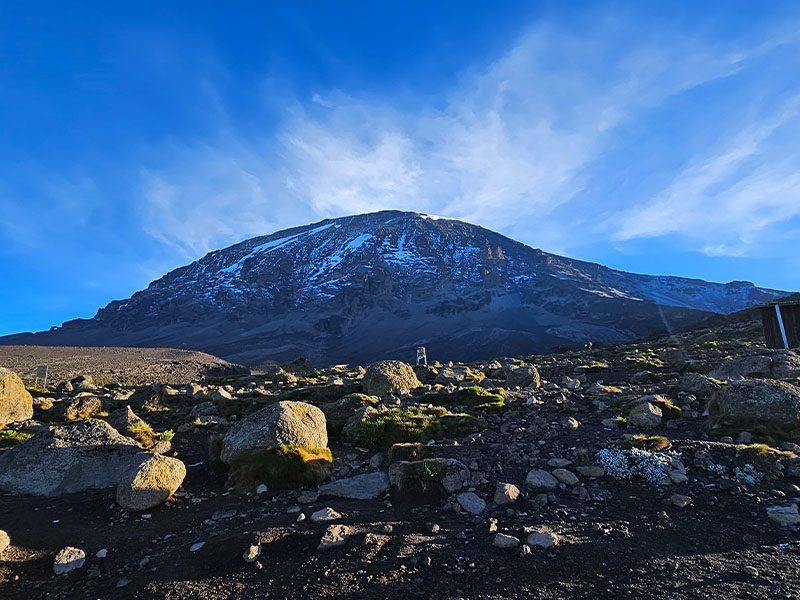
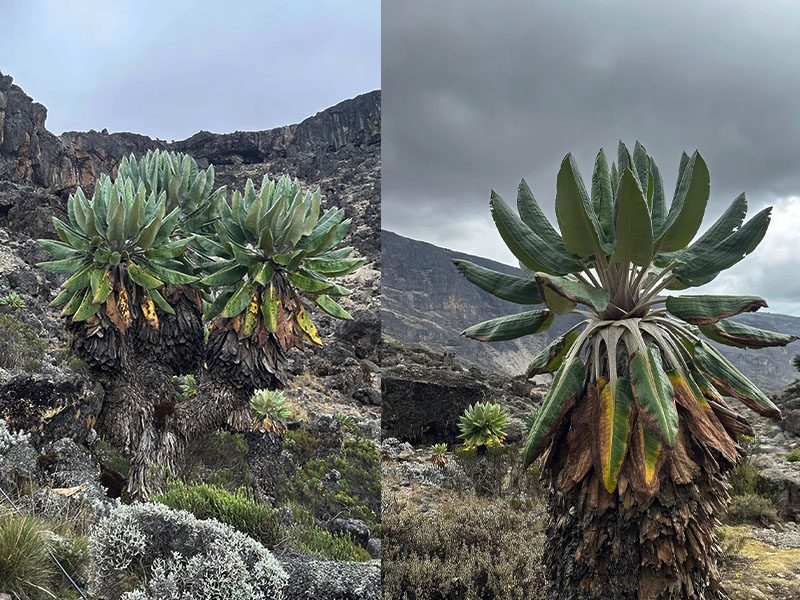
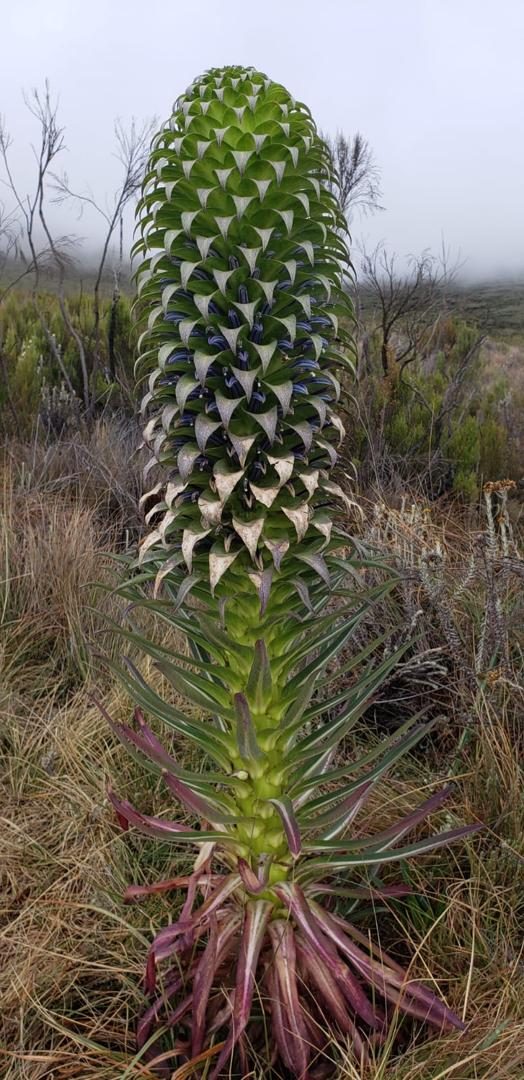
Giant groundsels in the alpine desert zone of Mount Kilimanjaro | Kili Quests
Machame vs Lemosho: comparing Kilimanjaro’s most scenic routes — a popular trail versus a quieter, more gradual approach.

Table of Contents

Overview of Machame and Lemosho Routes

Feature Machame Route Lemosho Route
Common nickname Whiskey Route No common nickname
Starting side Southern Kilimanjaro Western Kilimanjaro
Typical duration 6 or 7 days 7 or 8 days
Route experience Popular, scenic, active, and well-established Remote start, scenic landscapes, and a quieter first few days
Scenery Rainforest, moorland, alpine desert, Barranco Wall, and high summit zone Rainforest, Shira Plateau, moorland, alpine desert, Barranco Wall, and high summit zone
Crowd level Busier because it is one of the most popular Kilimanjaro routes Quieter at the beginning before joining the Machame trail later
Acclimatization Strong when completed over 7 days Stronger because of the longer 7 to 8-day itinerary
Best for Climbers who want a classic scenic route with a shorter itinerary and lower cost Climbers who want more acclimatization time, a quieter start, and a more gradual experience

What Is the Machame Route Like?

The Machame Route is one of the most popular Kilimanjaro routes and is often called the “Whiskey Route.” It is known for scenic trails, varied landscapes, and a strong acclimatization profile when completed over 7 days.
 
Machame approaches Kilimanjaro from the southern side and passes through rainforest, moorland, alpine desert, and the high summit zone. It also includes famous sections such as the Barranco Wall, which makes the route feel adventurous without requiring technical climbing skills.
 
Because Machame is well-established and widely offered, it can feel busier than Lemosho, especially during peak climbing seasons. However, it remains a strong choice for climbers who want a classic Kilimanjaro experience with excellent scenery, a shorter itinerary, and a more affordable price than longer routes.
 
For a full breakdown, see our Machame Route Kilimanjaro guide.

What Is the Lemosho Route Like?

The Lemosho Route starts on the western side of Kilimanjaro and is known for its quieter beginning, remote landscapes, and gradual approach. It is often chosen by climbers who want more time on the mountain and a stronger acclimatization profile.

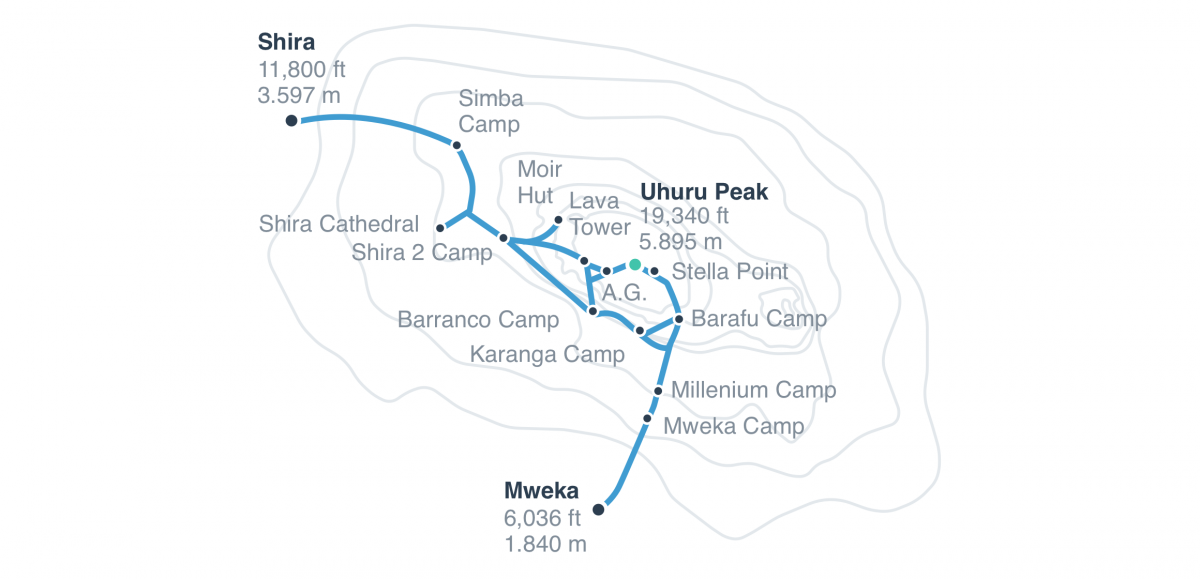
The route begins in a less crowded area before crossing the Shira Plateau and later joining the same southern circuit used by Machame. This gives Lemosho a strong mix of remote scenery, open highland views, and classic Kilimanjaro trail sections.

Lemosho is usually completed over 7 or 8 days, with the 8-day itinerary offering the most comfortable pacing. Because the route gives climbers more time to adjust to altitude, it is often a better choice for those who want to improve their summit profile without rushing the climb.

Learn more in our detailed Lemosho Route Kilimanjaro guide.

Key Differences Between Machame and Lemosho

Category Machame Route Lemosho Route
Acclimatization Strong when completed over 7 days, but the 6-day version can feel more rushed. Stronger because the route is longer and more gradual, especially on the 8-day version.
Scenery Very scenic, with rainforest, moorland, alpine desert, Barranco Wall, and summit views. More varied early scenery, including a quieter western approach and the Shira Plateau.
Difficulty Physically demanding, especially on shorter itineraries because the altitude gain feels faster. Similar overall difficulty, but the longer itinerary spreads the effort over more days.
Crowds Busier because it is one of the most popular Kilimanjaro routes. Quieter at the start before joining the Machame trail later in the climb.
Cost Usually more affordable because it is shorter and starts from a more common access point. Usually costs more because it is longer and starts from the western side of the mountain.
Best choice for Climbers who want a classic scenic route, lower cost, and a shorter itinerary. Climbers who want more acclimatization time, quieter early days, and a more gradual route profile.

Acclimatization: Which Route Gives You a Better Summit Profile?

One of the biggest differences between Machame and Lemosho is how much time each route gives your body to adjust to altitude.
 
Lemosho has the advantage because it is usually climbed over 7 or 8 days. The longer itinerary creates a more gradual approach, especially during the early part of the climb. This gives climbers more time to adapt before reaching the higher camps and summit night.
 
Machame also has a strong acclimatization profile when completed over 7 days. The route follows a good “climb high, sleep low” pattern, especially around Lava Tower and Barranco Camp. However, the 6-day Machame itinerary can feel more rushed because there is less time for your body to adjust.
 
If acclimatization is your top priority, Lemosho has the stronger advantage. If you choose Machame, the 7-day itinerary is the smarter option because it gives you a better pace than the shorter 6-day version.
For a deeper explanation of altitude risk and prevention, read our Altitude Sickness on Kilimanjaro guide and Kilimanjaro Acclimatization Tips.

Scenery and Overall Experience

Both Machame and Lemosho are among the most scenic Kilimanjaro routes, but they deliver the experience differently.
 
Machame gives climbers a dramatic southern approach with rainforest, moorland, alpine desert, the Barranco Wall, and strong views toward Kibo. It feels active and energetic because it is a popular route with many climbers on the trail, especially during peak seasons.
 
Lemosho offers more variety in the early days. The route begins on the quieter western side of Kilimanjaro, crosses remote forest and heath zones, then opens onto the wide Shira Plateau before joining the southern circuit. This gives Lemosho a more gradual and spacious feel before it later shares some of the same dramatic sections as Machame.
 
If you want the most classic scenic route with a lively trail atmosphere, Machame is strong. If you want a quieter beginning, more landscape variety, and a more remote early experience, Lemosho has the edge.

Difficulty Level: Is Machame or Lemosho Harder?

Machame and Lemosho are similar in overall difficulty because both eventually follow the southern circuit and include challenging sections such as the Barranco Wall, high-altitude trekking days, and summit night.
 
Neither route requires technical climbing skills. You do not need ropes or mountaineering experience. The real challenge is endurance, altitude, and how well your body adapts as you climb higher.
 
Machame can feel harder if you choose the 6-day itinerary because the altitude gain is faster and the recovery time is shorter. The 7-day Machame itinerary gives a better pace and is usually the smarter option for most climbers.
 
Lemosho can feel more comfortable because the route spreads the effort over 7 or 8 days. The extra time does not make Kilimanjaro easy, but it gives your body more space to adjust and makes the climb feel less rushed.
 
If you are worried about difficulty, compare the 7-day Machame Route against the 8-day Lemosho Route. That is the fairest comparison for most climbers.
 
Not sure what to expect? Read our full guide on how difficult Kilimanjaro really is.

Crowd Levels: Which Route Is Quieter?

Machame is usually busier because it is one of the most popular Kilimanjaro routes. During peak climbing seasons, the camps and trail sections can feel active, especially around Machame Camp, Barranco Camp, Karanga Camp, and Barafu Camp.
 
Lemosho starts quieter because it begins on the western side of Kilimanjaro. The first few days often feel more remote and peaceful, especially before the route reaches the Shira Plateau and later joins the southern circuit.
 
However, Lemosho does not stay completely quiet for the whole climb. After it joins the trail system used by Machame, the route becomes busier, especially near Barranco, Karanga, Barafu, and summit night.
 
If you want a classic route with more energy and other climbers around, Machame is fine. If you want a quieter start and a more remote early experience, Lemosho is the better choice.

Cost and Value: Which Route Is More Affordable?

Machame is usually more affordable than Lemosho because it is shorter, easier to access, and more commonly offered by Kilimanjaro operators. A 6 or 7-day Machame climb normally costs less than a 7 or 8-day Lemosho climb.
 
Lemosho usually costs more because it takes more days, starts from the western side of the mountain, and requires more crew support, food, park fees, and logistics. The extra cost is not only about comfort. It also gives climbers more time to acclimatize and enjoy a less rushed route experience.
 
If your main priority is budget, Machame gives strong value. If your main priority is acclimatization, scenery, and a more gradual climb, Lemosho often gives better overall value despite the higher cost.
 
For a full price breakdown, read our Kilimanjaro Climb Cost guide.
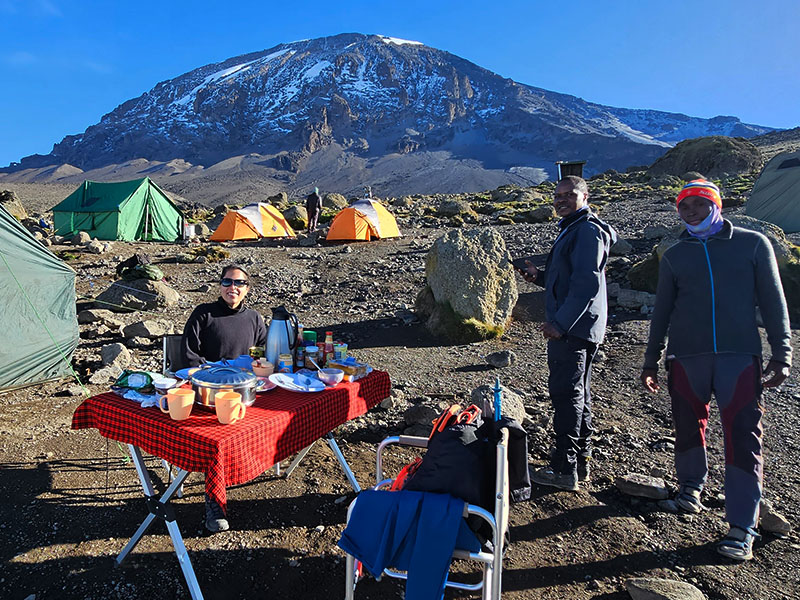
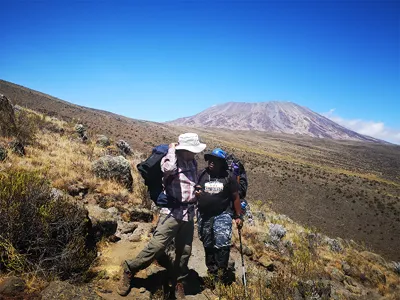
View of Kibo Peak from Karanga Camp on the Shira Route with rocky alpine terrain in the foreground.
Lemosho offers a longer and more gradual ascent, while Machame can feel steeper depending on the itinerary.

Machame vs Lemosho: Which Route Should You Choose?

Choose Lemosho if your main priority is acclimatization, a quieter start, and a more gradual climb. The route gives you more time on the mountain, especially if you choose the 8-day itinerary, which helps create a stronger summit profile.
 
Choose Machame if you want a shorter, more affordable, and classic Kilimanjaro route with excellent scenery. The 7-day Machame itinerary is the better choice for most climbers because it gives more time to adjust than the 6-day version.

Choose Lemosho If You Want More Acclimatization Time

Lemosho is the stronger choice if you want a slower approach and more time for your body to adapt to altitude. This is especially important for first-time high-altitude trekkers or anyone worried about rushing the climb.

Choose Machame If You Want a Shorter Classic Route

Machame is a strong option if you want a well-established trail, dramatic scenery, and a shorter itinerary. It is especially good for climbers who want a classic Kilimanjaro experience without the extra time and cost of Lemosho.

Choose Lemosho If You Prefer a Quieter Start

Lemosho begins on the western side of Kilimanjaro, so the first few days are usually quieter and more remote. This makes the early part of the climb feel more peaceful before the route later joins the busier southern circuit.

Choose Machame If You Are Watching Your Budget

Machame is usually more budget-friendly because it is shorter and easier to access. If cost matters but you still want a strong scenic route, Machame is a practical choice, especially over 7 days.

Machame vs Lemosho Pros and Cons

Route Pros Cons
Machame Route
  • Classic and well-established Kilimanjaro route
  • Excellent scenery across several vegetation zones
  • Strong acclimatization profile when climbed over 7 days
  • Usually more affordable than Lemosho
  • Good option for climbers with limited time
  • Can feel crowded during peak climbing seasons
  • 6-day version can feel rushed
  • Faster altitude gain than Lemosho
  • Less remote at the beginning of the climb
Lemosho Route
  • Longer and more gradual route profile
  • Quieter western approach in the early days
  • Strong acclimatization support, especially over 8 days
  • Highly scenic route with the Shira Plateau
  • Good option for climbers who want a less rushed experience
  • Usually more expensive than Machame
  • Requires more days on the mountain
  • Later joins the busier southern circuit
  • Not ideal for climbers with a tight schedule

How to Choose the Right Route for Your Kilimanjaro Climb

Choosing between Machame and Lemosho depends on your time, budget, altitude concerns, and the kind of trail experience you want.
 
Machame is the better fit if you want a shorter, more affordable, and classic Kilimanjaro route with dramatic scenery. Lemosho is the better fit if you want more acclimatization time, a quieter start, and a more gradual approach to the mountain.
Your Priority Better Route Choice Why
Best acclimatization support Lemosho Route It gives you more time on the mountain, especially with the 8-day itinerary.
Lower overall cost Machame Route It is usually shorter and easier to access, so it normally costs less than Lemosho.
Quieter early trail experience Lemosho Route It starts on the western side of Kilimanjaro before joining the busier southern circuit later.
Classic Kilimanjaro trail Machame Route It is one of the most established and recognizable Kilimanjaro routes.
More gradual pacing Lemosho Route The longer itinerary spreads the effort over more days and feels less rushed.
Limited travel time Machame Route It can be completed in fewer days, though 7 days is better than 6 for acclimatization.
Still unsure? Compare all options in our Kilimanjaro routes comparison guide to see how Machame and Lemosho compare with Marangu, Rongai, Northern Circuit, and other routes.
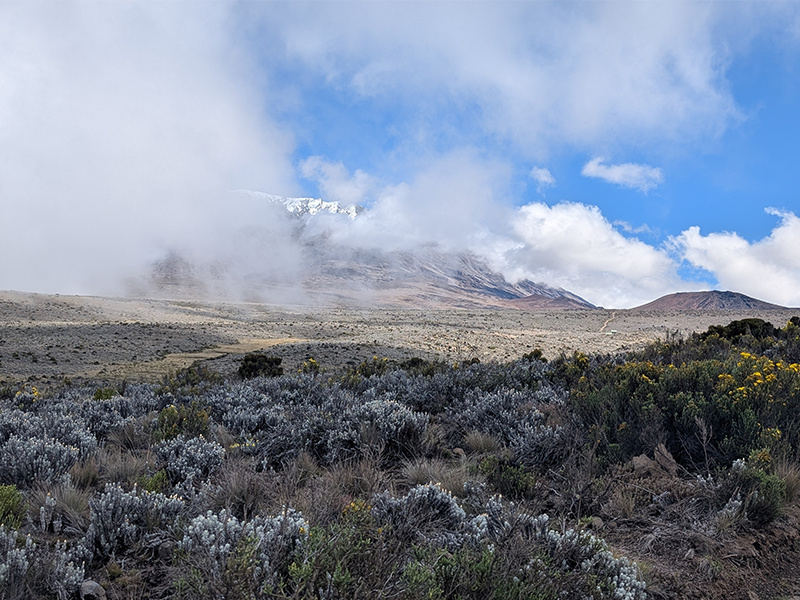
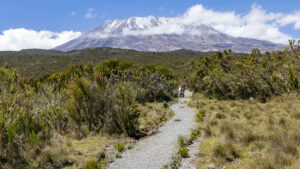
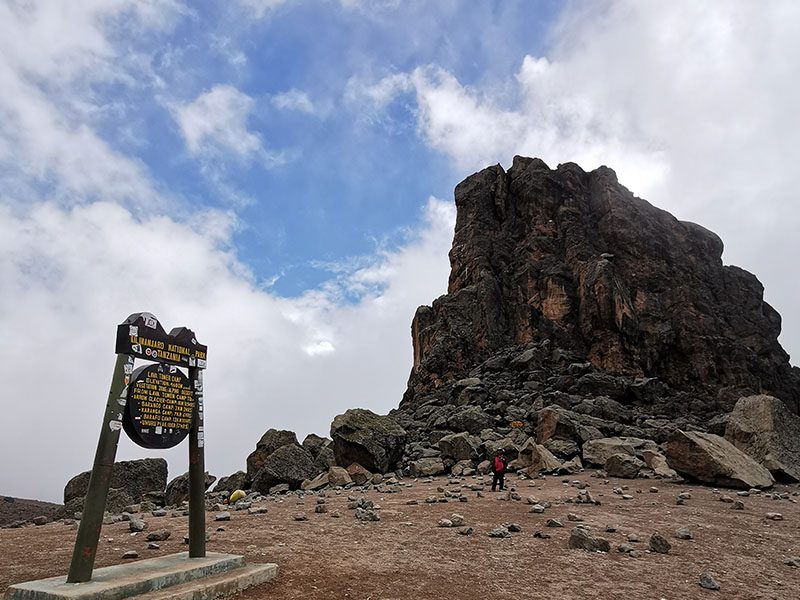
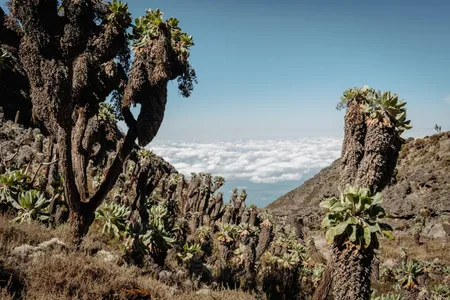
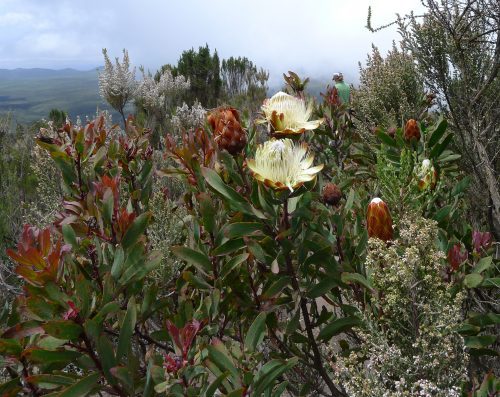
Moorland vegetation on Mount Kilimanjaro with cloud-covered summit and scattered alpine shrubs under a blue sky.
Lemosho features remote landscapes like the Shira Plateau, while Machame offers dramatic scenery across multiple zones.

Frequently Asked Questions About Machame vs Lemosho

Which route is better, Machame or Lemosho?

Lemosho is usually better if you want more acclimatization time, a quieter start, and a more gradual route profile. Machame is better if you want a shorter, more affordable, and classic Kilimanjaro route with excellent scenery. The best choice depends on your budget, schedule, fitness level, and comfort with altitude.

Is Machame or Lemosho better for beginners?

Lemosho is often the better option for beginners because it gives climbers more time to adjust to altitude, especially on the 8-day itinerary. Machame can also work well for beginners if you choose the 7-day version instead of the faster 6-day itinerary.

Is the Lemosho Route worth the extra cost?

Yes, Lemosho is worth the extra cost for many climbers because it offers a quieter start, more time on the mountain, stronger acclimatization support, and excellent scenery. If your budget allows, it is often the more comfortable choice.

Which route is more scenic, Machame or Lemosho?

Both routes are scenic, but Lemosho has the edge for variety because it starts on the western side of Kilimanjaro and crosses the Shira Plateau before joining the southern circuit. Machame is also very beautiful, especially around the rainforest, Barranco Wall, Karanga Valley, and summit zone.

Is Machame harder than Lemosho?

Machame can feel harder if you choose the 6-day itinerary because the altitude gain feels faster and there is less recovery time. Lemosho usually feels more gradual because it is climbed over 7 or 8 days. However, both routes still require good fitness, preparation, and respect for altitude.

Do Machame and Lemosho use the same trail?

Not at the beginning. Machame starts from the southern side of Kilimanjaro, while Lemosho starts from the western side. Lemosho later joins the southern circuit, so both routes share some of the same trail sections later in the climb, including areas around Barranco, Karanga, Barafu, and the summit approach.

Choose the Right Kilimanjaro Route with Local Experts

Choosing between Machame and Lemosho is not only about scenery. It is about your fitness level, time, budget, altitude concerns, and the kind of trekking experience you want.

At Kili Quests, we help you choose the Kilimanjaro route that matches your goals, travel dates, and comfort level. Whether Machame or Lemosho is the better fit, our local team will guide you toward a route and itinerary that gives you a strong, well-paced climb.
 
Contact our team for expert Kilimanjaro trip advice and a custom climb plan.

Related Articles

Kilimanjaro Climb Cost: Full Price Breakdown | Kili Quests

Plan Your Kilimanjaro Climb Budget

Climbing Kilimanjaro is a major investment choosing the right route and support team makes all the difference.
At Kili Quests, we help you:
Explore More Kilimanjaro Planning Guides

Cost is just one part of planning your climb. Explore these guides to choose the right route and prepare properly.

OUR CATEGORIES

How Much Does It Cost to Climb Kilimanjaro? Full Price Breakdown

Climbing Mount Kilimanjaro is not a cheap trip, and travelers should understand the real cost before booking. For many international climbers, a properly organized Kilimanjaro climb often starts around $2,000 per person, while many standard climbs fall between $2,500 and $4,000. Higher-comfort or premium climbs can cost more depending on the route, number of days, group size, inclusions, and service level.
 
The price can be confusing because different companies advertise very different rates. But Kilimanjaro pricing is not random. The final cost is shaped by national park fees, route length, guide and porter support, safety equipment, meals, transport, accommodation, and how responsibly the climb is operated.
 
This guide explains the real cost of climbing Kilimanjaro, what is usually included, what is usually excluded, what extra expenses to budget for, and why the cheapest climb is not always the best value.
 
Choosing the right route affects both price and acclimatization. Before booking, compare your options in Kilimanjaro Routes Comparison: Which Route Is Best?

Quick Answer: How Much Does It Cost to Climb Kilimanjaro?

For many international climbers, a Kilimanjaro climb usually starts from around $2,000 per person for lower-budget climbs, while standard climbs often range from about $2,500 to $3,500. Higher-comfort or premium climbs can cost more, especially on longer routes such as Lemosho or the Northern Circuit.
 
The final price depends on route length, number of climbers, park fees, guide and porter support, food, safety equipment, transport, hotel arrangements, and service level.
 
A lower price is not always better. Very cheap Kilimanjaro climbs may use shorter itineraries, weaker equipment, less experienced support, poor porter treatment, or fewer safety systems. For most climbers, the best value is a climb that balances fair price, proper acclimatization, safety, and reliable support.
Climb Category Typical Price Range What It Usually Means
Budget climb From around $2,000–$2,500 per person Usually shorter itineraries, group departures, basic logistics, and fewer comfort features.
Standard climb Around $2,500–$4,000 per person A better balance of route length, guide support, safety, meals, equipment, and overall value.
Premium climb Usually $4,000+ per person Longer routes, upgraded comfort, stronger logistics, private support, and higher service level.
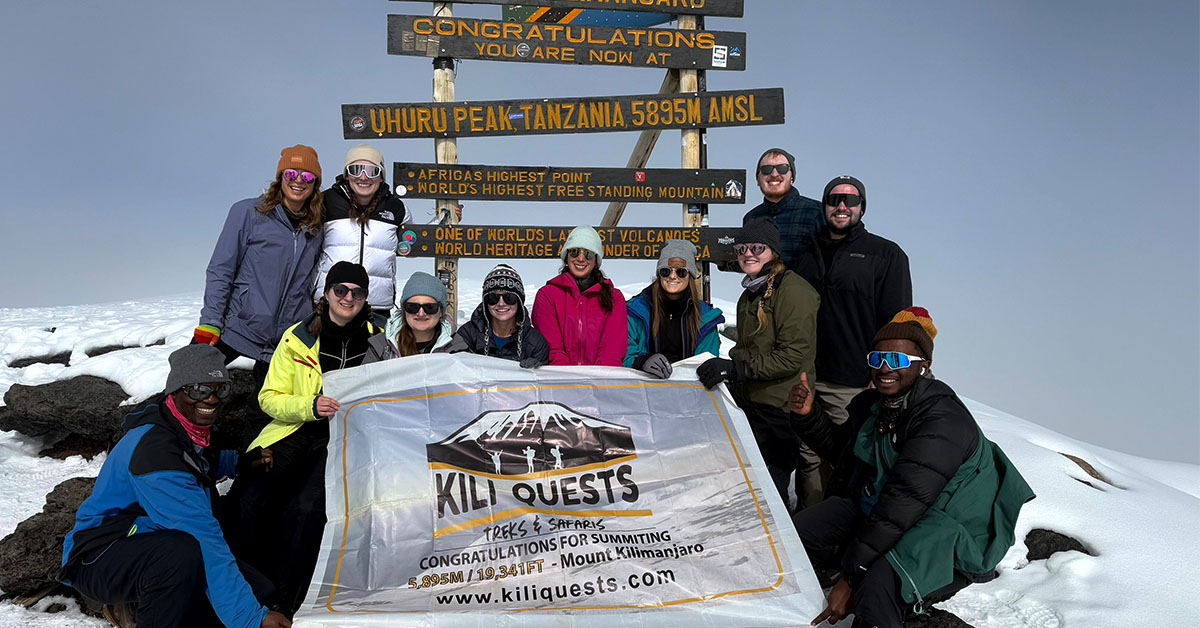
Group of trekkers celebrating together at Uhuru Peak, the summit of Mount Kilimanjaro
Kilimanjaro climbers at Uhuru Peak with their guide team after a successful summit.

Table of Contents

Average Cost to Climb Mount Kilimanjaro

The average cost to climb Kilimanjaro depends on the route, number of days, group size, and service level. Shorter routes usually cost less because they require fewer park-fee days, fewer meals, and fewer crew days. Longer routes cost more, but they often give your body more time to acclimatize.
 
Most climbers should not judge Kilimanjaro prices by the headline number alone. A cheaper climb may look attractive, but it can become poor value if it includes a rushed itinerary, weak equipment, limited safety support, or unclear exclusions.
 
The better question is not only “What is the cheapest Kilimanjaro climb?” The better question is: “What price gives me a safe, properly supported, and realistic climb?”
Cost Item Why It Affects the Price
Park fees Kilimanjaro National Park charges mandatory fees based on route type and number of days.
Route length Longer routes cost more because they require more park days, meals, crew wages, and logistics.
Guides and porters A proper climb needs licensed guides, assistant guides, porters, cooks, and support staff.
Food and water Meals, drinking water, cooking equipment, and camp support are part of mountain logistics.
Safety equipment Emergency oxygen, first aid supplies, communication tools, and guide monitoring add real cost.
Accommodation and transport Some packages include airport transfers and hotel nights before or after the climb.
Service level Private climbs, upgraded meals, better tents, private toilets, or premium support increase the price.

What Affects the Cost of Climbing Kilimanjaro?

The cost of climbing Kilimanjaro depends on several major factors. Once you understand these, the price differences between operators become easier to compare.

Route choice

Some routes are shorter and cheaper, while others are longer and more expensive. A route with more days on the mountain means higher park fees, more crew support, more meals, and more logistics.
 
For example, a shorter route like Marangu or a 6-day Machame itinerary may cost less than an 8-day Lemosho or 9-day Northern Circuit climb. But longer routes usually give your body more time to acclimatize, which can make the climb more manageable.
 
Before choosing by price alone, compare the options in Kilimanjaro Routes Comparison: Which Route Is Best?

Number of days on the mountain

This is why longer climbs cost more. But extra days can also provide better acclimatization, which is one of the most important factors on Kilimanjaro. For many climbers, paying for enough days is better value than rushing the mountain. Before choosing a shorter itinerary to save money, read How Many Days to Climb Kilimanjaro so you understand how route length affects cost, acclimatization, and summit preparation.

Group climb vs private climb

Joining a group climb usually costs less because transport, guides, crew, and logistics are shared among more climbers.
 
A private climb costs more because the itinerary and support system are arranged specifically for your group.
 
Private climbs may be worth the extra cost if you want more flexibility, a private schedule, or a more personalized experience.

Level of comfort and service

Not every Kilimanjaro climb offers the same comfort level. Some packages include basic camping equipment and simple meals, while others include upgraded tents, thicker mattresses, private toilet tents, better meals, and more personal support.
 
Higher comfort increases the price, but it can also improve your experience during a demanding multi-day trek.

Safety standards

A responsible Kilimanjaro operator invests in guide training, emergency planning, oxygen systems, first aid supplies, communication tools, and daily health monitoring. These systems cost money, but they are not extras to ignore.
 
If you are comparing companies, do not only ask what is cheap. Ask what safety support is included.

Ethical porter treatment

Porters are essential to every Kilimanjaro climb. A responsible company includes fair porter treatment, proper staffing levels, meals, equipment support, and reasonable loads in the cost of the trip.
 
Very low prices can sometimes mean the mountain crew is underpaid, overloaded, or poorly supported. That is not the kind of saving you want behind your climb.
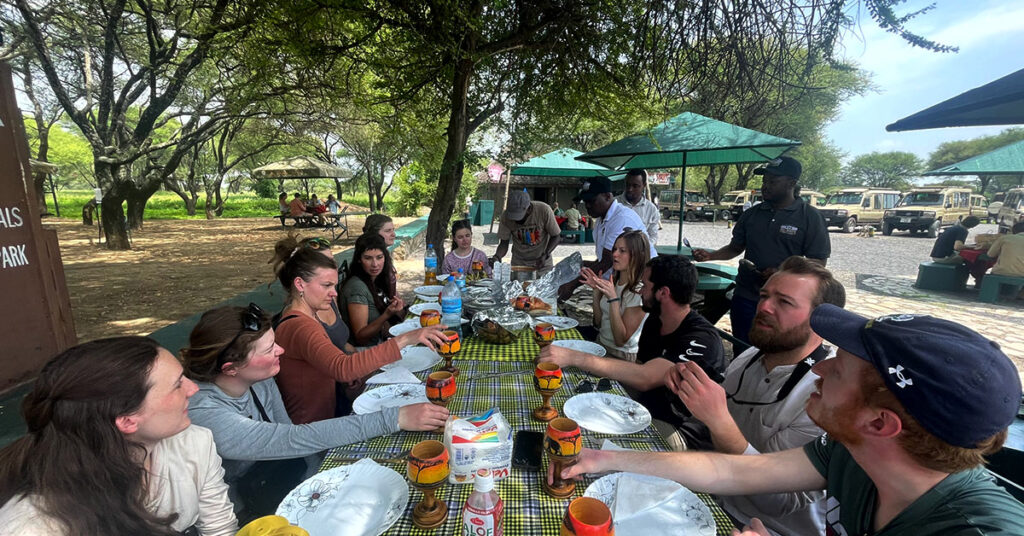
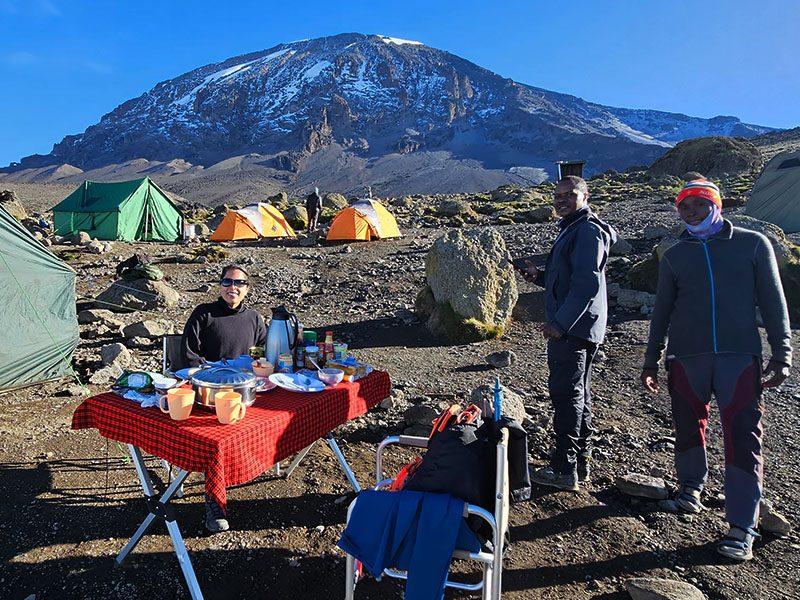
Tourists enjoying meals together at a Kilimanjaro camp after a day of trekking.

Kilimanjaro National Park Fees Explained

A large part of the cost of climbing Kilimanjaro goes to mandatory national park fees. These fees are not optional, and every licensed operator must include them when organizing a legal Kilimanjaro climb.
Park-related costs usually include:

  • Conservation fees
  • Camping fees or hut fees
  • Rescue fees
  • Crew entry fees
  • VAT on applicable services
These fees increase with the number of days you spend on the mountain. That is one reason why longer routes such as Lemosho and Northern Circuit cost more than shorter itineraries like Marangu or 6-day Machame.

However, more days can also give your body better time to acclimatize. So the cheapest route is not always the best value if it gives you less time to adjust to altitude.

Before comparing packages, make sure the operator clearly states whether park fees are included in the price. A quote that looks cheap may become more expensive if important fees are excluded or unclear.

Guide, Porter, and Crew Costs

A Kilimanjaro climb requires a full mountain support team. This is one of the biggest differences between Kilimanjaro and a normal hiking trip. Climbers do not carry everything alone, and the mountain operation depends on guides, porters, cooks, and support staff working together.
Most Kilimanjaro climbs include:


  • Lead guide
  • Assistant guides
  • Porters
  • Cook
  • Camp support staff depending on group size and service level
Guides manage the route, pace, safety checks, and summit strategy. Porters carry tents, food, cooking equipment, safety gear, and expedition supplies. Cooks prepare meals at camp so climbers can recover and continue each day.


A responsible company must pay and support this team properly. If a climb is extremely cheap, ask how the crew is paid, how many staff are included, what equipment they use, and whether porter welfare is respected.


The crew is not a small detail. Guides, porters, and cooks are one of the main reasons climbers can attempt Kilimanjaro safely and with proper support. Before comparing very cheap prices, read Kilimanjaro Porter Roles so you understand what porters do, why they are essential, and how their work affects the climb.

What Is Usually Included in a Kilimanjaro Climb Package?

Most reputable Kilimanjaro climb packages include the main services needed for the mountain trek. Exact inclusions vary by company, so always check the package details before booking.
Typical inclusions may include:
  • Licensed mountain guides
  • Assistant guides
  • Porters and cooks
  • National park fees and permits
  • Camping equipment or hut accommodation, depending on the route
  • Meals on the mountain
  • Drinking water during the trek
  • Transport to and from the mountain gate
  • Basic safety equipment such as emergency oxygen and first aid supplies
Some packages may also include hotel accommodation before and after the climb, airport transfers, pre-climb briefing, gear checks, or luggage storage. Do not assume these are included unless the operator clearly lists them.
 
For a deeper breakdown of what a proper trekking package should cover, read Kilimanjaro Climb Package before comparing prices.
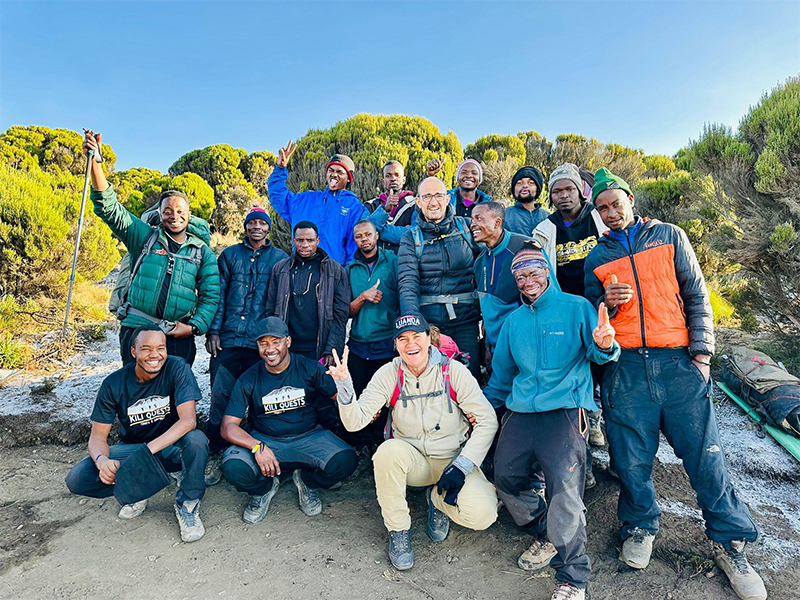
Kilimanjaro trekkers and porters smiling together at the end of a successful hike
Every Kilimanjaro climb is a team effort — guides, porters, and climbers sharing the journey to the summit.

What Is Usually Not Included?

Even when a Kilimanjaro package looks complete, there are usually extra costs that climbers must budget for separately. These costs can make a big difference in your total trip budget.
Common exclusions may include:
  • International flights
  • Tanzania visa
  • Travel insurance
  • Tips for guides, porters, and cooks
  • Personal trekking gear
  • Gear rental
  • Hotel upgrades
  • Extra snacks, drinks, and personal items
  • Optional safari, Zanzibar, or day tours before or after the climb
Always ask for a written list of inclusions and exclusions before paying a deposit. A package that looks cheaper at first can become more expensive if important costs are missing or unclear.

Extra Costs to Budget For

Your total Kilimanjaro budget should include more than the climbing package. These extra costs can add up quickly, especially for international travelers.

International Flights

Flights to Tanzania vary depending on your departure country, travel season, airline, and booking time. Most climbers fly into Kilimanjaro International Airport, but some also arrive through Arusha, Nairobi, Dar es Salaam, or Zanzibar depending on their wider travel plans.

Tanzania visa

Most foreign travelers need a visa to enter Tanzania. The cost depends on nationality, so check the current visa rules before traveling.requirements before traveling.

Travel insurance

Travel insurance is essential for Kilimanjaro. Your policy should cover high-altitude trekking and emergency evacuation. Do not buy a basic travel policy without checking the altitude limit.

Tips for the mountain crew

Tipping is standard on Kilimanjaro and should be planned before the climb. Guides, porters, and cooks work hard throughout the trek, and tips are an important part of the total trip budget.

Personal Gear or Gear Rental

If you do not own the required equipment, you may need to buy or rent items such as a sleeping bag, trekking poles, insulated jacket, waterproof layers, gloves, or summit gear.
 
Use Kilimanjaro Packing List to check what you need before deciding what to buy or rent.

Hotels Before and After the Climb

Many climbers stay at least one night before and one night after the trek. Some packages include these nights, while others do not.

Safari or Zanzibar Extension

Many travelers combine Kilimanjaro with a Tanzania safari or Zanzibar beach trip. These are separate costs from the climb unless your package clearly includes them.

Budget vs Standard vs Luxury Kilimanjaro Climbs

Not all Kilimanjaro climbs offer the same level of service, comfort, safety support, and itinerary quality. The price usually reflects the route length, group size, crew support, equipment quality, meals, safety systems, and overall service level.

Budget Kilimanjaro Climbs

Budget Kilimanjaro climbs usually sit near the lower end of the price range. They may work for travelers who want to control costs, especially on group departures or shorter itineraries.
 
However, climbers should be careful. A budget climb can become poor value if it uses a rushed route, weak equipment, limited safety support, poor meals, or unclear inclusions. If you choose a budget option, make sure park fees, crew support, safety equipment, food, and porter treatment are clearly explained.

Standard Kilimanjaro Climbs

Standard Kilimanjaro climbs usually offer the best balance for many travelers. They often include proper route planning, reliable equipment, experienced guides, good meals, fair crew support, and enough safety systems for a serious mountain trek.
 
For most climbers, this is the smartest category because it avoids the biggest risks of going too cheap while still keeping the trip realistic and affordable.

Premium Kilimanjaro Climbs

Premium Kilimanjaro climbs cost more because they usually include higher comfort, stronger logistics, private service, upgraded meals, better sleeping arrangements, private toilet tents, and longer itineraries with better acclimatization time.
 
A premium climb is not necessary for everyone, but it can be worth it for travelers who want more comfort, more support, and a less basic mountain experience.
 
The right choice depends on your budget, comfort expectations, route preference, and how much support you want during the climb.

Why Are Some Kilimanjaro Operators Much Cheaper Than Others?

Some Kilimanjaro operators advertise very low prices, and that can look attractive at first. But when a climb is much cheaper than the average, you need to ask what has been removed from the package.
 
A lower price may come from:
  • Shorter itineraries with less acclimatization time
  • Larger group sizes
  • Basic camping equipment
  • Simpler meals
  • Fewer comfort features
  • Limited hotel or transfer inclusions
  • Less experienced support teams
  • Lower crew wages or poor porter support
  • Weaker safety equipment or health monitoring
Not every lower-cost operator is bad, but a very cheap climb should always be checked carefully. Kilimanjaro is not the place to buy blindly based on the lowest number.
 
Before booking, ask what is included, what is excluded, how many days are on the mountain, what safety equipment is carried, how guides monitor altitude symptoms, and how porters are supported.

What Should You Never Cut From Your Kilimanjaro Budget?

There are some parts of a Kilimanjaro climb where saving money can create bigger problems. A cheap price is not worth it if it weakens safety, acclimatization, food, equipment, or crew support.
Do not cut corners on:
  • Enough days for acclimatization
  • Experienced mountain guides
  • Emergency oxygen and first aid support
  • Fair porter support
  • Proper meals on the mountain
  • Warm summit clothing
  • Good hiking boots
  • Travel insurance with high-altitude trekking cover
  • A realistic route for your fitness level
The goal is not to book the most expensive climb. The goal is to avoid a price that is too low to support a safe and properly organized mountain experience.
 
Before choosing a short route only to save money, read How Many Days to Climb Kilimanjaro and compare your options in Kilimanjaro Routes Comparison: Which Route Is Best?
Kilimanjaro porter walking along the mountain trail with gear balanced on head
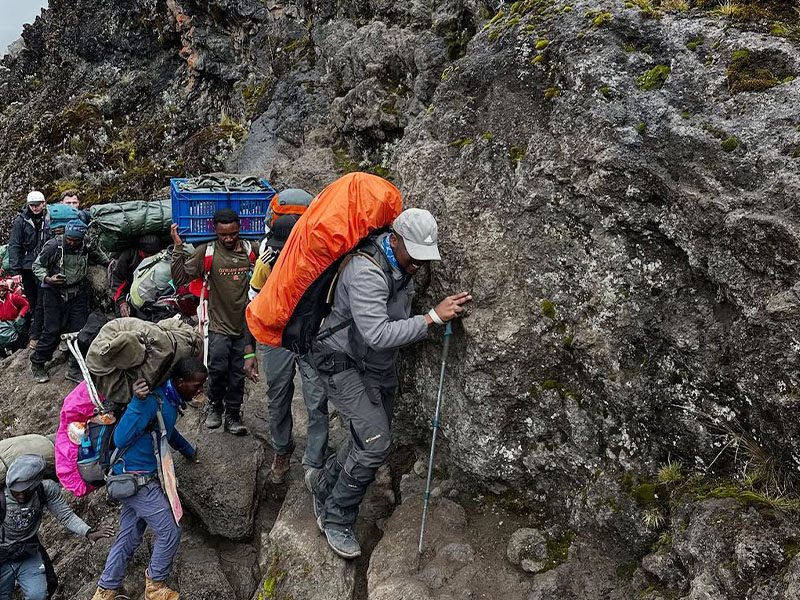
Porters guiding climbers up the Barranco Wall on Mount Kilimanjaro — a true display of strength, teamwork, and support on the mountain.

Example Kilimanjaro Price Scenarios

The exact price depends on the operator, route, group size, and service level. These examples show how route choice and comfort level can affect the final cost.

Lower-cost example

A 5 or 6-day group climb on a shorter route may sit near the lower end of the price range. This can appeal to budget travelers, but it usually gives less time for acclimatization and may include fewer comfort features.

Standard-Value Example

A 7-day Machame climb often sits in the middle range. This can be a good balance for climbers who want a scenic route, better acclimatization than shorter itineraries, and a more realistic summit plan.

Higher-value example

An 8-day Lemosho climb usually costs more because it includes more days on the mountain, higher park-fee totals, more crew time, and more meals. Many climbers still consider it better value because of the stronger acclimatization profile and scenic route experience.

Premium example

A 9-day Northern Circuit climb with upgraded service is usually one of the more expensive options. It offers the longest itinerary, quieter trails, strong acclimatization time, and a higher level of comfort and support.
 
The best choice is not always the cheapest or most expensive option. The best choice is the route and service level that match your fitness, budget, comfort expectations, and summit goals.

Is Climbing Kilimanjaro Worth the Cost?

For many climbers, Kilimanjaro is worth the cost because it is not just a normal hiking trip. It is a fully supported high-altitude expedition on the highest mountain in Africa.
 
The price covers more than the trail. It supports park fees, licensed guides, porters, cooks, meals, safety equipment, transport, logistics, and the mountain support system that makes the climb possible.
 
The value depends on choosing the right route and the right operator. A properly planned climb gives you better pacing, stronger support, clearer safety systems, and a more realistic mountain experience.
 
Kilimanjaro is expensive, but a well-organized climb can be worth it if the price includes proper acclimatization time, fair crew support, good meals, safe equipment, and experienced local guides

Frequently Asked Questions About Kilimanjaro Costs

How much does it cost to climb Kilimanjaro?

For many international climbers, a Kilimanjaro climb usually starts from around $2,000 per person for lower-budget climbs. Standard climbs often range from about $2,500 to $4,000, while premium climbs can cost more depending on the route, number of days, group size, and service level.
 
The final price depends on what is included, how many days you spend on the mountain, and the quality of support provided by the operator.

Why is climbing Kilimanjaro expensive?

Climbing Kilimanjaro is expensive because the trip includes mandatory national park fees, licensed guides, porters, cooks, food, equipment, transport, safety support, and mountain logistics.
 
A proper Kilimanjaro climb is not just a guide fee. It is a full expedition with a support team and regulated park costs.

What is the cheapest way to climb Kilimanjaro?

The cheapest way is usually to join a group climb on a shorter route with a lower-cost operator. However, the cheapest option is not always the best value.
 
Very low prices may mean shorter acclimatization time, basic equipment, weaker safety systems, unclear exclusions, or poor crew support. Always check what is included before choosing by price alone.

Are Kilimanjaro park fees included in the climb price?

Many reputable operators include Kilimanjaro park fees in the package price, but you should always confirm this before booking. Park fees are a major part of the total cost, so a quote that excludes them can look cheaper than it really is.
 
Ask for a clear written list of inclusions and exclusions before paying a deposit.

Do I need to tip Kilimanjaro guides and porters?

Yes. Tipping is standard on Kilimanjaro and should be included in your total budget. Guides, porters, and cooks work hard throughout the trek, and tips are an important part of the mountain crew’s income.
 
Ask your operator for tipping guidance before the climb so you can prepare the right amount.

Are flights included in Kilimanjaro climb packages?

Usually not. Most Kilimanjaro climb packages cover the mountain trek and some ground logistics, but international flights are normally booked separately by the traveler.
 
Some packages may include airport transfers or hotel nights, but this depends on the operator.

Does a longer Kilimanjaro route cost more?

Yes. Longer Kilimanjaro routes usually cost more because they require more park-fee days, more crew time, more meals, and more logistics.
 
However, longer routes can also give your body more time to acclimatize. For many climbers, paying for enough days is better value than choosing a rushed itinerary only to save money.

Plan Your Kilimanjaro Climb With Clear Pricing

Climbing Kilimanjaro is a major investment, and the cheapest price is not always the best value. The right climb should include a realistic itinerary, proper acclimatization time, experienced local guides, fair porter support, good meals, safety equipment, and clear inclusions.
 
At Kili Quests, we help climbers choose a route and package that matches their budget, fitness, travel dates, and summit goals. Our team explains what is included, what is not included, and how different routes affect the final cost.
 
If you are comparing Kilimanjaro prices, we can help you understand the real value behind the number and avoid choosing a package based only on the cheapest headline price.
 
• Contact Kili Quests today to request a clear Kilimanjaro climb quote.

Related Articles

Marangu Route Kilimanjaro: 6-Day Itinerary, Huts & Cost

Plan Your Marangu Route the Right Way

Preparation, acclimatization, and route choice make the difference.Explore these essential guides:

Climb Kilimanjaro with Comfort

Marangu offers hut comfort, but pacing and acclimatization still matter.
We plan every trek for a safe summit.

OUR CATEGORIES

Marangu Route Kilimanjaro: 6-Day Itinerary, Huts & Cost

Why Choose the Marangu Route?

The Marangu Route is one of the oldest and most established routes on Mount Kilimanjaro. It is best known as the only main Kilimanjaro route with hut accommodation, making it a popular choice for climbers who prefer sleeping in huts instead of tents.
 
Marangu begins at Marangu Gate on the southeastern side of the mountain and follows the same trail up and down. The route passes through rainforest, moorland, alpine desert, and the high summit zone before reaching Gilman’s Point and continuing to Uhuru Peak.
 
Marangu is often called the “Coca-Cola Route,” but that nickname can be misleading. The trail may feel more straightforward than some camping routes, but the shorter itinerary gives climbers less time to acclimatize. For most climbers, the 6-day Marangu itinerary is a smarter choice than the 5-day version because it includes an acclimatization day at Horombo Hut.
 
If you are comparing Marangu with other Kilimanjaro routes, read Kilimanjaro Routes Comparison: Which Route Is Best? before choosing your climb.

Quick Answer: Is the Marangu Route Worth It?

Yes, the Marangu Route is worth it if you want the only Kilimanjaro route with hut accommodation and a more structured trekking experience. It is a good choice for climbers who prefer sleeping in huts, using a clear established trail, and following a shorter itinerary.
 
However, Marangu is not automatically the easiest route. The 5-day version can be difficult because it gives limited time for acclimatization. For most climbers, the 6-day Marangu Route is the better option because it adds an acclimatization day at Horombo Hut.
 
Marangu works best for climbers who value comfort and simplicity, but it may not be the best choice if your main priority is scenery variety, quiet trails, or the strongest acclimatization profile.
Best For Why Marangu Works Well
Climbers who prefer huts Marangu is the only main Kilimanjaro route with permanent hut accommodation.
First-time climbers wanting structure The route follows an established trail with clear camps and a predictable itinerary.
Budget-conscious climbers Marangu is often more affordable than longer camping routes because it usually takes fewer days.
Climbers with limited time The route can be completed in 5 or 6 days, although 6 days is strongly preferred.
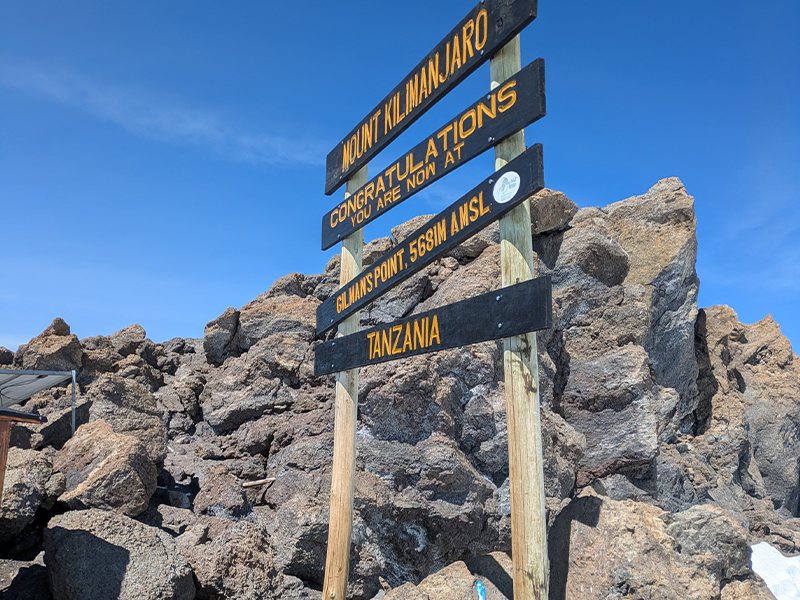
Alt Text: Gilman’s Point summit sign at 5,681 meters on Mount Kilimanjaro via the Marangu Route, with rocky terrain and blue sky | Kili Quests
Gilman’s Point (5,681m) marks the crater rim for trekkers ascending via the Marangu Route — a major achievement before reaching Uhuru Peak.

Table of Contents

What Is the Marangu Route on Kilimanjaro?

Where Does the Marangu Route Start?

The Marangu Route begins at Marangu Gate on the southeastern side of Mount Kilimanjaro. The trail passes through rainforest before opening into moorland and alpine desert zones.

How Long Is the Marangu Route?

The route typically takes 5 or 6 days to complete, covering approximately 72 kilometers (45 miles). The 6-day itinerary is strongly recommended to improve acclimatization and increase summit success.

Marangu Route Overview

Feature Details
Route Length 5 or 6 days
Distance About 72 km / 45 miles
Start Point Marangu Gate, southeastern Kilimanjaro
Highest Point Uhuru Peak, 5,895 m / 19,341 ft
Accommodation Permanent huts with shared sleeping rooms and dining areas
Difficulty Moderate, but altitude can be harder on short itineraries
Best For Climbers who want hut accommodation and a structured route
Success Profile Stronger on the 6-day itinerary than the shorter 5-day version
Because shorter routes allow less time for acclimatization, it’s important to understand how route choice affects summit success.Read our article about, Kilimanjaro Success Rate

Marangu Route Days and Elevation Profile

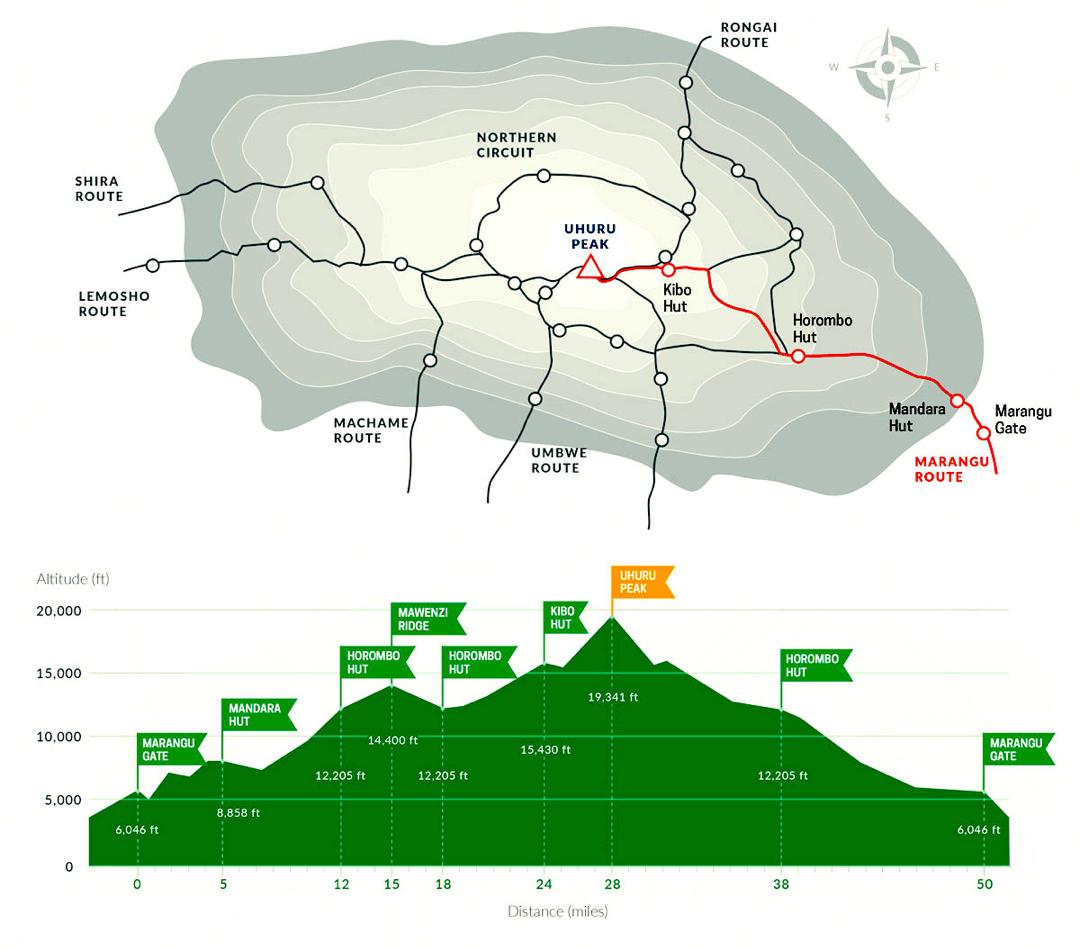
Marangu Route map on Mount Kilimanjaro showing elevation, trail path, and major camps to Uhuru Peak
Marangu Route Map – The only Kilimanjaro route with huts, following the same trail up and down via Horombo and Kibo Huts.

6-Day Marangu Route Itinerary

The 6-day Marangu itinerary is the better choice for most climbers because it includes an acclimatization day at Horombo Hut. The route is shorter than Lemosho or Northern Circuit, so the extra day is important for helping your body adjust before moving higher.

Day 1: Marangu Gate to Mandara Hut

The climb begins at Marangu Gate, where your team completes park registration before entering the rainforest. The trail climbs gradually through dense forest, where you may see blue monkeys, colobus monkeys, and tropical vegetation.
  • Altitude: 1,870 m to 2,700 m
  • Hiking time: 4–5 hours
  • Zone: Rainforest
  • Camp: Mandara Hut

Day 2: Mandara Hut to Horombo Hut

Day 2 leaves the rainforest and enters the moorland zone. The trail becomes more open, with views toward Mawenzi and the higher slopes of Kilimanjaro. This is one of the first days where altitude becomes more noticeable, so a slow pace matters.
  • Altitude: 2,700 m to 3,720 m
  • Hiking time: 6–7 hours
  • Zone: Moorland
  • Camp: Horombo Hut

Day 3 – Acclimatization Day at Horombo Hut

This extra day is one of the most important reasons to choose the 6-day Marangu itinerary instead of the 5-day version. Climbers usually take a short acclimatization hike toward Zebra Rocks, then return to sleep again at Horombo Hut.
 
This day helps your body adjust before moving higher to Kibo Hut. It does not guarantee altitude safety, but it gives your body more time to adapt.
  • Altitude: Around 3,720 m, with optional hike toward 4,000 m
  • Hiking time: 2–4 hours
  • Purpose: Acclimatization
  • Camp: Horombo Hut
For symptoms and warning signs, read Altitude Sickness on Kilimanjaro.

Day 4: Horombo Hut to Kibo Hut

The route continues through alpine desert toward Kibo Hut, the base for summit night. The landscape becomes drier, colder, and more exposed as you move higher. Climbers should walk slowly, drink regularly, and conserve energy for the summit attempt.
  • Altitude: 3,720 m to 4,700 m
  • Hiking time: 5–6 hours
  • Zone: Alpine desert
  • Camp: Kibo Hut

Day 5: Kibo Hut to Uhuru Peak, Then Down to Horombo Hut

Summit day is the hardest part of the Marangu Route. The climb usually begins around midnight and ascends steeply toward Gilman’s Point on the crater rim. From there, climbers continue toward Uhuru Peak, the highest point in Africa.
After reaching the summit, climbers descend back past Kibo Hut and continue down to Horombo Hut. This is a long and demanding day because of altitude, cold, darkness, and total hiking time.
  • Altitude: 4,700 m to 5,895 m, then down to 3,720 m
  • Hiking time: 12–14 hours total
  • Summit: Uhuru Peak
  • Camp: Horombo Hut
For a realistic look at summit night, read How Hard Is Kilimanjaro?

Day 6: Horombo Hut to Marangu Gate

The final day descends through moorland and rainforest back to Marangu Gate. After signing out, successful climbers receive their Kilimanjaro summit certificate before returning to Moshi or Arusha.
  • Altitude: 3,720 m to 1,870 m
  • Hiking time: 5–6 hours
  • Zone: Moorland to rainforest
  • Finish: Marangu Gate

How Much Does the Marangu Route Cost?

The Marangu Route is usually one of the more affordable Kilimanjaro routes because it is shorter than routes such as Lemosho and the Northern Circuit. Most Marangu climbs are completed in 5 or 6 days, which can reduce the total cost of park fees, crew support, food, and mountain logistics.
 
However, the cheapest Marangu climb is not always the best choice. The 5-day itinerary may cost less, but it gives your body less time to acclimatize. For most climbers, the 6-day Marangu Route is the smarter option because it includes an acclimatization day at Horombo Hut.
 
The final cost depends on several factors, including the number of climbers, route length, guide and porter support, hut logistics, meals, transport, park fees, equipment, and service level.
 
Do not choose Marangu only because it is cheaper. A lower price may not be a good value if the itinerary is rushed or the operator cuts corners on safety, food, guides, or porter care.Before comparing packages, read Kilimanjaro Climb Cost so you understand park fees, crew support, route length, tips, gear, insurance, and other expenses before booking.

Marangu Route Difficulty and Acclimatization

Is the Marangu Route Easy?

The Marangu Route is often described as one of the easier Kilimanjaro routes because the trail is more direct and climbers sleep in huts instead of tents. But this can be misleading.

Marangu is not technically difficult, but altitude can make it challenging. The route is usually completed in 5 or 6 days, which gives less time for acclimatization than longer routes such as Lemosho or Northern Circuit.

Why the 6-Day Marangu Route Is Better Than 5 Days

The 6-day Marangu itinerary is better because it adds an acclimatization day at Horombo Hut. This gives your body more time to adjust before going higher to Kibo Hut and attempting the summit.
 
The 5-day version is more rushed. It may cost less, but it gives your body less time to adapt to altitude. For most climbers, the 6-day version is the smarter and safer choice.

Who Should Choose the Marangu Route?

Choose the Marangu Route if you are:
  • A climber who prefers hut accommodation instead of tents
  • A traveler who wants a shorter and more structured Kilimanjaro itinerary
  • A budget-conscious climber who still wants a guided Kilimanjaro climb
  • Someone comfortable with a faster ascent profile
  • A climber who values comfort more than route variety
If your main goal is the strongest acclimatization profile, compare Marangu with Lemosho Route and Northern Circuit Route before deciding.

Best Time to Climb the Marangu Route

The best time to climb the Marangu Route is during the drier months, especially from January to early March and from June to October. These months usually offer better trail conditions, clearer views, and more stable weather.
 
Marangu can also be more comfortable than camping routes during wetter months because climbers sleep in huts. However, rain can still make the lower forest trail muddy and reduce visibility.
Season What to Expect Best For
January to early March Warmer conditions, good visibility, and fewer crowds than peak season. Climbers who want a good balance of weather and trail conditions.
June to October Drier weather, clearer skies, colder nights, and busier trails. Climbers who want the most reliable weather window.
April to May Long rains, muddy trails, lower visibility, and wetter conditions. Usually not recommended for most climbers.
November Short rains and more unpredictable conditions. Possible, but not ideal for most climbers.
For a full month-by-month breakdown, read Best Time to Climb Kilimanjaro before choosing your dates.

What Makes the Marangu Route Unique?

The Marangu Route is unique because it is the only main Kilimanjaro route with hut accommodation. Climbers sleep in shared huts at Mandara, Horombo, and Kibo instead of camping in tents.

It is also one of the most structured Kilimanjaro routes. The trail follows the same path up and down, which makes logistics simpler but gives less route variety than trails such as Lemosho, Machame, or Northern Circuit.

Marangu is often chosen by climbers who want a shorter route, hut accommodation, and a classic Kilimanjaro experience. Its main weakness is acclimatization. Because the route is usually done in 5 or 6 days, climbers need to take pacing seriously and should strongly consider the 6-day itinerary.
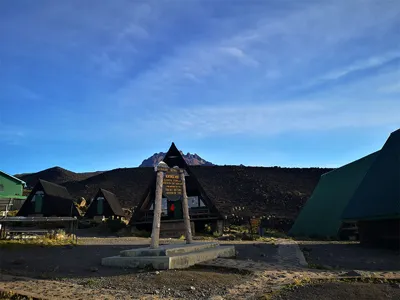
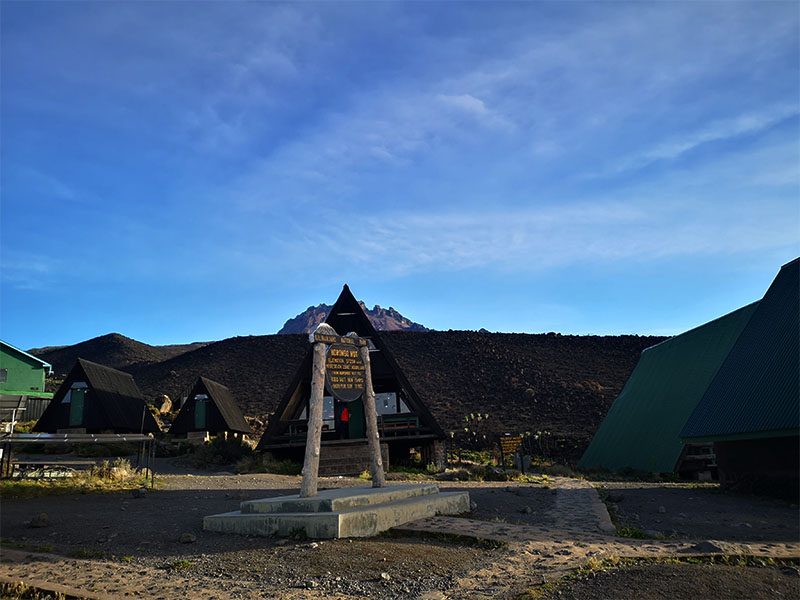
Horombo Huts on Mount Kilimanjaro’s Marangu Route with Mawenzi Peak in the background under a clear blue sky | Kili Quests
Horombo Huts (3,720m) on Kilimanjaro’s Marangu Route offer trekkers scenic views of Mawenzi Peak and a vital rest stop before Heading to Kibo Hut | Kili Quests.

Is the Marangu Route Right for You?

The Marangu Route is right for you if you want a hut-based Kilimanjaro climb with a shorter, more structured itinerary. It is especially attractive for climbers who prefer sleeping indoors instead of camping.

Choose Marangu If You Want:

  • Hut accommodation instead of tents
  • A shorter Kilimanjaro itinerary
  • A more structured and predictable route
  • A classic trail with established camps
  • A potentially more budget-friendly climb

Marangu May Not Be Ideal If:

  • You want the strongest acclimatization profile
  • You want the most scenic Kilimanjaro route
  • You prefer a quieter or more remote trail
  • You want a route that uses a different descent path
  • You only plan to choose the 5-day version

If you want stronger acclimatization and more scenery, compare Marangu with Lemosho Route and Machame Route before booking.

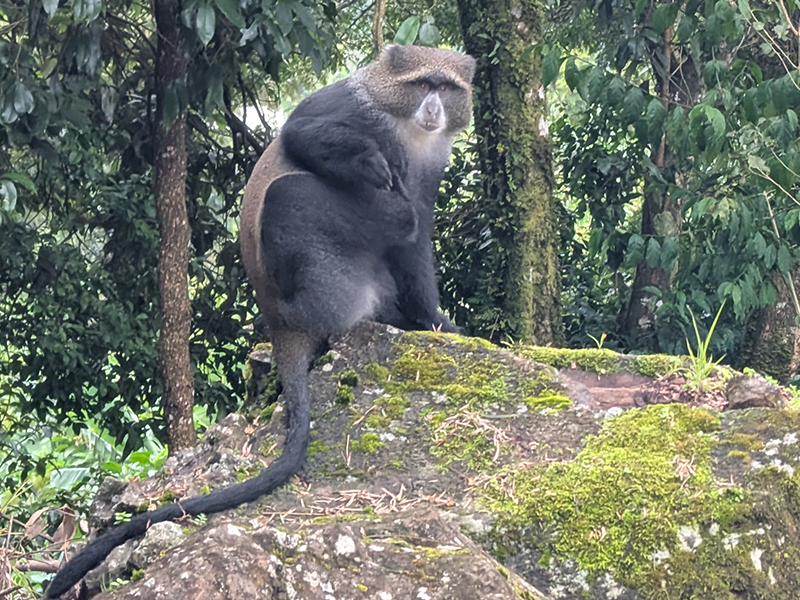
A Blue Monkey perched on a mossy rock in the rainforest zone of Mount Kilimanjaro, surrounded by dense green vegetation | Kili Quests
The Blue Monkey is one of the most commonly spotted primates in Kilimanjaro’s rainforest zone. Often seen near the lower trail sections like Marangu and Machame.

What to Pack for the Marangu Route

Even though Marangu uses huts, you still need proper mountain gear. The route crosses rainforest, moorland, alpine desert, and the cold summit zone, so your clothing must handle rain, wind, cold nights, and long trekking days.
 
Important items include warm layers, waterproof clothing, broken-in hiking boots, gloves, a warm hat, a headlamp, trekking poles, a sleeping bag, and daypack essentials.
 
Do not pack casually just because Marangu has huts. Summit night from Kibo Hut to Uhuru Peak can be extremely cold and physically demanding.
 
Use Kilimanjaro Packing List to prepare your clothing, boots, summit gear, toiletries, and daypack items before your climb.

Frequently Asked Questions About the Marangu Route

Why is the Marangu Route called the “Coca-Cola Route”?

The Marangu Route is nicknamed the “Coca-Cola Route” because it is considered one of the easier and more comfortable routes on Mount Kilimanjaro. It also has hut accommodation and historically offered bottled drinks at the camps.

Is the Marangu Route good for beginners?

Yes, many first-time climbers choose the Marangu Route because it has a clear trail and hut accommodation. However, the shorter itinerary means less time for acclimatization, so the 6-day version is strongly recommended.

How many days does the Marangu Route take?

The Marangu Route usually takes 5 or 6 days. The 6-day itinerary includes an acclimatization day at Horombo Hut, which improves the chances of reaching the summit.

Does the Marangu Route have huts?

Yes. The Marangu Route is the only Kilimanjaro route with permanent huts, including Mandara Hut, Horombo Hut, and Kibo Hut.

What summit point do climbers reach from the Marangu Route?

Climbers on the Marangu Route usually reach the crater rim at Gilman’s Point before continuing along the rim to Uhuru Peak, the highest point in Africa.

What wildlife can be seen on the Marangu Route?

The lower rainforest section of Mount Kilimanjaro often includes sightings of animals such as the Blue Monkey, colobus monkeys, and various bird species.

Climb Kilimanjaro via the Marangu Route With Kili Quests

The Marangu Route is a good choice if you want a hut-based Kilimanjaro climb with a shorter and more structured itinerary. But because the route gains altitude quickly, proper pacing and the 6-day itinerary are important.
 
At Kili Quests, we guide Marangu climbs with experienced local guides, steady pacing, daily health checks, good mountain meals, fair porter care, and clear summit preparation.
 
If you want hut accommodation without ignoring altitude risk, our team can help you choose the right Marangu itinerary and prepare properly for the climb.
 
Contact Kili Quests today to plan your Marangu Route Kilimanjaro climb with experienced local guides.

Related Articles

Machame Route Kilimanjaro: 7-Day Itinerary, Difficulty & Cost

Reach the Summit with Confidence

Success on Kilimanjaro depends on the right route, acclimatization, and team.We plan every Machame climb for a safe summit.

Plan Your Machame Route the Right Way

The right route, acclimatization, and team make the difference.We plan your Machame climb for a safe summit

OUR CATEGORIES

Machame Route Kilimanjaro: 7-Day Itinerary, Difficulty & Cost

Why Choose the Machame Route?

The Machame Route is one of the most popular ways to climb Mount Kilimanjaro because it offers strong scenery, a varied trail, good acclimatization, and a classic Kilimanjaro adventure. It begins at Machame Gate on the southwestern side of the mountain, climbs through rainforest, crosses moorland and alpine desert, passes Lava Tower and Barranco Wall, and reaches the summit from Barafu Camp.

Machame is often called the “Whiskey Route” because it is more demanding than the Marangu Route, which is sometimes called the “Coca-Cola Route.” That does not mean Machame is only for expert climbers. Many first-time Kilimanjaro climbers choose Machame, but they should choose the 7-day version, train properly, and respect the altitude.

The Machame Route is best for climbers who want a scenic and active Kilimanjaro climb without choosing one of the longest routes. If you are still comparing your options, read our Kilimanjaro Routes Comparison: Which Route Is Best? to see how Machame compares with Lemosho, Marangu, Rongai, and the Northern Circuit.

Quick Answer: Is the Machame Route Worth It?

Yes, the Machame Route is worth it if you want a scenic, active, and popular Kilimanjaro climb with good acclimatization. The 7-day version is the best choice for most climbers because it gives more time to adjust to altitude before summit night.
 
Machame is not the easiest Kilimanjaro route, but it gives a strong balance of scenery, challenge, and summit preparation. It is best for climbers with average to good fitness who want a more adventurous route than Marangu but do not want the longer schedule of Lemosho or the Northern Circuit.
Best For Why Machame Works Well
Active trekkers The route has steeper sections, varied terrain, and a more adventurous feel.
First-time climbers with good fitness The 7-day itinerary gives better acclimatization than the shorter 6-day version.
Scenery lovers Machame crosses rainforest, moorland, Lava Tower, Barranco Wall, alpine desert, and summit terrain.
Climbers comparing popular routes Machame gives a strong balance of scenery, challenge, and route popularity.
Trekkers and porters ascending the Kissing Rock section on Barranco Wall along the Machame Route, Kilimanjaro
The Kissing Rock on Barranco Wall, one of the most famous sections of the Machame Route on Mount Kilimanjaro.

Table of Contents

What Is the Machame Route on Kilimanjaro?

The Machame Route is a southern approach route on Mount Kilimanjaro. It starts at Machame Gate, climbs through rainforest, continues to Shira Cave Camp, crosses toward Lava Tower, descends to Barranco Camp, and then follows the southern circuit toward Karanga, Barafu, and Uhuru Peak.

Machame is popular because it gives climbers a full Kilimanjaro experience in 6 or 7 days. The route has varied scenery, good acclimatization when done over 7 days, and several memorable sections, including Lava Tower, Barranco Wall, and the summit climb from Barafu Camp.

  Where Does the Machame Route Start?

The Machame Route begins at Machame Gate on the southwestern side of Mount Kilimanjaro. The first hiking day enters the rainforest zone, where the trail can be humid, muddy, and slippery depending on weather conditions.

How Long Is the Machame Route?

The Machame Route is usually climbed in 6 or 7 days and covers about 62 kilometers / 37 miles. The 7-day version is strongly recommended for most climbers because it gives more time for acclimatization and makes the climb less rushed.
 
If you are deciding how many days you need, read our How Many Days to Climb Kilimanjaro guide before choosing your route.

Machame Route Overview

Feature Details
Route Length 6 or 7 days
Distance ~62 km / 37 miles
Start Point Machame Gate, southwest side
Highest Point Uhuru Peak, 5,895 m / 19,341 ft
Difficulty Moderate to challenging
Best For Hikers wanting adventure and scenery
Success Rate ~95% on the 7-day itinerary

Machame Route Days and Elevation Profile

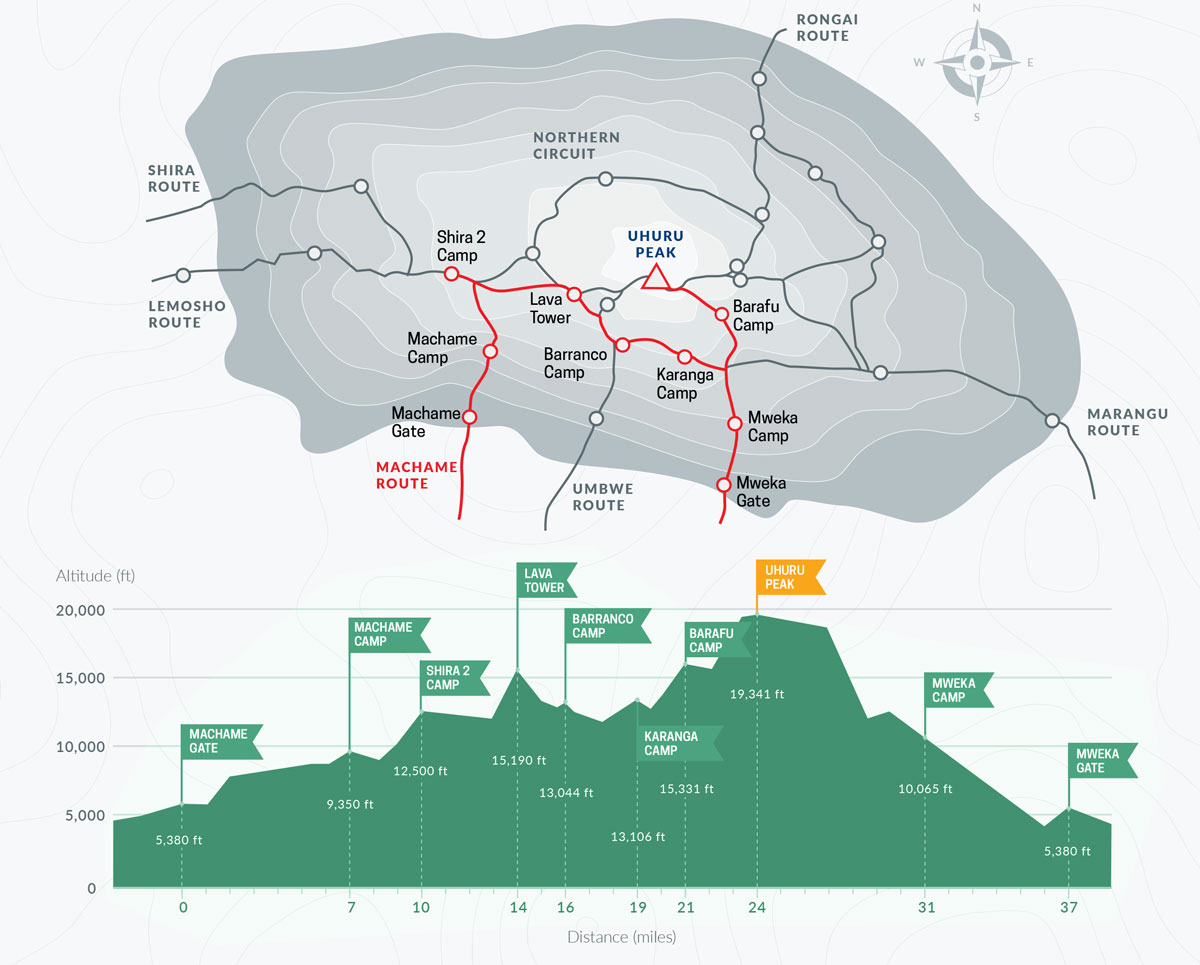
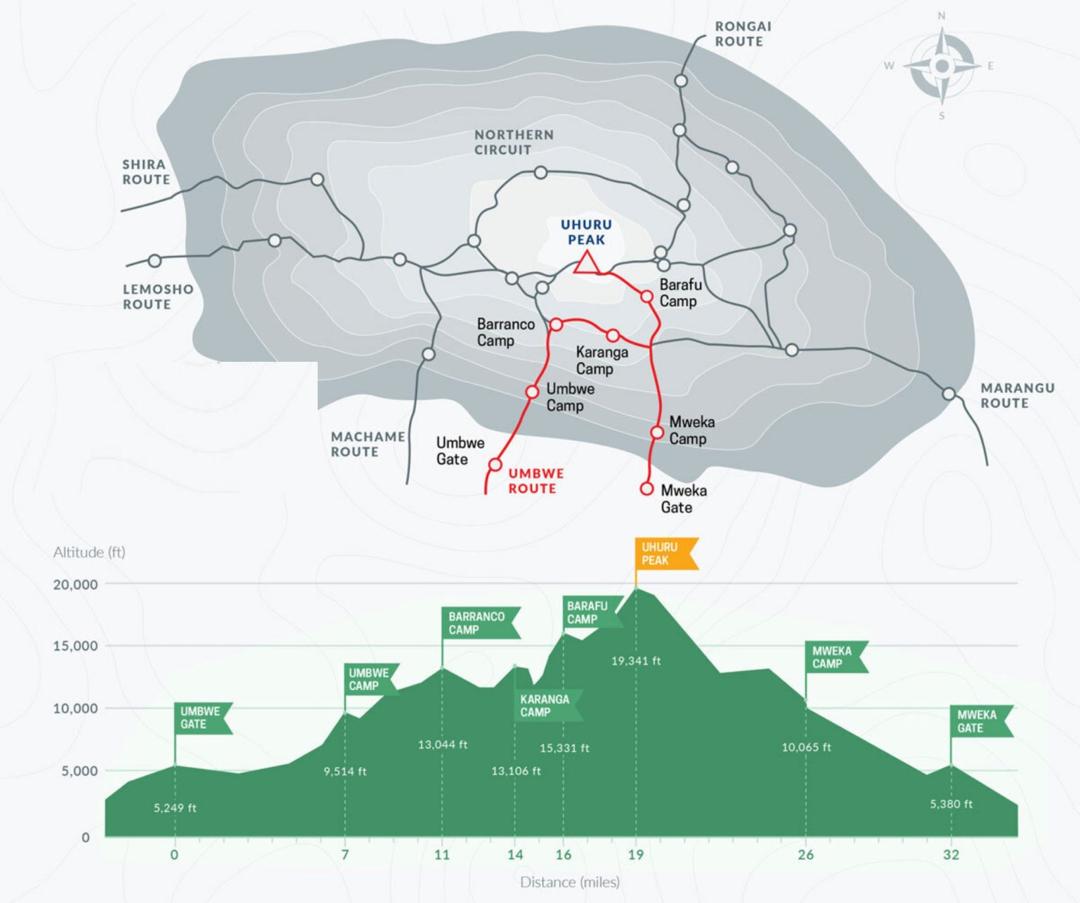
Machame Route map on Mount Kilimanjaro showing trail path, elevation profile, and major camps to Uhuru Peak
A scenic Kilimanjaro trail via Lava Tower and Barafu Camp, descending through Mweka Gate.

7-Day Machame Route Itinerary

The 7-day Machame itinerary is the best version for most climbers because it gives more time for acclimatization than the 6-day option. The route still feels active and challenging, but the extra day helps reduce the pressure of gaining altitude too quickly.

Day 1 – Machame Gate to Machame Camp

The climb begins at Machame Gate, where your team completes park registration before entering the rainforest. The trail climbs steadily through thick forest, and conditions can be muddy or slippery after rain. This first day is not technically difficult, but the steady uphill walking can feel demanding.
  • Altitude: 1,800 m to 2,835 m
  • Hiking time: 5–6 hours
  • Zone: Rainforest
  • Camp: Machame Camp

Day 2: Machame Camp to Shira Cave Camp

Day 2 leaves the rainforest and enters the moorland zone. The trail becomes more open, with better views of Kilimanjaro and the surrounding landscape. The climb is steady, and you begin sleeping at a higher altitude, so slow pacing becomes important.
  • Altitude: 2,835 m to 3,750 m
  • Hiking time: 5–6 hours
  • Zone: Moorland
  • Camp: Shira Cave Camp

Day 3: Shira Cave Camp to Barranco Camp via Lava Tower

This is one of the most important acclimatization days on the Machame Route. Climbers ascend toward Lava Tower at about 4,630 meters, then descend to sleep lower at Barranco Camp. This follows the climb-high, sleep-low principle, which helps the body adapt before going higher.
  • Altitude: 3,750 m to 4,630 m, then down to 3,960 m
  • Hiking time: 6–7 hours
  • Zone: Alpine desert
  • Camp: Barranco Camp
This is also where some climbers may begin noticing altitude symptoms. Read our Altitude Sickness on Kilimanjaro guide so you understand what symptoms are common and which warning signs should not be ignored.

Day 4: Barranco Camp to Karanga Camp

Day 4 begins with the Barranco Wall, one of the most famous features on the Machame Route. The wall looks intimidating from camp, but most climbers manage it safely with slow movement and guide support. After the wall, the trail continues across ridges and valleys toward Karanga Camp.

  • Altitude: 3,960 m to 4,035 m
  • Hiking time: 4–5 hours
  • Highlight: Barranco Wall
  • Camp: Karanga Camp

Day 5: Karanga Camp to Barafu Camp

This is a shorter but important day because Barafu Camp is the base camp for summit night. Climbers arrive, rest, eat early, prepare warm summit gear, and try to sleep before the midnight summit attempt.
  • Altitude: 4,035 m to 4,673 m
  • Hiking time: 3–4 hours
  • Zone: Alpine desert
  • Camp: Barafu Camp

Day 6: Barafu Camp to Uhuru Peak, then down to Mweka Camp

Summit day is the hardest part of the Machame Route. The climb begins around midnight in cold, thin air. Climbers move slowly toward Stella Point before continuing along the crater rim to Uhuru Peak, the highest point in Africa.
 
After reaching the summit, climbers descend back to Barafu Camp for a short rest before continuing down to Mweka Camp. This is a long and exhausting day, so mental strength, warm clothing, and steady guide pacing are very important.
  • Altitude: 4,673 m to 5,895 m, then down to 3,100 m
  • Hiking time: 12–14 hours total
  • Summit: Uhuru Peak
  • Camp: Mweka Camp
If you are worried about the challenge, read our How Hard Is Mount Kilimanjaro? guide for a realistic look at summit night, altitude, fitness, and mental preparation.

Day 7: Mweka Camp to Mweka Gate

The final day is a descent through the rainforest to Mweka Gate. After signing out, successful climbers receive their Kilimanjaro certificate before returning to Moshi or Arusha.
  • Altitude: 3,100 m to 1,640 m
  • Hiking time: 3–4 hours
  • Zone: Rainforest
  • Finish: Mweka Gate

6-Day vs 7-Day Machame Route: Which Is Better?

The Machame Route can be climbed in 6 or 7 days, but the 7-day itinerary is the better choice for most climbers. The extra day gives your body more time to adjust to altitude and makes the climb less rushed.
Option Best For Main Risk
6-Day Machame Very fit climbers with previous trekking experience Faster ascent and less time for acclimatization
7-Day Machame Most first-time climbers and travelers who want better acclimatization Slightly higher cost because of the extra day
The 6-day Machame Route may look attractive because it saves time and money, but it gives your body less time to adapt. For most climbers, the 7-day version is the smarter choice because summit success depends more on acclimatization than speed.

Machame Route Difficulty, Acclimatization & Fitness

How Difficult Is the Machame Route?

The Machame Route is moderately difficult to challenging. It is not a technical climb, and you do not need ropes or climbing equipment, but the trail includes steep sections, long trekking days, high altitude, and a cold summit night.
 
The hardest part is usually summit night from Barafu Camp to Uhuru Peak. Climbers start around midnight, move slowly in freezing conditions, and continue for several hours at high altitude before reaching the summit. This is where fitness, mental strength, pacing, and warm gear matter most.

How Acclimatization Works on Machame

Machame has good acclimatization when done over 7 days because it includes the Lava Tower climb-high, sleep-low day. Climbers ascend to a higher altitude during the day, then descend to sleep lower at Barranco Camp. This helps the body adapt before the route continues toward Karanga and Barafu.
 
The 6-day version is more rushed, which can make acclimatization harder. If you want a stronger summit profile and a less pressured climb, choose the 7-day Machame itinerary.
 
Read our Kilimanjaro Success Rate by Route guide to understand how route choice, itinerary length, pacing, and acclimatization affect summit success.

Who Should Choose the Machame Route?

Choose the Machame Route if you are:


  • A first-time climber with average to good fitness
  • A trekker who wants a more active route than Marangu
  • A traveler who wants dramatic scenery in 7 days
  • A climber who wants good acclimatization without choosing a longer route
  • Someone who is comfortable with a popular and sometimes busy trail

Training still matters. Machame is not a route you should treat casually. Read our Kilimanjaro Training Plan before your climb so you know how to prepare your endurance, legs, lungs, and hiking strength.

How Much Does the Machame Route Cost?

The Machame Route usually costs less than longer routes such as Lemosho or the Northern Circuit because it is normally completed in 6 or 7 days. However, the final price still depends on the number of climbers, service level, park fees, guide and porter support, meals, equipment, transport, and what is included in the package.
 
The 7-day Machame Route costs more than the 6-day version because it adds one extra day of park fees, crew wages, food, and mountain logistics. For most climbers, that extra day is worth it because it gives better acclimatization and a stronger summit profile.
 
Do not choose Machame only because it may be cheaper than Lemosho.A lower price may not be a good value if the itinerary is too rushed or the operator cuts corners on safety, food, guides, or porter care.Before comparing packages, read Kilimanjaro Climb Cost so you understand park fees, crew support, route length, tips, gear, insurance, and other expenses before booking.
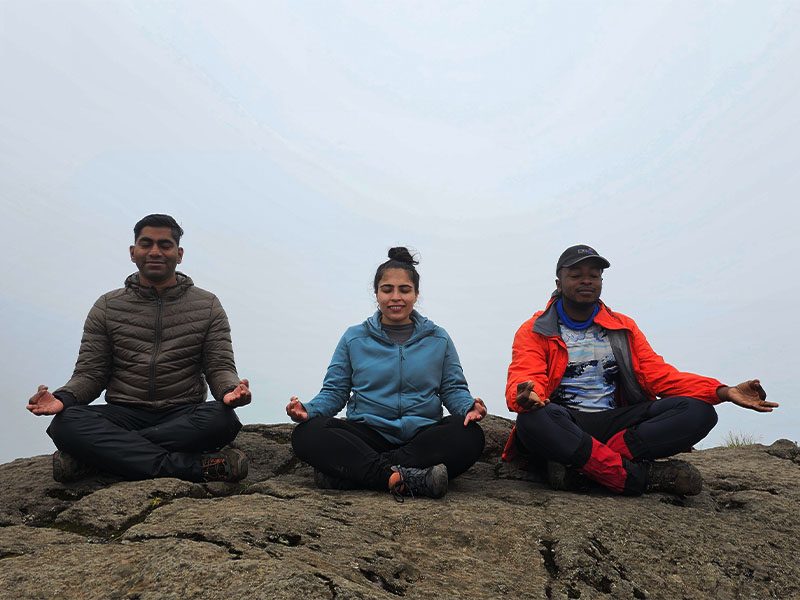
Trekkers meditating on a rock during a peaceful break on the Machame Route, Mount Kilimanjaro | Kili Quests
Mindful Moment on the Machame Trail – Climbers pause for a short meditation break on the way to Shira Camp, embracing Kilimanjaro’s calm Moorland environment.

Best Time to Climb the Machame Route

The best time to climb the Machame Route is during the drier months, especially from January to early March and from June to October. These months usually offer better trail conditions, clearer views, and more stable weather.
 
Season What to Expect Best For
January to early March Warmer conditions, good visibility, and fewer crowds than peak season Climbers who want a good balance of weather and trail conditions
June to October Drier weather, clear skies, colder nights, and busier trails Climbers who want the most reliable weather window
April to May Long rains, muddy trails, lower visibility, and wetter camps Usually not recommended
November Short rains and more unpredictable conditions Possible, but not ideal for most climbers
For a full month-by-month breakdown, read our Best Time to Climb Kilimanjaro guide before choosing your travel dates.

What Makes the Machame Route Special?

The Machame Route is special because it gives climbers a dramatic and varied Kilimanjaro experience in a 7-day itinerary. The trail starts in rainforest, climbs into moorland, crosses alpine desert, passes Lava Tower, climbs the Barranco Wall, and reaches the summit from Barafu Camp.
 
Machame is also popular because it gives better acclimatization than very short routes when climbed over 7 days. The Lava Tower day is especially important because climbers gain altitude during the day and sleep lower at Barranco Camp.
 
The route is not the quietest option on Kilimanjaro, but it is one of the most rewarding for climbers who want scenery, challenge, and a classic mountain experience.

Machame Route vs Lemosho Route

Machame and Lemosho are two of the best Kilimanjaro routes for scenery and acclimatization. Both routes pass Lava Tower, Barranco Wall, Karanga Camp, and Barafu Camp before summiting from the southern side. The biggest differences are the starting point, route length, crowd levels, and pacing.
Category Machame Route Lemosho Route
Starting Side Southwestern Kilimanjaro Western Kilimanjaro
Best Duration 7 days 8 days
Scenery Excellent, with rainforest, Lava Tower, Barranco Wall, and southern circuit views Excellent, with rainforest, Shira Plateau, western approach, Lava Tower, and Barranco Wall
Crowds Busier from the beginning Quieter at the start, busier after joining the southern circuit
Acclimatization Good on the 7-day itinerary Very strong on the 8-day itinerary
Best For Climbers who want a popular, scenic, active route in 7 days Climbers who want more time, a quieter start, and stronger acclimatization

Choose Machame if you want a scenic and active Kilimanjaro route in 7 days. Choose Lemosho if you want more time, a quieter beginning, and a stronger acclimatization profile. You can also read our Lemosho Route Kilimanjaro Guide for a deeper comparison.

Is the Machame Route Right for You?

The Machame Route is right for you if you want a scenic, active, and popular Kilimanjaro climb with good acclimatization on a 7-day itinerary. It is a strong choice for climbers who want more challenge than Marangu but do not want the longer schedule of Lemosho or the Northern Circuit.

Choose Machame If You Want:

  • A scenic Kilimanjaro route with rainforest, moorland, Lava Tower, Barranco Wall, and summit views
  • A more active and adventurous climb than Marangu
  • A popular route with strong support logistics
  • Good acclimatization on the 7-day itinerary
  • A classic Kilimanjaro trekking experience

Machame May Not Be Ideal If:

  • You want the quietest route on Kilimanjaro
  • You prefer the slowest possible acclimatization profile
  • You only want the easiest route
  • You are uncomfortable with steeper trail sections
  • You want a more remote start, where Lemosho may be a better choice
Trekkers posing with hiking poles at the Shira Cave Camp sign on Day 2 of the Machame Route, Kilimanjaro | Kili Quests
Shira Cave Camp (3,750m) – Climbers celebrate their arrival at this scenic moorland campsite on Day 2 of the Machame Route, Kilimanjaro.

What to Pack for the Machame Route

The Machame Route crosses several climate zones, so you need to pack for rainforest, moorland, alpine desert, and freezing summit conditions. The most important items include warm layers, waterproof clothing, broken-in hiking boots, gloves, a warm hat, a headlamp, a sleeping bag, trekking poles, and a comfortable daypack.
 
Do not underestimate summit night. The climb from Barafu Camp to Uhuru Peak is cold, slow, and physically demanding. Good gear can make a major difference in comfort, safety, and performance.
 
Use our Kilimanjaro Packing List to prepare your clothing, boots, sleeping bag, summit gear, toiletries, and daypack items before your climb.

Frequently Asked Questions About the Machame Route

How difficult is the Machame Route on Mount Kilimanjaro?

The Machame Route is moderately difficult to challenging. It does not require technical climbing skills, but it includes steep sections, long trekking days, high altitude, and a cold summit night. The 7-day version is easier to manage than the 6-day version because it gives more time for acclimatization.

Why is the Machame Route called the Whiskey Route?

The Machame Route is called the “Whiskey Route” because it is more physically demanding than the Marangu Route, which is often called the “Coca-Cola Route.” The nickname reflects the route’s steeper trail, longer camping style, and more adventurous character.

How many days does the Machame Route take?

The Machame Route usually takes 6 or 7 days. The 7-day itinerary is recommended for most climbers because it provides better acclimatization and makes the climb less rushed.

Is the Machame Route good for beginners?

Yes, Machame can be good for beginners who have average to good fitness and choose the 7-day itinerary. Beginners should train properly, walk slowly, use the right gear, and take altitude seriously.

Is Machame better than Lemosho?

Machame is better if you want a scenic, active, and popular route in 7 days. Lemosho is usually better if you want a quieter start, more time, and stronger acclimatization on an 8-day itinerary.

How much does the Machame Route cost?

The Machame Route usually costs less than longer routes because it takes fewer days, but the final price depends on route length, group size, service level, park fees, crew support, food, equipment, and transport. The 7-day version costs more than the 6-day version but gives better acclimatization.

Climb Kilimanjaro via the Machame Route with Kili Quests

The Machame Route is a strong choice if you want a scenic, active, and well-paced Kilimanjaro climb. At Kili Quests, we guide Machame climbs with experienced local guides, proper pacing, safety checks, good mountain meals, fair porter care, and realistic summit preparation.
 
Our 7-day Machame itinerary is designed for climbers who want better acclimatization than the shorter version while still enjoying one of Kilimanjaro’s most famous routes.
 
Ready to climb Kilimanjaro on the Machame Route? Contact Kili Quests today and let our local team help you choose the right dates, itinerary, gear, and preparation plan for your climb.

Related Articles

Rongai Route Kilimanjaro: 6–7 Day Itinerary, Difficulty & Cost

Plan Your Rongai Route Climb

The Rongai Route offers a quiet, steady path to the summit.
Get expert advice and a personalized quote for your climb.

Kilimanjaro Planning Guides

Choosing the right route is just the start. Explore these key guides:

OUR CATEGORIES

Rongai Route Kilimanjaro: 6–7 Day Itinerary, Difficulty & Cost

Rongai Route Kilimanjaro: Quiet Northern Trail from the North

 The Rongai Route is the only Kilimanjaro trail that approaches the mountain from the north, near the Kenya–Tanzania border. It is known for being quieter and drier than the southern routes, making it a strong choice for climbers who want a more peaceful trekking experience.

Rongai offers a steady ascent, remote wilderness, wide views, and dramatic scenery around Mawenzi Peak. It is not as lush or varied as Lemosho or Machame, but it gives climbers a quieter side of Kilimanjaro that many people never see.
The route is usually climbed in 6 or 7 days, with the 7-day itinerary offering a better acclimatization profile. If you want a less crowded trail with a gradual approach and a different Kilimanjaro experience, Rongai is worth considering.
 
For a full route comparison, see our Kilimanjaro Routes Comparison guide.

Quick Answer: Is the Rongai Route a Good Kilimanjaro Route?

Yes, the Rongai Route is a good Kilimanjaro route for climbers who want a quieter, drier, and more gradual trail from the northern side of the mountain. It is usually climbed in 6 or 7 days, with the 7-day version recommended for better acclimatization.
 
Rongai is best for climbers who prefer fewer crowds, remote scenery, and a steady approach. It is less dramatic than Lemosho or Machame in terms of scenery, but it offers excellent views of Mawenzi Peak and a peaceful wilderness feel.
View of Mawenzi Peak from Stella Point on Mount Kilimanjaro
Mawenzi Peak views are one of the highlights of the Rongai Route near the summit zone.

Table of Contents

Why the Rongai Route Is Unique on Kilimanjaro

The Rongai Route is unique because it is the only official Kilimanjaro route that starts from the northern side of the mountain. Most other routes begin from the south or west, where rainfall is higher and trails are busier.
 
Because Rongai approaches from the drier northern side, it can be a strong option during wetter months. The trail also feels quieter and more remote, especially in the early stages near Simba Camp, Second Cave, and Kikelewa.
 
Another unique feature is the descent. Climbers ascend from the north but usually descend through the Marangu Route, giving them two different sides of Kilimanjaro in one trek.

Rongai Route Overview

Feature Rongai Route Details
Typical duration 6 to 7 days
Distance About 73 km / 45 miles
Starting point Rongai Gate, northern Kilimanjaro
Exit point Marangu Gate
Highest point Uhuru Peak, 5,895 m / 19,341 ft
Difficulty Moderate, with altitude still the main challenge
Best for Quiet trails, dry conditions, remote scenery, and steady ascent
Recommended option 7-day Rongai for better acclimatization
Not sure if Rongai is the right route for you? Compare all options in our Kilimanjaro Routes Comparison guide.

Rongai Route Days and Elevation Profile

Rongai Route map showing camps and elevation profile on Kilimanjaro
The Rongai Route approaches Kilimanjaro from the quieter northern side before descending through Marangu.

Who Is the Rongai Route Best For?

The Rongai Route is best for climbers who want a quieter Kilimanjaro experience with fewer crowds, a drier northern approach, and a steady trail profile.
 
It is a good choice for:
  • First-time climbers who want a less crowded route
  • Trekkers climbing during wetter months
  • Climbers who prefer remote wilderness over busy camps
  • People who want strong views of Mawenzi Peak
  • Trekkers who are comfortable choosing a 7-day itinerary for better acclimatization
Rongai is not the best choice if you want the most dramatic scenery or the strongest acclimatization profile. In that case, Lemosho or Northern Circuit may be better.

7-Day Rongai Route Itinerary

The 7-day Rongai Route is the better choice for most climbers because it gives more time for acclimatization than the shorter 6-day version. The route starts at Rongai Gate, passes through Simba Camp, Second Cave, Kikelewa, Mawenzi Tarn, and Kibo Hut, then descends through the Marangu Route after summit day.
 
Below is the typical 7-day Rongai itinerary.

Day 1: Rongai Gate to Simba Camp

  • Altitude: 2,000 m to 2,625 m
  • Time: 4–5 hours
  • Gentle hike through forest zone
Your adventure begins on the quiet northern side of Kilimanjaro at Rongai Gate, near the Kenya border. After registration, you’ll start a gentle hike through farmland and pine forest.
This section is relatively easy and allows your body to begin adjusting gradually. Wildlife sightings such as colobus monkeys are sometimes possible.You’ll arrive at Simba Camp in the afternoon, where you’ll enjoy your first night on the mountain.

Day 2: Simba Camp to Second Cave Camp

  • Altitude: 2,625 m to 3,450 m
  • Time: 5–6 hours
  • Beautiful views of Kibo and wilderness trail
The trail leaves the forest behind and enters the moorland zone, offering wide open views of Kibo Peak. The path remains steady and not too steep, making it a comfortable trekking day.As you gain altitude, you’ll begin to feel the effects of thinner air, so it’s important to maintain a slow, steady pace.Second Cave Camp provides a scenic and less crowded overnight stop.

Day 3: Second Cave to Kikelewa Camp

  • Altitude: 3,450 m to 3,600 m
  • Time: 4 hours
  • Scenic moorland terrain with fewer climbers
This is a shorter trekking day designed to support acclimatization. The trail becomes quieter and more remote, with fewer climbers compared to southern routes.You’ll hike across rolling moorland terrain with beautiful views of Mawenzi Peak, one of Kilimanjaro’s three volcanic cones.Kikelewa Camp is set in a sheltered valley, offering a peaceful atmosphere for rest and recovery.

Day 4: Kikelewa to Mawenzi Tarn Camp

  • Altitude: 3,600 m to 4,330 m
  • Time: 4–5 hours
  • Camp beneath rugged Mawenzi Peak
Today’s trek is steeper but rewarding, as you climb toward Mawenzi Tarn, one of the most scenic camps on Kilimanjaro.The camp sits beneath the dramatic spires of Mawenzi Peak, providing incredible views and a true high-altitude environment.This is an important acclimatization day, allowing your body to adjust before moving higher.

Day 5: Mawenzi Tarn to Kibo Hut

  • Altitude: 4,330 m to 4,700 m
  • Time: 4–5 hours
  • Final staging point before summit night
The landscape changes dramatically as you enter the alpine desert zone. Vegetation disappears, and the terrain becomes dry and rugged.The hike is steady but feels more demanding due to the altitude. You’ll arrive at Kibo Hut, the final base camp before your summit attempt.After an early dinner, you’ll rest for a few hours before beginning the summit push around midnight.

Day 6: Kibo Hut to Uhuru Peak, descend to Horombo Hut

  • Altitude: 4,700 m to 5,895 m (summit), then down to 3,720 m
  • Time: 12–14 hours
  • Overnight climb, summit at sunrise, long descent
This is the most challenging and rewarding day of the climb. You’ll start your summit attempt in the early hours of the morning, trekking slowly in the dark toward Gillman’s Point and Stella Point.From there, it’s a final push to Uhuru Peak — the highest point in Africa. Reaching the summit at sunrise is an unforgettable experience.After celebrating, you’ll descend back to Kibo Hut briefly, then continue down to Horombo Hut for rest.

Day 7: Horombo Hut to Marangu Gate

  • Altitude: 3,720 m to 1,870 m
  • Time: 5–6 hours
  • Final descent through forest and receive certificate
Your final day is a long but steady descent through moorland and forest zones. As you reach lower altitudes, the air becomes richer in oxygen, making the hike feel easier.At Marangu Gate, you’ll receive your summit certificate and celebrate the successful completion of your Kilimanjaro climb.
 
Choosing a longer itinerary like this significantly improves your chances of reaching the summit. Learn more about Kilimanjaro success rates and why Kilimanjaro climb duration plays a key role in summit success.

6-Day vs 7-Day Rongai Route: Which Is Better?

The Rongai Route can be climbed in either 6 or 7 days, but the 7-day itinerary is usually the better choice for acclimatization and comfort.
 
The 6-day version is shorter and may cost less, but it gives your body less time to adjust to altitude. The 7-day version adds more breathing room and creates a steadier climb profile, especially for first-time Kilimanjaro climbers.
Option Best For Main Consideration
6-Day Rongai Route Climbers with limited time and strong fitness Faster ascent with less acclimatization time
7-Day Rongai Route Most climbers, especially first-time Kilimanjaro trekkers Better acclimatization and a more comfortable pace
For most climbers, we recommend the 7-day Rongai Route because the extra day supports a safer and more comfortable climb.

Rongai Route Difficulty and Acclimatization

The Rongai Route is considered moderately difficult. The trail is not technical, and it is generally less steep than routes such as Machame, but it still reaches the same summit: Uhuru Peak at 5,895 meters.
 
The main challenge is altitude. Even though Rongai has a steady ascent profile, climbers still need enough time for the body to adjust. The 7-day itinerary is better than the 6-day version because it gives more time for acclimatization before summit night.
 
Rongai can be a good option for first-time climbers who want a quieter trail and a more gradual approach. However, it does not offer as many natural “climb high, sleep low” opportunities as some other routes, so pacing and guide support are very important.
 
For a deeper explanation of the challenge, read How Difficult Is Kilimanjaro? You can also read our guide on How to Acclimatize on Kilimanjaro before choosing your route.

Rongai Route Cost: What Affects the Price?

The cost of the Rongai Route depends on the number of days, group size, service level, park fees, crew support, transport, meals, camping equipment, and safety arrangements.
 
A 7-day Rongai climb usually costs more than a 6-day option because it requires an extra day of park fees, food, guide support, porter support, and camp logistics. However, the extra day can be worth it because it gives climbers more time to acclimatize.
 
Do not choose Rongai only by the cheapest price. Very low prices can mean weaker safety support, rushed itineraries, poor crew treatment, or missing services. A responsible Kilimanjaro climb should include experienced guides, proper meals, fair porter support, emergency planning, and clear inclusions.
 
For a full price breakdown, read our main guide to Kilimanjaro Climb Cost.

Best Time to Climb the Rongai Route

The Rongai Route is one of the better Kilimanjaro routes during wetter months because it approaches the mountain from the drier northern side. This does not mean it never rains, but conditions are often less wet than on the southern slopes.

The best times to climb Rongai are usually:

  • January to early March: warmer conditions and good visibility
  • June to October: drier weather and popular trekking months
  • November or wetter shoulder periods: Rongai can be a better option than some southern routes because of its drier northern approach

If you want the most stable weather, choose the main dry seasons. If you want fewer crowds and are comfortable with possible rain, Rongai can still be considered outside peak months.

For a full seasonal breakdown, read Best Time to Climb Kilimanjaro.
Trekkers at Kikelewa Camp on the Rongai Route with Mawenzi Peak in the distance
Kikelewa Camp offers peaceful moorland scenery and strong views toward Mawenzi Peak.

What Makes the Rongai Route Different?

Rongai is different from other Kilimanjaro routes because it gives climbers a quieter northern approach and a descent through the Marangu Route. This creates a different experience from routes that start and finish on the southern side.
 
Main differences include:
  • It is the only route that starts from northern Kilimanjaro
  • It is usually quieter than Machame and Marangu
  • It has a drier trail profile than southern routes
  • It offers strong views of Mawenzi Peak
  • It can be useful during wetter seasons
  • It descends through Marangu, giving climbers a different exit route
The trade-off is scenery. Rongai is beautiful, but it is generally less varied than Lemosho or Machame, especially in the early stages.

Is the Rongai Route Right for You?

The Rongai Route is a good choice if you want a quieter Kilimanjaro climb with fewer trekkers, drier conditions, and a gradual approach from the north.

Rongai may be right for you if:
  • You want a peaceful trail with fewer crowds
  • You are climbing during a wetter season
  • You prefer a steady ascent profile
  • You like remote wilderness and open landscapes
  • You want strong views of Mawenzi Peak
  • You are considering a 7-day itinerary for better acclimatization
Rongai may not be the best choice if you want the most dramatic scenery, the strongest acclimatization profile, or a very social trail experience. In that case, Lemosho, Machame, or Northern Circuit may be better options.
 

Rongai Route Pros and Cons

Pros Cons
Quieter than many popular Kilimanjaro routes Less scenic variety than Lemosho or Machame
Drier northern approach, useful in wetter periods Fewer natural climb-high, sleep-low features than some routes
Gradual trail profile, especially comfortable on 7 days Long travel to the starting gate from Moshi or Arusha
Excellent Mawenzi Peak views Summit night is still demanding and should not be underestimated
Descends through Marangu, giving two route experiences Not ideal for climbers who want the most varied scenery
Kilimanjaro trekker walking through alpine desert near Kibo Hut on Rongai Route
The alpine desert near Kibo Hut marks the final stage before Rongai’s summit night.

Rongai vs Other Kilimanjaro Routes

Rongai is best understood by comparing it with the more popular Kilimanjaro routes.
 
  • Rongai vs Marangu: Rongai is quieter and starts from the north, while Marangu has hut accommodation and is often busier.
  • Rongai vs Machame: Machame is more scenic and social, while Rongai is quieter and drier.
  • Rongai vs Lemosho: Lemosho has more varied scenery and a stronger acclimatization profile, while Rongai offers solitude and a remote northern approach.
  • Rongai vs Northern Circuit: Northern Circuit is longer and has excellent acclimatization, while Rongai is shorter, quieter, and simpler.
If you are still unsure, compare all routes in our Kilimanjaro Routes Comparison guide.

What to Pack for the Rongai Route

Packing for Rongai is similar to other Kilimanjaro routes, but you should pay attention to dry, windy, and cold conditions as you move higher toward Mawenzi Tarn and Kibo Hut.
 
Important items include:
  • Warm layers for cold nights and summit day
  • Waterproof jacket and trousers
  • Broken-in hiking boots
  • Trekking poles for the descent
  • Sun protection for exposed sections
  • Warm gloves, hat, and neck gaiter
  • A good sleeping bag rated for cold conditions
  • A comfortable daypack for water, snacks, and extra layers
For the full gear checklist, read our Kilimanjaro Packing List.

Frequently Asked Questions About the Rongai Route

Is the Rongai Route difficult?

The Rongai Route is moderately difficult. It has a steady trail profile and is not technical, but altitude is still the main challenge. The 7-day itinerary is better for most climbers because it gives the body more time to adjust before summit night.

How many days does the Rongai Route take?

The Rongai Route usually takes 6 or 7 days. The 7-day itinerary is recommended for most climbers because it offers better acclimatization, a more comfortable pace, and a stronger summit profile than the shorter 6-day option.

Why choose the Rongai Route on Kilimanjaro?

Choose the Rongai Route if you want a quieter Kilimanjaro climb, a drier northern approach, remote scenery, strong Mawenzi Peak views, and fewer crowds than the busier southern routes.

Is the Rongai Route good during the rainy season?

Yes, Rongai can be a good option during wetter months because it approaches Kilimanjaro from the drier northern side. Rain is still possible, but the route is often less wet than southern approaches such as Machame, Umbwe, or Marangu.

Is Rongai better than Machame or Lemosho?

Rongai is better if you want a quieter and drier route with fewer trekkers. Machame and Lemosho are usually better if you want more scenic variety and stronger acclimatization features. For most climbers, the best choice depends on your travel dates, fitness, scenery preference, and how many days you can spend on the mountain.
 

Climb the Rongai Route With Kili Quests

The Rongai Route is a strong choice for climbers who want a quieter Kilimanjaro trail, a drier northern approach, and a steady 6–7 day route to the summit.
 
At Kili Quests, we recommend the 7-day Rongai itinerary for better acclimatization and a more comfortable pace. Our local guides help you plan the right route, prepare properly, and climb with safe support from the first day to the final descent.
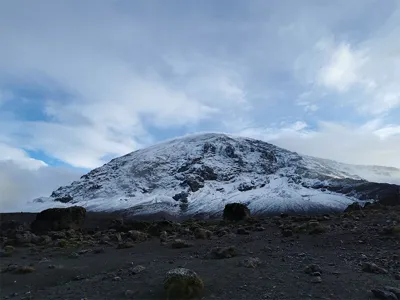
 
Contact us today to plan your Rongai Route climb with Kili Quests.

Related Articles

Northern Circuit Kilimanjaro: 9-Day Itinerary, Difficulty & Cost

Climb with the Highest Success Rate

The Northern Circuit offers the best acclimatization — but pacing and guidance still matter.

Plan Your Climb the Right Way

Preparation and acclimatization make the difference.
Explore these guides:

OUR CATEGORIES

Northern Circuit Kilimanjaro: Longest Route With Best Acclimatization

The Northern Circuit Route is the longest Kilimanjaro route and one of the best choices for climbers who want strong acclimatization, quiet trails, and wide panoramic views around the mountain.

Starting from the western side of Kilimanjaro, the route follows the early section of the Lemosho trail before turning north and circling the quieter northern slopes. This gives climbers a longer, more gradual approach before summit night.

The standard 9-day Northern Circuit itinerary gives your body more time to adjust to altitude than shorter routes such as Marangu or 6-day Machame. That makes it one of the strongest Kilimanjaro routes for climbers who want a safer pace and a better summit profile when properly guided.

This guide covers the Northern Circuit itinerary, difficulty, acclimatization, cost, scenery, pros and cons, and who this route is best suited for.
 

Quick Answer: Is the Northern Circuit Route Good for Kilimanjaro?

Yes, the Northern Circuit is one of the best Kilimanjaro routes for acclimatization, scenery, and a quieter trekking experience. It is the longest main route on the mountain, usually completed in 9 days, which gives climbers more time to adapt to altitude.
 
The route starts from the western side, follows part of the Lemosho trail, then circles around the quieter northern slopes before heading to the summit. Because it takes more days and avoids the busiest trail sections for much of the climb, it is ideal for climbers who want a slower pace, fewer crowds, and strong acclimatization.
 
The main drawbacks are time and cost. The Northern Circuit takes longer and usually costs more than shorter routes, but for many climbers, the extra days are worth it.

Why Choose the Northern Circuit Route?

The Northern Circuit Route is best known for three things: excellent acclimatization, low crowds, and a long scenic journey around Kilimanjaro.
 
Unlike shorter routes that reach high altitude quickly, the Northern Circuit gives climbers more days on the mountain. This slower pace helps the body adjust better and reduces the pressure of rushing toward summit night.
 
The route also explores the quieter northern side of Kilimanjaro, where fewer climbers pass compared with the southern circuit, Machame, or Marangu routes. This makes the experience feel more remote and peaceful.
 
Choose the Northern Circuit if you want:


  • A longer 9-day Kilimanjaro itinerary
  • Strong acclimatization profile
  • Quieter trails with fewer crowds
  • Panoramic views around the mountain
  • A premium route with more time to adjust
  • A strong summit profile when properly paced
This is not usually the cheapest Kilimanjaro route, but it is one of the best for climbers who value safety, scenery, and acclimatization.
Climbers at Barafu Camp (4,673m) on Mount Kilimanjaro’s Northern Circuit Route, preparing for the final summit push to Uhuru Peak | Kili Quests
Barafu Camp is the final overnight base camp before summit day on the Northern Circuit. From here, climbers tackle the ascent to Uhuru Peak via Stella Point.

Table of Contents

What Is the Northern Circuit Route on Kilimanjaro?

The Northern Circuit Route is the longest main route on Mount Kilimanjaro. It begins from the western side at Londorossi Gate, follows the early part of the Lemosho Route, then turns north to circle around the quieter northern slopes.

This longer route gives climbers a more complete Kilimanjaro experience. Instead of heading quickly toward the southern circuit, the trail moves around the mountain, offering wide views, remote landscapes, and a quieter atmosphere before joining the final summit approach.

The Northern Circuit is usually completed in 9 days. Its biggest advantage is acclimatization. The extra days allow the body more time to adjust before reaching high camps and attempting Uhuru Peak.

Northern Circuit Route Overview

Feature Northern Circuit Route Details
Route duration Usually 9 days
Distance About 98 km / 61 miles
Starting point Londorossi Gate, western Kilimanjaro
Highest point Uhuru Peak, 5,895 m / 19,341 ft
Difficulty Moderate to challenging because of the length and summit night
Acclimatization One of the strongest profiles on Kilimanjaro due to the longer itinerary
Best for Climbers who want strong acclimatization, quieter trails, scenery, and enough time for a longer trek
Main drawback Takes more time and usually costs more than shorter routes
Because longer routes significantly improve summit success, it’s important to understand how itinerary length affects your chances of reaching the summit.
 
Read our article about, Kilimanjaro Success Rate

Northern Circuit Days and Elevation Profile

Northern Circuit Route map on Mount Kilimanjaro showing full circuit trail, elevation profile, and key camps to Uhuru Peak
The longest Kilimanjaro route, offering excellent acclimatization and 360° views around the mountain.

9-Day Northern Circuit Route Itinerary

Day 1: Londorossi Gate to Mti Mkubwa Camp

Altitude: 2,100 m → 2,650 m
Hiking time: 3–4 hours
 
The trek begins at Londorossi Gate on the western side of Kilimanjaro. After registration, you enter the rainforest zone and walk through a green, shaded trail toward Mti Mkubwa Camp. Wildlife sightings are possible in this lower forest section, especially monkeys and forest birds.

Day 2: Mti Mkubwa Camp to Shira 1 Camp

Altitude: 2,650 m → 3,610 m
Hiking time: 5–6 hours
 
The trail climbs out of the rainforest and into the moorland zone. As the vegetation opens, views across the Shira Plateau begin to appear. This is one of the first major altitude gains of the route, so a slow pace is important.

Day 3: Shira 1 Camp to Shira 2 Camp

Altitude: 3,610 m → 3,850 m
Hiking time: 4–5 hours
 
This day crosses the open Shira Plateau, one of Kilimanjaro’s most scenic high-altitude landscapes. The walking is steadier, with wide views of Kibo and the surrounding wilderness. The gradual profile helps climbers settle into the rhythm of the trek.

Day 4: Shira 2 Camp to Lava Tower to Moir Hut

Altitude: 3,850 m → 4,600 m → 4,200 m
Hiking time: 6–7 hours
 
This is an important acclimatization day. The trail climbs toward Lava Tower, a dramatic volcanic landmark at high altitude, before descending to Moir Hut for the night. This “climb high, sleep low” pattern helps the body adapt before the route moves around the northern slopes.

Day 5: Moir Hut to Buffalo Camp

Altitude: 4,200 m → 4,020 m
Hiking time: 5–6 hours
 
The route now moves into Kilimanjaro’s quieter northern side. This section feels more remote than the busier southern trails, with wide alpine landscapes and views stretching toward Kenya on clear days.
 

Day 6: Buffalo Camp to Third Cave Camp

Altitude: 4,020 m → 3,870 m
Hiking time: Around 5 hours
 
This is one of the quietest parts of the Northern Circuit. The trail crosses remote alpine desert terrain with fewer climbers and open views. The slightly lower sleeping altitude also supports acclimatization before the climb to base camp.

Day 7: Third Cave Camp to School Hut

Altitude: 3,870 m → 4,750 m
Hiking time: 4–5 hours
 
The trail climbs steadily toward School Hut, the base camp used for the summit attempt. This day is shorter but important, because you will rest, hydrate, eat early, and prepare for the midnight summit push.

Day 8: School Hut to Uhuru Peak to Mweka Camp

Altitude: 4,750 m → 5,895 m → 3,100 m
Hiking time: 12–14 hours
 
Summit day is the hardest part of the Northern Circuit Route. The climb usually begins around midnight in cold, dark conditions. You ascend slowly toward the crater rim, continue to Uhuru Peak, then descend to Mweka Camp after a short rest.
This is a long and demanding day, but the extended acclimatization profile of the Northern Circuit helps climbers arrive better prepared than on shorter routes.

Day 9: Mweka Camp to Mweka Gate

Altitude: 3,100 m → 1,640 m
Hiking time: 3–4 hours
 
The final day descends through the rainforest to Mweka Gate. After completing park checkout, successful climbers receive their summit certificate before returning to town.

Why the Northern Circuit Has a Strong Summit Profile

The Northern Circuit has one of the strongest summit profiles on Kilimanjaro because it gives climbers more time to acclimatize before summit night.
 
The 9-day itinerary allows a slower altitude gain, more recovery time, and better adjustment before reaching high camps. This is especially important because altitude is one of the main reasons climbers struggle on Kilimanjaro.

Longer Itinerary Means Better Acclimatization

More days on the mountain give your body more time to adapt to lower oxygen levels. This does not guarantee summit success, but it improves your chances when combined with proper pacing, hydration, nutrition, and guide support.

Lower Pressure Than Shorter Routes

Shorter routes can feel rushed because climbers gain altitude faster with less recovery time. The Northern Circuit spreads the climb over more days, making the experience more gradual.

Good Option for First-Time Climbers With Enough Time

The Northern Circuit can be a strong option for first-time climbers who want a slower pace and have enough time for a 9-day trek. It is still physically demanding, but the route gives the body more opportunity to adjust.
 
For climbers comparing route options, see our Kilimanjaro routes comparison guide

Northern Circuit Route Cost

The Northern Circuit usually costs more than shorter Kilimanjaro routes because it takes 9 days on the mountain. More days mean more park fees, crew wages, food, camping logistics, guide support, and mountain operations.
 
The final price depends on the number of climbers, whether the climb is private or group-based, the level of service, included transfers, hotel nights, equipment, safety support, and route arrangements.
 
The Northern Circuit is not the cheapest route, but it offers strong value for climbers who want better acclimatization, quieter trails, and a more complete Kilimanjaro experience.
 
If your main goal is to reduce cost, a shorter route may look cheaper. But on Kilimanjaro, choosing only by price can be a mistake. A longer route gives your body more time to adjust, which can make the climb safer and more enjoyable.
 
For a full breakdown of park fees, crew costs, inclusions, exclusions, and extra expenses, read our main guide to Kilimanjaro climb cost.

Northern Circuit Route Pros and Cons

Pros Cons
Excellent acclimatization profile due to the 9-day itinerary More expensive than shorter Kilimanjaro routes
Quieter northern slopes with fewer crowds Requires more time on the mountain
Beautiful 360-degree scenery around Kilimanjaro Longer distance can feel tiring for some climbers
Strong option for climbers who want a slower, safer pace Not ideal for travelers with limited vacation days

Best Time to Climb the Northern Circuit

The best time to climb the Northern Circuit is during Kilimanjaro’s drier trekking seasons, when visibility is better and trail conditions are more stable.
 
The best months are usually:
  • January to early March
  • June to October
January to early March can offer warmer conditions and fewer climbers. June to October is one of the most popular climbing seasons because of drier weather and clearer mountain views.
 
The Northern Circuit can be climbed outside these months, but rainier periods such as March to May and parts of November can make the trail wetter, colder, and less comfortable.
 
For a full seasonal breakdown, read our best time to climb Kilimanjaro guide.
 
Read our article about,Best Time to Climb Kilimanjaro 
Trekker climbing and hugging a rock on Kilimanjaro’s Barranco Wall, a fun and scenic segment encountered on the Northern Circuit via Lemosho | Kili Quests
The Barranco Wall, known as the “Breakfast Wall,” is a fun and challenging highlight of the Northern Circuit after it merges with Lemosho.

What Makes the Northern Circuit Unique?

The Northern Circuit is unique because it gives climbers one of the most complete journeys around Mount Kilimanjaro. Instead of following only the busier southern routes, it circles around the quieter northern slopes before heading toward the summit.

This gives the route a different feel from Machame, Marangu, or the standard Lemosho itinerary. You experience open plateau scenery, remote northern landscapes, views toward Kenya, and a longer approach that supports acclimatization.

Its biggest strength is the combination of time, scenery, and solitude. Its biggest drawback is that it requires more days and usually costs more.

Is the Northern Circuit Route Right for You?

The Northern Circuit Route is a strong choice if you want a longer, quieter, and better-acclimatized Kilimanjaro climb.


Choose the Northern Circuit if you:
  • Want one of the best acclimatization profiles on Kilimanjaro
  • Prefer fewer crowds and quieter trails
  • Have enough time for a 9-day climb
  • Want a scenic route with views around the mountain
  • Are willing to pay more for extra days and better pacing
  • Want a strong route option as a first-time climber
This route may not be ideal if you are short on time, looking for the cheapest climb, or prefer a faster itinerary. In that case, routes such as Machame or Marangu may be worth comparing, but they offer less time for acclimatization.

Northern Circuit vs Lemosho Route

The Northern Circuit and Lemosho Route both start from the western side of Kilimanjaro and share the early trail through Londorossi Gate, Mti Mkubwa, and the Shira Plateau.
 
The main difference is what happens after the early section. Lemosho usually continues toward the southern circuit and Barranco, while the Northern Circuit turns north and circles around the quieter side of the mountain.
 
Northern Circuit is usually better for climbers who want more acclimatization time, fewer crowds, and a longer trek. Lemosho is better for climbers who want excellent scenery and acclimatization but prefer a slightly shorter itinerary, usually 7 or 8 days.
 
Both are strong routes. The better choice depends on your time, budget, fitness, and comfort with a longer climb.
Three happy trekkers posing in front of the Barafu Camp sign on Kilimanjaro’s Northern Circuit Route, flexing muscles before summit day | Kili Quests
A light-hearted moment at Barafu Camp (4,673m) on the Northern Circuit Route — trekkers flex their energy and spirit before the final ascent to Uhuru Peak.

Frequently Asked Questions About the Northern Circuit Route

How long does the Northern Circuit Route take?

The Northern Circuit Route usually takes 9 days. This makes it the longest main Kilimanjaro route and gives climbers more time to acclimatize before summit night.

Is the Northern Circuit Route difficult?

The Northern Circuit is moderately challenging. The route is long, and summit night is still demanding, but the gradual 9-day itinerary helps many climbers adjust better than shorter routes.

The challenge is not technical climbing. It is the combination of distance, altitude, cold, and several days of trekking.

Why is the Northern Circuit good for acclimatization?

The Northern Circuit is good for acclimatization because it gives climbers more days on the mountain and follows a slower altitude profile. This allows the body more time to adjust before reaching high camps and attempting the summit.

Is the Northern Circuit good for beginners?

Yes, the Northern Circuit can be a good route for beginners who have enough time and budget for a longer climb. Its slower pace and strong acclimatization profile make it more forgiving than shorter routes.
However, beginners still need proper training, patience, and guide support.

Is the Northern Circuit better than Lemosho?

The Northern Circuit is usually better for acclimatization and solitude because it is longer and quieter. Lemosho is also scenic and well-acclimatized, but it is usually shorter.
 
Choose Northern Circuit if you want the longest, quietest, and most gradual route. Choose Lemosho if you want excellent scenery and acclimatization with fewer days.

Climb the Northern Circuit With Kili Quests

The Northern Circuit is one of the best Kilimanjaro routes for climbers who want more time, better acclimatization, fewer crowds, and a quieter mountain experience.
 
At Kili Quests, we plan Northern Circuit climbs with careful pacing, experienced local guides, proper safety checks, and full mountain support from start to summit. Our team helps you prepare, choose the right itinerary, and climb with a strategy that respects altitude instead of rushing it.
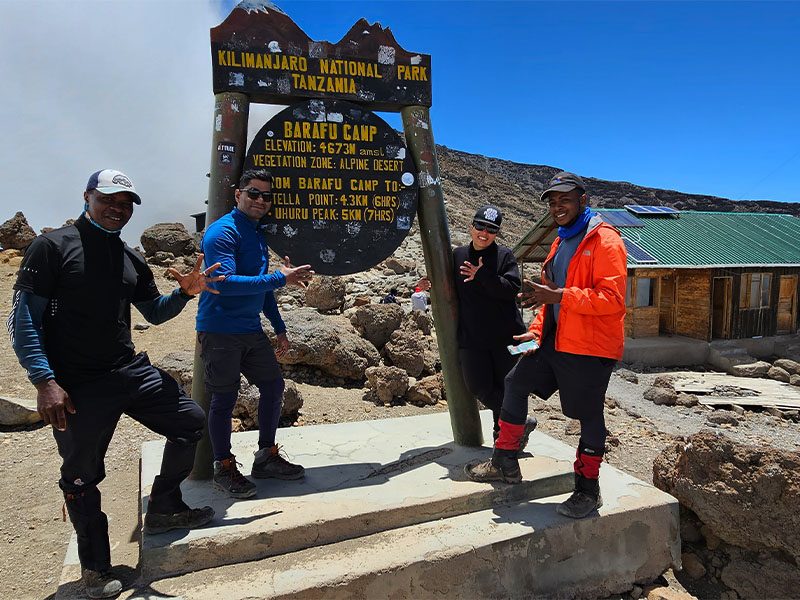
 
If you want a longer Kilimanjaro route with strong acclimatization and panoramic scenery, contact us to plan your Northern Circuit climb.

Related Articles

Shira Route Kilimanjaro: Itinerary, Difficulty & Cost

Choose the Right Kilimanjaro Route

The right route makes all the difference on Kilimanjaro.We help you plan your climb based on:

Plan Your Kilimanjaro Climb

Choosing the right route is key to your success.
Explore these guides to prepare properly:

OUR CATEGORIES

Shira Route Kilimanjaro: Remote Western Trail with Open Views

Climbing Kilimanjaro via the Shira Route offers one of the most scenic and remote experiences on the mountain, but it also comes with a serious altitude challenge.
 
Unlike most Kilimanjaro routes that begin lower in the rainforest, the Shira Route starts high on the western side of the mountain, around the Shira Plateau. This gives climbers wide-open views from the beginning, but it also means your body has less time to adjust during the first stage of the trek.
 
The Shira Route is best suited for experienced trekkers, climbers who have already spent time at altitude, or travelers who want a quieter trail with dramatic scenery. For most first-time climbers, the Lemosho Route is often a better choice because it starts lower and allows a more gradual acclimatization profile.
 
Before choosing this route, it is important to understand the itinerary, altitude profile, difficulty, cost, and how it compares with other Kilimanjaro routes.

Quick Answer: Is the Shira Route Good for Kilimanjaro?

The Shira Route is a scenic and quiet Kilimanjaro route that starts on the western side of the mountain and crosses the Shira Plateau before joining the southern circuit toward Barranco, Barafu, and Uhuru Peak.
 
It is a beautiful route, but it is not the best choice for everyone. The main challenge is the high starting altitude, which gives your body less time to adjust compared with routes that begin lower, such as Lemosho.
 
The Shira Route is best for experienced hikers, climbers who have already acclimatized, or trekkers who want remote scenery and fewer crowds. First-time climbers should compare it carefully with Lemosho before booking.

Why Choose the Shira Route?

The Shira Route is one of the quieter trails on Mount Kilimanjaro. It approaches the mountain from the west and gives climbers open views across the Shira Plateau early in the trek.
 
The route is known for:
  • Remote western approach
  • Wide-open plateau scenery
  • Fewer crowds than Machame or Marangu
  • Dramatic views of Kibo and volcanic landscapes
  • Access to famous landmarks such as Lava Tower and Barranco Wall
However, the Shira Route also has a major drawback: it starts high. This can make acclimatization more difficult, especially for climbers arriving from low altitude. Because of this, the route is better suited to trekkers with previous altitude experience or those who are already well acclimatized before the climb.
 
For many first-time climbers, the Lemosho Route offers a better balance of scenery, remoteness, and acclimatization.
Lava Tower on the Shira Route of Mount Kilimanjaro with a trekker standing near the volcanic rock formation.
Lava Tower is one of the most important acclimatization points on the Shira Route before descending toward Barranco Camp.

Table of Contents

Shira Route Overview

Feature Shira Route Details
Route duration Usually 7 days
Starting point Western Kilimanjaro / Shira Plateau area
Highest point Uhuru Peak, 5,895 m / 19,341 ft
Difficulty Challenging because of the high starting altitude
Scenery Open plateau views, volcanic landscapes, Lava Tower, Barranco Wall, and southern circuit scenery
Best for Experienced trekkers, altitude-prepared climbers, and travelers who want a quieter western approach
Main drawback Less gradual acclimatization than Lemosho because the route starts high

Shira Route Days and Elevation Profile

Shira Route map on Mount Kilimanjaro showing trail path from Shira Plateau to Uhuru Peak via Barranco and Barafu Camps
Begins at high altitude on the Shira Plateau and joins the Lemosho-Machame trail to the summit.

Shira Route Days and Elevation Profile

The Shira Route begins high on the western side of Kilimanjaro and crosses the Shira Plateau before joining the same southern circuit used by parts of the Lemosho and Machame routes.
 
This route usually follows a 7-day itinerary, passing through Shira 1 Camp, Shira 2 Camp, Lava Tower, Barranco Camp, Karanga Camp, Barafu Camp, Uhuru Peak, and Mweka Gate.
 
Because the route starts at a higher elevation than most Kilimanjaro routes, acclimatization must be taken seriously from the first day.

7-Day Shira Route Itinerary

Day 1: Shira Gate to Shira 1 Camp

Altitude: 3,600 m – 3,610 m
Hike Time: 1–2 hours
 
Your adventure begins high on the Shira Plateau  unlike most routes that start in the rainforest. This short first day helps your body begin adjusting to altitude while you enjoy wide, open views of the mountain and surrounding plains.

Day 2: Shira 1 to Shira 2 Camp

Altitude: 3,610 m – 3,850 m
Hike Time: 4–5 hours
 
A steady and gradual trek across alpine terrain. The landscape becomes more rugged and exposed, with fewer plants and more volcanic rock formations. This is an important day for building rhythm and pacing.

Day 3: Shira 2 to Barranco Camp (via Lava Tower)

Altitude: 3,850 m → 4,640 m → 3,960 m
Hike Time: 6–7 hours
 
One of the most important days for acclimatization. You climb up to Lava Tower (4,640 m), where many trekkers begin to feel the effects of altitude, before descending to Barranco Camp.
This “climb high, sleep low” strategy helps your body adapt and improves your chances of reaching the summit.
 
Read more about Kilimanjaro acclimatization if you want to understand how “climb high, sleep low” helps your body adjust.

Day 4: Barranco Camp to Karanga Camp

Altitude: 3,960 m → 4,035 m
Hike Time: 4–5 hours
 
Start the day by climbing the famous Barranco Wall — a steep but non-technical scramble that offers incredible views. After reaching the top, the trail continues through valleys and ridges toward Karanga Camp.

Day 5: Karanga Camp to Barafu Camp

Altitude: 4,035 m → 4,673 m
Hike Time: 3–4 hours
 
A shorter trekking day as you make your way to Barafu Camp, the base camp for your summit attempt. After lunch, you’ll rest, hydrate, and prepare your gear before an early night.

Day 6: Summit Day – Barafu Camp to Uhuru Peak to Mweka Camp

Altitude: 4,673 m → 5,895 m → 3,100 m
Hike Time: 12–14 hours
The most challenging and rewarding day of your climb. You’ll begin your ascent around midnight, trekking in cold, dark conditions toward Stella Point, then continue to Uhuru Peak , the highest point in Africa.After celebrating at the summit, you descend back to Barafu for a short rest, then continue down to Mweka Camp.
 
Understand what to expect in our Kilimanjaro summit day guide 

Day 7: Mweka Camp to Mweka Gate

Altitude: 3,100 m → 1,640 m
Hike Time: 3–4 hours
 
Your final descent takes you through lush rainforest terrain. At the gate, you’ll receive your summit certificate marking the end of your Kilimanjaro adventure.

Shira Route Difficulty and Acclimatization

The Shira Route is considered a challenging Kilimanjaro route mainly because it starts high on the mountain. Beginning around the Shira Plateau means climbers gain altitude quickly at the start of the trek, which gives the body less time to adjust.

The walking itself is not technical. You do not need ropes or climbing equipment, but you should be comfortable with multi-day trekking, long walking hours, and changing mountain conditions.

The hardest parts of the Shira Route are:
  • High starting altitude
  • Long trekking days after joining the southern circuit
  • Lava Tower acclimatization day
  • Barranco Wall section
  • Summit night from Barafu Camp
  • Long descent after reaching Uhuru Peak
This route is better for climbers who already have hiking experience or who have spent time at altitude before the trek. If you are a first-time climber and altitude is a major concern, compare Shira carefully with the Lemosho Route, which starts lower and offers a more gradual beginning.

Shira Route Cost

The Shira Route usually costs more than shorter Kilimanjaro routes because it is commonly done over 7 days and requires full mountain crew support, park fees, camping equipment, meals, transport, and safety logistics.
 
The final price depends on the number of climbers, service level, inclusions, guide and porter support, airport transfers, accommodation before and after the climb, and whether the climb is private or group-based.
 
Shira is not usually chosen as the cheapest Kilimanjaro option. It is chosen for scenery, remoteness, and the western approach. If price is your main concern, remember that the cheapest climb is not always the safest or best value, especially on a route where altitude management matters from the beginning.
 
For a full breakdown of park fees, crew costs, inclusions, exclusions, and extra expenses, read our main guide to Kilimanjaro climb cost.
View of Kibo Peak from Karanga Camp on the Shira Route with rocky alpine terrain in the foreground.
From Karanga Camp, the Shira Route offers dramatic views of Kibo before climbers continue toward Barafu and the summit.

Best Time to Climb the Shira Route

The best time to climb the Shira Route is during Kilimanjaro’s drier trekking seasons, when trail conditions are more stable and mountain views are clearer.

The best months are usually:
  • January to early March
  • June to October

January to early March can offer warmer conditions and fewer climbers. June to October is one of the most popular trekking periods because of drier weather and clearer skies.

The rainier periods, especially March to May and parts of November, can make the trail wetter, colder, and less comfortable. Since Shira starts high and crosses exposed terrain early, weather conditions can feel harsher than on lower forest-start routes.

For a full seasonal breakdown, read our best time to climb Kilimanjaro guide.

Shira Route Pros and Cons

Pros Cons
Quiet western approach with fewer climbers High starting altitude can make acclimatization harder
Beautiful open views across the Shira Plateau Not ideal for many first-time climbers
Joins the scenic southern circuit toward Barranco and Barafu Less gradual beginning than Lemosho
Passes famous landmarks such as Lava Tower and Barranco Wall Requires serious attention to pacing and altitude symptoms

What Makes the Shira Route Unique?

The Shira Route is unique because it begins high on the western side of Kilimanjaro and gives climbers immediate access to the open landscapes of the Shira Plateau.
 
Unlike routes that begin in dense rainforest, Shira starts with wide views, exposed terrain, and a strong sense of remoteness from the first day. It later joins the southern circuit, meaning climbers still experience major Kilimanjaro highlights such as Lava Tower, Barranco Wall, Barafu Camp, Stella Point, and Uhuru Peak.
 
The route’s biggest strength is scenery. Its biggest weakness is the high starting altitude

Is the Shira Route Right for You?

The Shira Route may be right for you if you want a quieter western approach, wide-open scenery, and a route that feels more remote at the beginning.

Choose the Shira Route if you:
  • Have previous high-altitude trekking experience
  • Want fewer crowds than Machame or Marangu
  • Prefer open plateau views and volcanic scenery
  • Are comfortable with a high starting altitude
  • Want to join the scenic southern circuit toward Barranco and Barafu
You may be better suited to another route if you are a first-time climber, worried about altitude, or want a more gradual start. In that case, the Lemosho Route is often a stronger choice because it starts lower while still offering excellent scenery.
Sweeping view of Mount Kilimanjaro’s Kibo Peak from Karanga Camp on the Shira Route, with rocky alpine terrain under a bright morning sky | Kili Quests
From Karanga Camp, Shira Route trekkers enjoy this dramatic view of Kibo — a reminder of the summit that awaits beyond Barafu Camp.

Shira Route vs Lemosho Route

The Shira and Lemosho routes both approach Kilimanjaro from the west and later join the southern circuit. The main difference is the starting altitude.
 
The Shira Route starts higher on the Shira Plateau, which gives climbers open views quickly but makes the first stage more demanding for acclimatization. The Lemosho Route starts lower and allows a more gradual beginning through forest and moorland zones.
 
For most first-time climbers, Lemosho is usually the better option because it offers similar scenery with a stronger acclimatization profile. Shira is better suited to trekkers who already have altitude experience or who specifically want the high western plateau start.

Frequently Asked Questions About the Shira Route

Where does the Shira Route start on Kilimanjaro?

The Shira Route starts on the western side of Mount Kilimanjaro near the Shira Plateau. Unlike routes that begin lower in the rainforest, Shira starts at a higher elevation, which gives climbers open views early but makes acclimatization more challenging.

Why is the Shira Route considered difficult?

The Shira Route is considered difficult mainly because of its high starting altitude. Climbers begin the trek already high on the mountain, which gives the body less time to adjust compared with routes that start lower.
 
The walking is not technical, but the altitude profile makes pacing and acclimatization very important.

How many days does the Shira Route take?

The Shira Route is usually completed in 7 days. This gives climbers time to cross the Shira Plateau, pass Lava Tower, continue through Barranco and Karanga, summit from Barafu Camp, and descend through Mweka Gate.

Is the Shira Route good for beginners?

The Shira Route is not usually the best choice for beginners because it starts high and can make acclimatization harder. Beginners are often better suited to routes with a more gradual start, such as Lemosho.
 
Shira can still be a good option for trekkers who already have hiking experience or have spent time at altitude before the climb.

Is Shira better than Lemosho?

For most first-time climbers, Lemosho is usually better than Shira because it starts lower and gives the body more time to adjust. Shira is quieter and scenic, but the high starting altitude makes it more demanding from the beginning.
 
The better route depends on your experience, fitness, altitude background, and comfort with a high start.

Climb the Shira Route With Kili Quests

The Shira Route is a beautiful but demanding Kilimanjaro trail. Its remote western approach and open plateau views make it memorable, but the high starting altitude means the route must be planned carefully.
 
At Kili Quests, we help you choose the right Kilimanjaro route based on your experience, fitness, travel dates, and acclimatization needs. If Shira is the right fit, our local mountain team will guide you with careful pacing, safety checks, proper support, and a clear summit strategy.
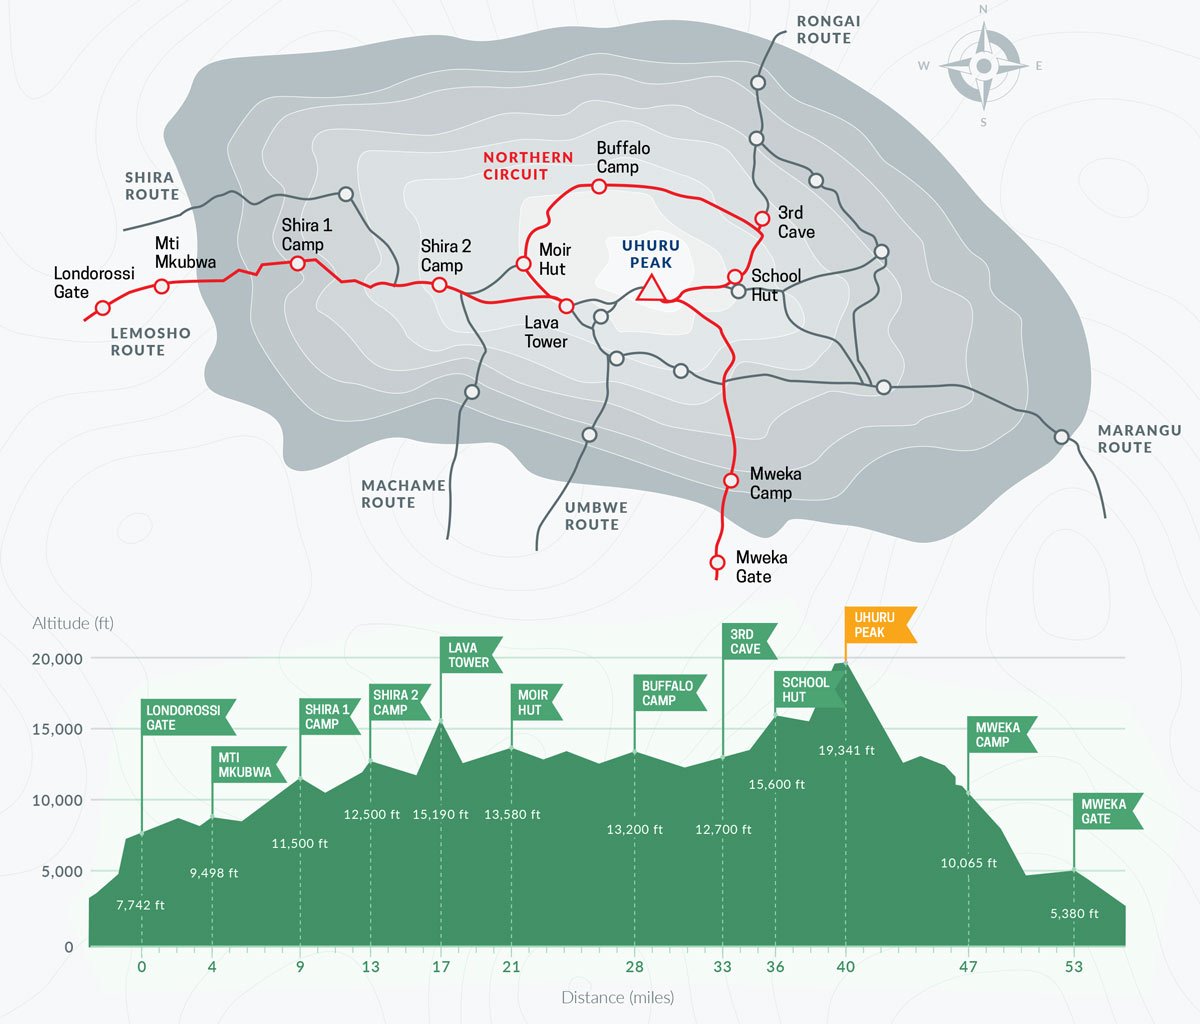
 
If you are unsure whether Shira or Lemosho is better for you, contact our team for honest route advice before booking.

Related Articles

Umbwe Route Kilimanjaro: Itinerary & Difficulty

Plan Your Umbwe Route Climb

The Umbwe Route is steep, direct, and built for experienced climbers.
Get expert advice and a personalized plan for your climb.

Kilimanjaro Planning Guides

Make the right decision before your climb:
Compare all Kilimanjaro routes

OUR CATEGORIES

Umbwe Route Kilimanjaro: Itinerary & Difficulty

The Umbwe Route is the steepest and most direct trail on Mount Kilimanjaro. It climbs quickly from the southern rainforest toward Barranco Camp before joining the southern circuit route to Barafu, Stella Point, and Uhuru Peak.
 
This route is quiet, scenic, and adventurous, but it is also one of the hardest ways to climb Kilimanjaro. The fast elevation gain gives your body less time to adjust, which makes acclimatization the biggest challenge on Umbwe.
 
For that reason, the Umbwe Route is best for experienced trekkers who are already comfortable with steep terrain, long hiking days, and high-altitude conditions. Most first-time climbers are better served by longer routes such as Machame Route Kilimanjaro, Lemosho Route Kilimanjaro, or the Northern Circuit.
 
Still comparing your options? Read our full Kilimanjaro routes comparison guide before choosing Umbwe.

Quick Answer: Is the Umbwe Route Good for Kilimanjaro?

The Umbwe Route is good only for experienced trekkers who want a steep, quiet, and direct climb on Kilimanjaro. It is not the best route for beginners because it gains altitude quickly and gives the body less time to acclimatize.
 
Umbwe is best for climbers who already have strong fitness, hiking experience, and confidence at altitude. If your main goal is better acclimatization and a more comfortable summit profile, routes such as Lemosho, Machame, or the Northern Circuit are usually better choices.
A climber stands on snow-covered terrain near Stella Point on Mount Kilimanjaro, holding a cup and trekking pole while overlooking the crater rim.
A trekker pauses to take in the spectacular view near Stella Point, where Kilimanjaro’s crater rim opens up into a vast, icy alpine landscape.

Table of Contents

Why the Umbwe Route Is Unique

The Umbwe Route is the most direct path up Kilimanjaro, ascending quickly through the southern slopes before joining the southern circuit near Barranco Camp.Unlike longer routes, Umbwe prioritizes speed over gradual acclimatization. This creates a more intense trekking experience, with fewer crowds and a strong sense of wilderness.However, the fast ascent makes it one of the riskiest routes in terms of altitude adaptation.

Umbwe Route Overview

Feature Details
Route duration Usually 6 days
Approximate distance About 53 km / 33 miles
Starting point Umbwe Gate
Finish point Mweka Gate
Highest point Uhuru Peak, 5,895 m / 19,341 ft
Difficulty Very challenging
Acclimatization profile Poorer than longer routes because of fast elevation gain
Best for Experienced trekkers who want a steep, quiet, direct route
Not ideal for Beginners, nervous hikers, or climbers who need more acclimatization time
Not sure if Umbwe is the right choice? Compare all options in our complete Kilimanjaro routes guide to find the best route for your experience level.

Umbwe Route Days and Elevation Profile

Umbwe Route map on Mount Kilimanjaro showing trail path, elevation chart, and key camps to Uhuru Peak
Kilimanjaro’s steepest and most direct route, ascending via Barranco and Karanga Camps.

Umbwe Route Camps and Elevation Gain

The Umbwe Route gains altitude quickly in the first two days, which is why it is considered one of the hardest Kilimanjaro routes for acclimatization. The climb starts at Umbwe Gate, passes through Umbwe Cave Camp, then joins the southern circuit near Barranco Camp before continuing toward Barafu and the summit.

Day Route Section Sleeping Altitude Acclimatization Note
Day 1 Umbwe Gate to Umbwe Cave Camp 2,850 m / 9,350 ft Steep first day through rainforest with fast elevation gain.
Day 2 Umbwe Cave Camp to Barranco Camp 3,900 m / 12,795 ft Big altitude jump; this is where acclimatization becomes serious.
Day 3 Barranco Camp to Karanga Camp 3,995 m / 13,106 ft Shorter altitude gain; useful recovery and adaptation day.
Day 4 Karanga Camp to Barafu Camp 4,650 m / 15,255 ft High-altitude base camp before summit night.
Day 5 Barafu Camp to Uhuru Peak, then down to Mweka Camp 3,100 m / 10,170 ft Longest and hardest day; summit push followed by major descent.
Day 6 Mweka Camp to Mweka Gate Exit at 1,640 m / 5,380 ft Final forest descent and certificate collection.

6-Day Umbwe Route Itinerary

The 6-day Umbwe itinerary is the standard version of this route, but it is also one of the most demanding ways to climb Kilimanjaro. The trail gains altitude quickly in the first two days before joining the southern circuit near Barranco Camp.
 
Because the route is steep and short, slow pacing and honest altitude monitoring are very important from the beginning.

Day 1: Umbwe Gate to Umbwe Cave Camp

The climb begins at Umbwe Gate, where your team completes park registration before entering the rainforest. The trail starts steeply and climbs through dense forest along a narrow ridge. This first day is more demanding than the opening day on many other Kilimanjaro routes because there are fewer flat sections.
 
The forest can be humid, muddy, and slippery after rain, so steady pacing is important. You will sleep at Umbwe Cave Camp, surrounded by thick vegetation and a quiet mountain atmosphere.
  • Altitude: 1,800 m to 2,850 m
  • Hiking time: 5–6 hours
  • Zone: Rainforest
  • Camp: Umbwe Cave Camp

Day 2: Umbwe Cave to Barranco Camp

Day 2 continues steeply as the trail leaves the rainforest and enters the moorland zone. The views begin to open as you climb higher, but the altitude gain is serious. This is one of the key reasons Umbwe is considered a difficult route.
 
By the time you reach Barranco Camp, the Umbwe Route joins the southern circuit used by routes such as Machame and Lemosho. From here, the trail becomes more familiar, but the early altitude gain has already made acclimatization more demanding.
  • Altitude: 2,850 m to 3,900 m
  • Hiking time: 5–6 hours
  • Zone: Moorland
  • Camp: Barranco Camp
This is where altitude can start to affect some climbers. Read our Altitude Sickness on Kilimanjaro guide so you understand common symptoms and warning signs before choosing a fast route like Umbwe.

Day 3: Barranco Camp to Karanga Camp

Day 3 begins with the Barranco Wall, one of the most famous features on Kilimanjaro’s southern circuit. The wall looks intimidating from camp, but most climbers manage it safely with slow movement and guide support.
 
After the Barranco Wall, the trail crosses ridges and valleys before descending into Karanga Valley and climbing again to Karanga Camp. This day is important because it gives your body a little more time to adjust before moving higher.
  • Altitude: 3,900 m to 3,995 m
  • Hiking time: 4–5 hours
  • Highlight: Barranco Wall
  • Camp: Karanga Camp

Day 4: Karanga Camp to Barafu Camp

Day 4 is shorter, but it takes you to Barafu Camp, the base camp for summit night. The landscape becomes drier, colder, and more exposed as you enter the alpine desert zone.
 
After reaching Barafu, climbers rest, eat early, prepare warm summit gear, and try to sleep before the midnight summit attempt. This is not the day to rush. Saving energy for summit night is more important than arriving fast.
  • Altitude: 3,995 m to 4,650 m
  • Hiking time: 3–4 hours
  • Zone: Alpine desert
  • Camp: Barafu Camp

Day 5: Barafu Camp to Uhuru Peak, then down to Mweka Camp

Summit day is the hardest part of the Umbwe Route. The climb usually begins around midnight in cold, thin air. Climbers move slowly toward Stella Point before continuing along the crater rim to Uhuru Peak, the highest point in Africa.
 
After reaching the summit, you descend back toward Barafu Camp for a short rest before continuing down to Mweka Camp. This is a long and exhausting day, so mental strength, warm clothing, slow pacing, and guide support are very important.
  • Altitude: 4,650 m to 5,895 m, then down to 3,100 m
  • Hiking time: 12–14 hours total
  • Summit: Uhuru Peak
  • Camp: Mweka Camp
If you are worried about summit night, read our How Hard Is Mount Kilimanjaro? guide for a realistic look at altitude, fitness, cold conditions, and mental preparation.

Day 6: Mweka Camp to Mweka Gate

The final day is a descent through the rainforest to Mweka Gate. The trail can be wet and slippery, especially after rain, so trekking poles are still useful even though you are going downhill.
 
After signing out at the gate, successful climbers receive their Kilimanjaro certificate before returning to Moshi or Arusha.
  • Altitude: 3,100 m to 1,640 m
  • Hiking time: 3–4 hours
  • Zone: Rainforest
  • Finish: Mweka Gate

Umbwe Route Difficulty and Acclimatization

The Umbwe Route is one of the most difficult Kilimanjaro routes because it climbs steeply and gains altitude quickly in the first two days. The challenge is not technical climbing. You do not need ropes, ice axes, or mountaineering experience. The real challenge is the combination of steep terrain, physical effort, and limited acclimatization time.
 
On longer routes, your body has more time to adjust gradually as you move higher. Umbwe gives you less of that buffer. This makes pacing, hydration, rest, and guide supervision especially important.
The route becomes more manageable after it joins the southern circuit near Barranco Camp, but by then you have already gained altitude quickly. That is why Umbwe is usually recommended for experienced trekkers rather than first-time Kilimanjaro climbers.
 
If you are still learning how altitude affects the body, read our Kilimanjaro altitude sickness guide before choosing this route. You should also understand the basic principles of Kilimanjaro acclimatization so you know why longer routes often provide a safer summit profile.

Safety on the Umbwe Route

Because the Umbwe Route gains altitude quickly, safety depends on slow pacing, daily health checks, hydration, and honest communication with your guide. Climbers should not ignore symptoms such as headache, nausea, dizziness, loss of appetite, or unusual fatigue.

A good Umbwe climb should include experienced guides, proper mountain equipment, emergency oxygen, pulse oximeter checks, and a clear descent plan if altitude symptoms become serious.

The biggest mistake on Umbwe is treating it like a short shortcut to the summit. It is not. The route is shorter, but the altitude challenge is higher because your body has less time to adjust.

Umbwe Route Cost

The Umbwe Route is often priced as a shorter Kilimanjaro climb because it is commonly completed in 6 days. However, the final cost still depends on the level of service, guide and crew support, park fees, camping equipment, safety equipment, transfers, meals, and group size.
 
Do not choose Umbwe only because it may cost less than longer routes. A shorter route can reduce the number of mountain days, but it can also reduce acclimatization time. For many climbers, paying for an extra day on a better-acclimatized route is a smarter decision.
 
For a full breakdown of park fees, crew support, tips, inclusions, and extra expenses, read our complete Kilimanjaro climb cost guide.
Climbers posing at Barafu Camp on the Lemosho Route before summit night on Mount Kilimanjaro
A cheerful moment at Barafu Camp, the final staging point on the steep and scenic Umbwe Route before the summit climb begins.

Best Time to Climb the Umbwe Route

The best time to climb the Umbwe Route is during Kilimanjaro’s drier seasons: January to early March and June to October.
 
Because Umbwe is steep from the first day, dry trail conditions are important. Rain can make the rainforest and ridge sections slippery, muddy, and more tiring.
 
Avoid the long rainy season from mid-March to May if possible. November can also bring short rains, especially on the lower mountain.
 
For a full month-by-month breakdown, read our complete best time to climb Kilimanjaro guide.
 

Is the Umbwe Route Right for You?

The Umbwe Route may be right for you if you are an experienced trekker, comfortable with steep trails, and confident hiking for several days at high altitude.

Choose Umbwe if you want a quiet, direct, and physically demanding Kilimanjaro route. It can be rewarding for strong climbers who understand the altitude challenge and do not want a crowded trail.

Avoid Umbwe if you are a beginner, unsure about your fitness, or want the best acclimatization profile. In that case, routes like Lemosho, Machame, or the Northern Circuit are usually better choices.

Who Should Avoid the Umbwe Route?

The Umbwe Route is not the right choice for everyone. You should avoid Umbwe if you are a first-time trekker, unsure about your fitness, nervous about steep trails, or worried about altitude sickness.

You should also avoid Umbwe if your main goal is the best possible acclimatization profile. In that case, a longer route such as Lemosho, Machame, or the Northern Circuit is usually a smarter choice.

Umbwe can be rewarding, but it is not the route to choose only because it is short. A shorter Kilimanjaro climb is not always easier. On Umbwe, the shorter schedule often makes the climb harder because your body has less time to adapt.
Umbwe Is Best For Umbwe Is Not Best For
Experienced trekkers First-time hikers
Climbers who want a steep challenge Climbers worried about altitude sickness
People who prefer quieter trails Travelers who want the easiest route
Fit climbers with previous altitude experience Climbers who need more acclimatization time

Umbwe Route Pros and Cons

The Umbwe Route is powerful for the right climber, but it is not a safe “shortcut” for everyone. Use this quick comparison before deciding whether it fits your experience level and altitude confidence.

Pros of the Umbwe Route Cons of the Umbwe Route
Very quiet compared to busier Kilimanjaro routes One of the hardest routes because of the steep ascent
Direct and adventurous trail from the southern side Less time for acclimatization, especially on the 6-day itinerary
Scenic rainforest and ridge sections in the early days Not recommended for most beginners or nervous hikers
Fewer crowds before joining the southern circuit near Barranco Higher altitude challenge than longer routes like Lemosho or Northern Circuit
Strong sense of achievement for experienced trekkers Can feel rushed if chosen only because it is short
View of Mawenzi Peak rising above the clouds as seen from Stella Point on Mount Kilimanjaro
Nearing Stella Point on the Umbwe Route — a snowy, high-altitude section with sweeping views of Mawenzi and the expansive volcanic landscape below.

What to Pack for the Umbwe Route

Packing for the Umbwe Route should focus on steep terrain, changing weather, and cold summit conditions. The early days can be humid in the rainforest, while the higher camps become dry, cold, and exposed.
 
You should bring strong hiking boots, trekking poles, layered clothing, rain protection, warm gloves, a headlamp, a sleeping bag rated for cold conditions, and enough personal items for six or seven days on the mountain.
 
Because Umbwe is steep from the first day, trekking poles are especially useful for balance, knee support, and reducing fatigue during descents. For a full item-by-item checklist, read our complete Kilimanjaro packing list before your climb.

Umbwe vs Machame and Umbwe vs Lemosho

Umbwe Route vs Machame Route

The Umbwe Route and Machame Route both approach Kilimanjaro from the southern side and eventually join the southern circuit, but they offer very different climbing experiences.
 
Umbwe is steeper, quieter, and more direct. It feels more remote in the early days and is better suited to experienced trekkers looking for a serious challenge.
Machame is more popular and usually offers a better acclimatization profile, especially on the 7-day version. It is still challenging, but it gives climbers a more balanced route with strong scenery, better pacing, and more gradual altitude adjustment.
 
For most climbers, Machame Route Kilimanjaro is the better choice. Umbwe is better only if you specifically want a steeper, quieter, and more demanding trail.

Umbwe Route vs Lemosho Route

Umbwe and Lemosho are almost opposite choices. Umbwe is short, steep, and direct. Lemosho is longer, more gradual, and better for acclimatization.
 
The Lemosho Route Kilimanjaro is usually a better choice for first-time climbers who want beautiful scenery and a stronger summit profile. It allows more time for the body to adjust and offers a more varied approach across the western side of Kilimanjaro.
 
Umbwe is better for experienced trekkers who want a tougher challenge and fewer crowds. Lemosho is better for climbers who want scenery, acclimatization, and a more comfortable route to the summit.

Frequently Asked Questions About the Umbwe Route

How difficult is the Umbwe Route on Kilimanjaro?

The Umbwe Route is considered the most challenging route on Mount Kilimanjaro. Its steep terrain and rapid altitude gain provide little time for acclimatization, making it best suited for experienced climbers.

Why is the Umbwe Route considered the toughest Kilimanjaro route?

The Umbwe Route follows a steep and direct path up the southern slopes of the mountain. Because climbers gain altitude quickly, the risk of altitude sickness is higher compared to longer routes like the Lemosho Route or Northern Circuit Route.

How many days does the Umbwe Route take?

Most climbers complete the Umbwe Route in 6 days, making it one of the shorter routes on Mount Kilimanjaro.

Is the Umbwe Route dangerous?

The Umbwe Route is not dangerous when managed properly by experienced guides, but it has a higher altitude challenge than longer Kilimanjaro routes. The main risk is not the trail itself. The bigger concern is rapid elevation gain and limited acclimatization time.

Is 6 days enough for the Umbwe Route?

Six days is the standard Umbwe itinerary, but it is not ideal for every climber. Because the route gains altitude quickly, a 7-day Umbwe itinerary gives more time for acclimatization and is usually a smarter choice for climbers who want a safer pace.

Which is better, Umbwe or Machame?

Machame is better for most climbers because it offers a more balanced route, better acclimatization, and strong scenery. Umbwe is better only for experienced trekkers who specifically want a steeper, quieter, and more demanding climb.

Which is better, Umbwe or Lemosho?

Lemosho is better for most first-time climbers because it is longer, more scenic, and better for acclimatization. Umbwe is shorter, steeper, and more intense, making it better for experienced climbers looking for a serious challenge.

Plan Your Umbwe Route Climb with Kili Quests

The Umbwe Route is not the easiest way to climb Kilimanjaro, but for the right climber, it can be one of the most rewarding. It is steep, quiet, direct, and physically demanding, so it needs honest planning and experienced mountain support.
 
At Kili Quests, we help you choose the right route based on your fitness, trekking experience, travel dates, and acclimatization needs. If Umbwe is not the safest fit, we will tell you clearly and recommend a better route.
 
Contact us today to plan your Kilimanjaro climb with experienced local guides.

Related Articles

How to Train for Kilimanjaro: 6-Week Fitness Plan-Kili Quests

Train Smart for Kilimanjaro

Not sure if your fitness level is enough for the climb?At Kili Quests, we help you:
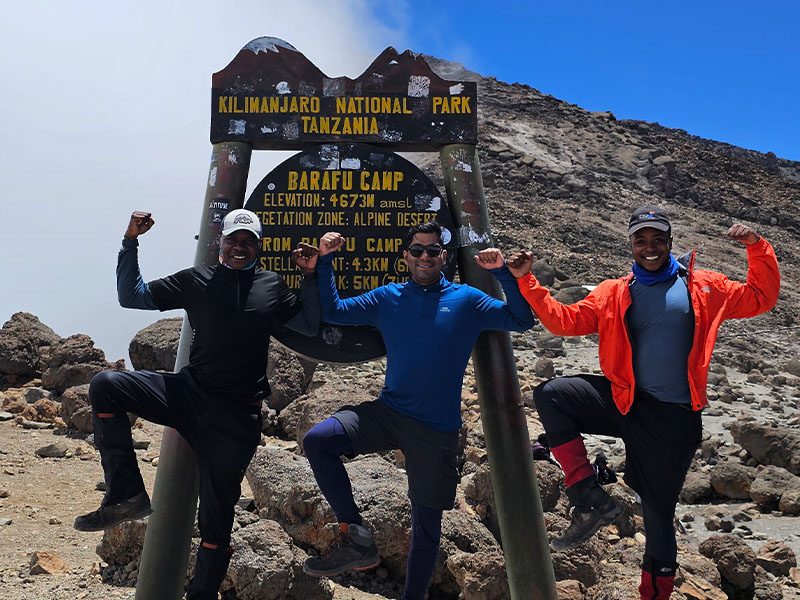
Preparing for Kilimanjaro the Right Way

Training is only part  your route, timing, and acclimatization matter. Explore these guides:

OUR CATEGORIES

How to Train for Kilimanjaro: 6-Week Fitness Plan

Kilimanjaro Is Not Technical , But It Is Demanding

Climbing Mount Kilimanjaro does not require ropes, climbing equipment, or mountaineering experience. But that does not mean it is easy. The real challenge is walking for several days at altitude while your body deals with fatigue, thinner air, changing weather, and long summit hours.
 
Most trekking days involve steady walking for 5 to 8 hours. Summit night can take much longer and often becomes the hardest part of the climb. By then, your legs are tired, your sleep may be lighter, and the altitude makes every step feel slower.
 
Training prepares your body for this reality. It helps you build endurance, leg strength, balance, backpack comfort, and recovery ability. The goal is not to become fast. The goal is to move steadily, recover overnight, and repeat the effort for several days.
 
If this is your first high-altitude trek, read Climbing Kilimanjaro for Beginners and How Hard Is Kilimanjaro? before choosing your route.

Quick Answer: How Should You Train for Kilimanjaro?

You should train for Kilimanjaro by building hiking endurance, leg strength, cardio fitness, stair or hill capacity, backpack comfort, and recovery. Most climbers should train for at least 6 to 8 weeks before the climb. If you are starting from a low fitness level, give yourself more time.
Your training should include:
  • Walking or hiking 4 to 5 days per week
  • One longer hike each weekend
  • Hill, stair, or incline treadmill training 1 to 2 times per week
  • Leg and core strength training 2 times per week
  • Practice with hiking boots and a daypack
  • Gradual backpack weight up to about 6 to 8 kg
  • Rest days to avoid injury and arrive fresh
Kilimanjaro training is not about speed. It is about steady movement, long hours on your feet, and the ability to keep going day after day.
Smiling hiker walking on a trail with trekking gear, building stamina for Kilimanjaro | Kili Quests
With the right training, every step becomes part of your success story.

Table of Contents

What You’re Really Training For

Most people think Kilimanjaro training is about getting “fit.” In reality, it’s about preparing your body for a very specific type of effort.You are not training for speed.
You are training to:
  • Move steadily for long hours
  • Recover overnight and repeat the effort
  • Stay balanced on uneven terrain
  • Keep going when your energy drops
This is why fast runners sometimes struggle, while slower, consistent hikers succeed.Kilimanjaro rewards patience and rhythm  not intensity.
 
Many climbers are surprised by how demanding it is , see our How Hard Is Kilimanjaro? Difficulty Explained.

6-Week Kilimanjaro Training Plan Overview

Week Cardio / Walking Strength Training Hiking Practice Rest
Week 1 3 easy walks, 30–45 minutes 2 light sessions 1 longer walk, 60–90 minutes 1–2 rest days
Week 2 3 walks, 45–60 minutes 2 sessions 1 hike, 1.5–2 hours 1–2 rest days
Week 3 3 walks with hills, stairs, or incline 2 sessions 1 hike, 2–3 hours 1 rest day
Week 4 3–4 sessions with incline or stairs 2 sessions 1 hike, 3–4 hours 1 rest day
Week 5 3 sessions with backpack practice 2 lighter sessions 1 hike, 4–5 hours 1 rest day
Week 6 2–3 moderate sessions 1 light session 1 long hike, then taper 2 rest days

The First Two Weeks: Building a Foundation That Lasts

The beginning of your training should feel almost too easy.That’s intentional.
 
Your goal in the first two weeks is to create consistency. Your body needs to get used to regular movement before it can handle intensity.
 
Go for walks several times a week. Keep a steady pace. You should finish your sessions feeling like you could continue if needed.At the same time, start light strength training. Focus on simple movements like squats, lunges, and planks.
 
These exercises support your joints and improve stability, which is more important than raw strength on the mountain.If you push too hard too early, you risk burnout or injury. If you build slowly, your body adapts naturally.
 
Your training should match your itinerary  see our How Long It Takes to Climb Kilimanjaro.
 

Weeks Three and Four: When Your Body Starts Adapting

By this stage, something changes.Your body is no longer adjusting  it’s improving.
Walks that once felt difficult become manageable. This is where you begin to increase the challenge.
  • Start adding hills to your routes.
  • Use stairs whenever possible.

Extend the duration of your hikes so your body learns to stay active for longer periods.This is also the phase where strength becomes more important.Not for climbing up  but for coming down.

Descending puts significant strain on your legs. Without preparation, this is where fatigue builds quickly. Training your legs to handle that impact will make a big difference during your trek.

Weeks Five and Six: Training for the Reality of the Mountain

Now your training becomes specific.You are no longer just exercising  you are preparing for Kilimanjaro itself.
 
Begin hiking with a backpack. Add weight gradually until you are carrying around 6 to 8 kilograms. This changes your posture, your balance, and how your body uses energy.More importantly, start doing back-to-back hikes.
For example:
  • A long hike on Saturday
  • Another long hike on Sunday
This is one of the most valuable things you can do.Kilimanjaro is not about one difficult day. It’s about showing up again the next morning and continuing, even when your body is tired.That second day teaches your body exactly what the mountain will demand.

Best Strength Exercises for Kilimanjaro Training

Exercise Sets Reps Why It Helps
Squats 3 10–15 Builds leg strength for uphill trekking.
Lunges 3 8–12 each leg Helps with balance and uneven terrain.
Step-ups 3 10 each leg Closely matches uphill hiking movement.
Calf raises 3 15–20 Supports long uphill walking.
Plank 3 30–60 seconds Strengthens your core for balance and backpack comfort.

Cardio Training for Kilimanjaro

Cardio training helps your body handle long trekking days without burning out too early. You do not need to train like a runner, and you do not need high-intensity workouts every day. For Kilimanjaro, steady endurance is more useful than speed.
Good cardio options include:
  • Brisk walking
  • Long hikes
  • Incline treadmill walking
  • Stair climbing
  • Cycling
  • Swimming
  • Slow jogging if you already run comfortably
The key is consistency. Your cardio sessions should build your ability to move for long periods at a controlled pace. Kilimanjaro is climbed slowly, so your training should prepare you for steady effort, not short bursts of speed.

Hiking Practice: The Most Important Kilimanjaro Training

Hiking is the best training for Kilimanjaro because it prepares your body for the exact movement you will repeat on the mountain. Gym workouts help, but they do not fully prepare your feet, knees, balance, joints, and mental patience the way hiking does.
Hiking practice helps you build:
  • Foot comfort
  • Knee and ankle strength
  • Balance on uneven terrain
  • Pacing control
  • Backpack comfort
  • Confidence on long walking days
  • Mental patience when tired

Try to include one longer hike each week. As your training improves, add hills, stairs, uneven trails, or a backpack to make the practice more realistic.

How to Train for Kilimanjaro Without Mountains

You can still prepare well for Kilimanjaro even if you do not live near mountains. The goal is to copy the effort of uphill walking, long time on your feet, and repeated movement over several days.
Use these training options:
  • Stair climbing
  • Incline treadmill walking
  • Step-ups
  • Long city walks
  • Parking garage stairs
  • Walking with a loaded backpack
  • Back-to-back long walks on weekends
If you live in a flat area, stairs and incline treadmill sessions are especially useful. They help your legs adapt to uphill movement and prepare your body for slow, steady climbing.

What to Do in the Final Week Before Kilimanjaro

In the final week before Kilimanjaro, reduce your training intensity. This is not the time to test your limits or start hard new workouts. The goal is to arrive rested, healthy, and ready to climb.
During the final week:
  • Do light walks
  • Stretch gently
  • Sleep well
  • Hydrate regularly
  • Check your gear
  • Avoid heavy leg workouts
  • Avoid long, exhausting hikes
  • Do not try new boots or new training routines

Arriving tired is a mistake. Your final week should help your body recover so you begin the climb fresh.

Kilimanjaro Training Mistakes to Avoid

Many climbers make training harder than it needs to be by focusing on the wrong things. Kilimanjaro rewards consistency, not extreme workouts.

Training Too Hard Too Early

Pushing too hard in the first weeks can cause injury, soreness, and burnout. Build slowly so your body has time to adapt.

Only Running and Not Hiking

Running can help cardio fitness, but it does not fully prepare your feet, knees, backpack comfort, balance, or downhill muscles. Hiking should be part of your training.

Ignoring Descending

Going downhill can be hard on your knees and thighs. Practice descents, step-downs, and controlled walking so your legs are ready for the way down.

Not Testing Boots and Backpack

Do not bring new boots or an untested backpack to Kilimanjaro. Train with the gear you plan to use so you can fix problems before the climb.

Training Without Rest

More training is not always better. Your body improves during recovery. Take rest days so you do not arrive exhausted.

Arriving Tired

Do not destroy yourself in the final week. Reduce intensity, sleep well, hydrate, and arrive fresh.

Altitude Will Be the Hardest Part — No Matter Your Fitness

No training plan can fully prepare you for altitude.You can be very fit and still feel its effects.What training does is give you a stronger base. When altitude slows you down, your body is still capable of continuing.It also helps you control your breathing and maintain a steady pace  both of which are essential at high elevation.
 
 To understand how altitude affects your body, read our Altitude Sickness Guide.
Smiling climber at Uhuru Peak holding a flag or sign after a successful Kilimanjaro ascent | Kili Quests
The reward of every step — with the right training, Kilimanjaro is within reach.

Training With Your Gear Is Part of Preparation

Many climbers make the mistake of bringing new gear to Kilimanjaro without testing it.This creates unnecessary problems.Your boots should already feel comfortable before you arrive. Your backpack should fit properly. Your clothing layers should be familiar.
During training:
  • Wear your actual hiking boots
  • Use your backpack
  • Practice with trekking poles
  • Test your layering system in different conditions

This removes uncertainty and helps you focus on the climb itself.

 Use our Kilimanjaro Packing List to make sure you’re fully prepared.

Recovery Is What Allows You to Improve

Training is only effective if your body has time to recover.Without rest, your body doesn’t adapt  it simply becomes tired.
Make sure you:
  • Sleep at least 7–8 hours per night
  • Take at least one full rest day each week
  • Stretch regularly after workouts
If you feel constantly exhausted, reduce your intensity. Arriving tired is one of the worst ways to start your climb.
 
Choosing the right season also impacts your performance , read our Best Time to Climb Kilimanjaro.

The Real Goal of Training

The goal is not to arrive as the strongest person on the mountain.
The goal is to arrive:
  • Comfortable walking for hours
  • Confident in your pace
  • Mentally prepared for long days
Kilimanjaro is a slow journey. Success comes from consistency, not speed.One step at a time  repeated over days  is what takes you to the summit.

Frequently Asked Questions About Training for Kilimanjaro

How fit do you need to be to climb Mount Kilimanjaro?

You don’t need to be an athlete to climb Kilimanjaro, but you do need a solid level of endurance.The key requirement is not speed or strength  it’s your ability to walk for multiple hours a day, for several days in a row, while carrying a daypack and dealing with altitude. Most trekking days involve steady movement at a slow pace, often on uneven or steep terrain.A good benchmark is this:
  • If you can comfortably complete a 5–6 hour hike and still feel capable the next day, you are on the right track.
Fitness doesn’t eliminate the challenge, but it gives your body the ability to cope with fatigue, recover overnight, and maintain a steady pace  all of which are critical for summit success.

How long should you train before climbing Kilimanjaro?

For most people, 6 to 8 weeks of structured training is enough to prepare for Kilimanjaro  provided that training is consistent.What matters is not just the duration, but progression. Your training should gradually increase:
  • Time spent on your feet
  • Exposure to hills or elevation
  • Ability to recover between sessions

If you already have a good fitness base, you may need less time. If you are starting from a low activity level, giving yourself more time will significantly improve your experience on the mountain.The goal is simple: arrive feeling prepared, not rushed.

Can beginners climb Mount Kilimanjaro?

Yes , and in fact, many successful climbers are beginners.Kilimanjaro is one of the few high-altitude mountains in the world that is accessible to people without technical climbing experience. However, that does not mean it is easy.Beginners who succeed usually do three things well:
  • They follow a structured training plan
  • They choose the right route and itinerary
  • They take acclimatization seriously

With the right preparation and guidance, first-time trekkers regularly reach Uhuru Peak.

What type of exercise is best for Kilimanjaro training?

The most effective training is hiking, because it closely matches the demands of the mountain.However, hiking alone is not enough. A well-rounded training approach should include:
  • Endurance work (long walks, hikes, or cycling)
  • Strength training (especially legs and core)
  • Incline training (hills or stairs)
  • Time-on-feet training (long-duration movement, not intensity)

The goal is to prepare your body for sustained effort not short bursts of performance.If you train in a way that reflects how you will move on the mountain, your body adapts much more effectively.

Should you train with a backpack before climbing Kilimanjaro?

Yes , and it is one of the most important parts of your preparation.On the mountain, you will carry a daypack with water, layers, snacks, and personal items. Even a moderate weight of 6–8 kg changes how your body moves.Training with a backpack helps your body adapt by:
  • Strengthening your shoulders and back
  • Improving balance and posture
  • Teaching your body how to manage energy under load
Climbers who skip this step often feel discomfort early in the trek, even if they are otherwise fit.

Plan Your Kilimanjaro Climb the Right Way

Training gets your body ready, but reaching the summit also depends on the route, pace, acclimatization schedule, guide team, and safety support. The smartest plan combines physical preparation with a realistic itinerary.
 
At Kili Quests, we help climbers choose routes and schedules that match their fitness level, travel dates, and altitude concerns. Our local guides support you with steady pacing, daily health checks, proper acclimatization planning, good mountain meals, and safe summit preparation.
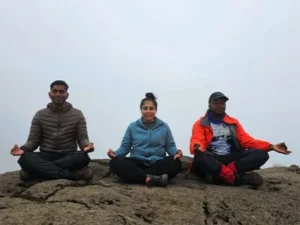
 
If you are preparing for Kilimanjaro, we can help you choose the right route and climb plan before you arrive in Tanzania.
 
Contact Kili Quests today to plan your Kilimanjaro climb with experienced local guides.

Related Articles

Wildlife on Mount Kilimanjaro: Animals & Plants Guide

Experience Kilimanjaro’s Ecosystems

Every step on the mountain reveals a new environment.

Plan Your Kilimanjaro Climb

The right route and timing help you experience every zone fully.

OUR CATEGORIES

Wildlife on Mount Kilimanjaro: Animals, Plants and Ecological Zones

Mount Kilimanjaro is not only Africa’s highest mountain. It is also one of the most ecologically diverse places in East Africa, with changing landscapes, plants, birds, and animals from the lower slopes to the summit.
 
As you climb higher, the environment changes quickly. The warm cultivated foothills give way to rainforest, then moorland, alpine desert, and finally the cold arctic summit zone. Each zone has its own wildlife, plant life, temperature, rainfall pattern, and trekking conditions.
 
Most animals on Kilimanjaro are found in the lower rainforest and moorland zones, where there is more vegetation, water, and shelter. Higher up the mountain, wildlife becomes rare, but the plants become more unusual. Giant groundsels, lobelias, everlasting flowers, lichens, and hardy alpine plants show how life adapts to altitude, cold nights, and strong sunlight.
 
In this guide, you will learn what animals and plants live on Mount Kilimanjaro, which ecological zones you pass through, where wildlife sightings are most likely, and what climbers can realistically expect to see during a trek.
 
For a broader mountain introduction, read Mount Kilimanjaro overview.

Quick Answer: What Wildlife Can You See on Mount Kilimanjaro?

Most wildlife on Mount Kilimanjaro is found in the lower rainforest and moorland zones. Climbers may see black-and-white colobus monkeys, blue monkeys, bushbucks, duikers, birds, insects, and unique plants such as giant groundsels, giant lobelias, and Impatiens kilimanjari.
 
Wildlife sightings become less common as you climb higher because the mountain becomes colder, drier, and more exposed. The rainforest has the richest biodiversity, while the alpine desert and summit zones have very little animal life.
 
The most memorable natural features on Kilimanjaro are often the plants and ecological zones rather than large animals. Trekkers should expect changing landscapes, rare flowers, giant alpine plants, birdlife, and occasional monkey sightings rather than a safari-style wildlife experience.
Ecological Zone Elevation Range What You May See
Cultivation Zone 800–1,800 m Farms, banana trees, coffee plants, villages, birds, insects, and local Chagga landscapes.
Rainforest Zone 1,800–2,800 m Colobus monkeys, blue monkeys, birds, mosses, ferns, camphor trees, fig trees, and Impatiens kilimanjari.
Moorland Zone 2,800–4,000 m Giant lobelias, giant groundsels, shrubs, grasses, sunbirds, ravens, and wide mountain views.
Alpine Desert Zone 4,000–5,000 m Sparse grasses, lichens, hardy alpine plants, white-necked ravens, dry ground, cold nights, and strong sunlight.
Arctic Summit Zone 5,000–5,895 m Ice, glaciers, volcanic rock, thin air, almost no plants, and very limited wildlife.
Giant groundsels in the alpine desert zone of Mount Kilimanjaro | Kili Quests
Surreal and beautiful — giant groundsels thrive in Kilimanjaro’s alpine desert.

Table of Contents

Mount Kilimanjaro Ecological Zones Overview

Kilimanjaro is divided into five main ecological zones, each shaped by elevation, temperature, and moisture levels. These zones are not just labels , they define what you see, feel, and experience during your climb.

Cultivation Zone (800–1,800 m)

At the base of the mountain, life is shaped by human activity. This zone is home to farms, villages, and fertile volcanic soil that supports agriculture.Banana trees, coffee plants, maize, and beans dominate the landscape, reflecting the deep connection between local communities and the mountain. The Chagga people, who have lived here for generations, rely on this land for their livelihoods.Wildlife here is limited compared to higher zones, but you will see birds, insects, and domesticated animals.
 
This zone matters because it represents the cultural foundation of Kilimanjaro , where your journey begins not just physically, but socially.

Rainforest Zone (1,800–2,800 m)

As you gain altitude, the landscape changes dramatically. The air becomes humid, the temperature drops slightly, and dense forest begins to surround you.The rainforest is the richest ecological zone on Kilimanjaro. Tall trees such as camphor and fig create a thick canopy, while moss, ferns, and epiphytes cover branches and trunks. This layered vegetation traps moisture, creating ideal conditions for life.
This is where most wildlife is found. You may see black-and-white colobus monkeys moving through the trees, hear birds calling overhead, or spot small antelopes hidden in the undergrowth.Guides often point out unique plants like Impatiens kilimanjari, a flower found only on Kilimanjaro.
 
Wildlife sightings are best during the right season see our best time to climb Kilimanjaro guide.
 
This zone is important not just for biodiversity, but also for acclimatization. The gradual start helps your body adjust before higher altitudes.
Impatien kilimanjarica flower blooming on Mount Kilimanjaro | Kili Quests
Impatiens kilimanjarica -Delicate beauty — this bright flower grows only on Kilimanjaro.
Kilimanjaro White-eye bird perched on a branch in the mountain forest | Kili Quests
A rare gem of the mountain — the Kilimanjaro White-eye is found nowhere else on Earth.

Moorland Zone (2,800–4,000 m)

As the forest fades, the landscape opens into a wide, dramatic environment known as the moorland. Trees disappear, replaced by shrubs, grasses, and some of the most unusual plants on the mountain.
Here you will find giant lobelias and groundsels , plants that have adapted to extreme temperature changes. During the day, they store heat, and at night, they protect themselves from freezing conditions.
The environment feels quieter and more exposed, with fewer animals but more striking views. Birds like sunbirds and ravens are still present, and small mammals may be seen occasionally.
 
Nights become colder here , see our Kilimanjaro night temperature guide.
 
This zone is where many climbers begin to truly feel the altitude, making it both physically and visually significant.
Protea kilimandscharica flowering shrub in the heath zone of Mount Kilimanjaro | Kili Quests
Protea kilimandscharica is a hardy flowering shrub found in Kilimanjaro’s high-altitude Moorland zone showcasing nature’s resilience and beauty.
Lobelia deckenii growing in the moorland zone of Mount Kilimanjaro | Kili Quests
Lobelia deckenii is a giant rosette plant adapted to Kilimanjaro’s moorland, storing water to survive freezing temperatures and harsh winds.

Alpine Desert Zone (4,000–5,000 m)

Above the moorland, the environment becomes harsh and minimal. The alpine desert is cold, dry, and windy, with intense sunlight during the day and freezing temperatures at night.
Vegetation is sparse. Only small grasses, lichens, and hardy alpine plants survive here. Wildlife is rare, though you may still see white-necked ravens flying above or near camps.
The lack of life is not a sign of emptiness , it is a reflection of how extreme conditions shape survival.
This zone challenges both the environment and the climber, making preparation essential.
Everlasting flower, blooming near Kilimanjaro’s summit | Kili Quests
Timeless beauty — the Everlasting flower blooms near the summit, undisturbed by frost and wind.
White-necked Raven gliding above the slopes of Mount Kilimanjaro | Kili Quests
A clever companion — White-necked Ravens often soar alongside trekkers in the high zones.

Arctic Summit Zone (5,000–5,895 m)

At the highest point, life almost disappears entirely. The summit zone is defined by glaciers, ice, and thin air.There are no plants, and only rare microorganisms may survive in sheltered areas. Occasionally, a bird may pass through, but this environment is largely lifeless.Reaching this zone feels otherworldly  a complete contrast to the lush rainforest below.This final stage represents the extreme end of Kilimanjaro’s ecological range.

Why Kilimanjaro Has So Many Ecosystems

Kilimanjaro’s diversity is driven by altitude.As you climb, temperature drops by roughly 6°C for every 1,000 meters. Rainfall is highest in the forest zone and decreases as you ascend. These changes create completely different environments within a short distance.This is what makes Kilimanjaro unique , few places in the world allow you to experience so many ecosystems in a single trek.
 
Your route determines how you experience these zones , explore our Kilimanjaro routes guide.
Animal or Bird Where It May Be Seen What to Know
Black-and-white colobus monkey Rainforest zone One of the most memorable animals climbers may see in the forest, often moving through the trees.
Blue monkey Rainforest zone Common in forested areas and usually seen or heard during the lower sections of the climb.
Bushbuck Forest and lower mountain areas A shy antelope species that is more difficult to spot because it stays hidden in vegetation.
Duiker Forest and moorland edges Small antelope that may be seen briefly, especially in quieter areas.
White-necked raven Moorland, alpine desert, and high camps One of the most commonly seen birds in the higher zones of Kilimanjaro.
Sunbirds Forest and moorland zones Small colorful birds often seen near flowering plants.
Kilimanjaro white-eye Montane forest areas A notable bird associated with Kilimanjaro and nearby highland habitats.

Rare and Endemic Species on Kilimanjaro

Some plants and animals found on Kilimanjaro exist nowhere else:
  • Dendrosenecio kilimanjari (giant groundsel)
  • Lobelia deckenii
  • Impatiens kilimanjari
  • Kilimanjaro white-eye bird
These species have adapted to survive extreme conditions, making them an important part of the mountain’s identity.
Plant Zone Why It Matters
Impatiens kilimanjari Rainforest zone A delicate flower strongly associated with Kilimanjaro’s forest environment.
Giant groundsel Moorland and alpine zones One of Kilimanjaro’s most unusual plants, adapted to cold nights and strong sunlight.
Lobelia deckenii Moorland zone A giant rosette plant that stores water and survives freezing mountain conditions.
Protea kilimandscharica Heath and moorland zones A hardy flowering shrub that adds color to higher slopes.
Everlasting flowers Alpine zones Small tough flowers that survive in cold, dry, exposed conditions.
Camphor trees Rainforest zone Important forest trees that help create the dense, moist lower mountain environment.
Podocarpus trees Rainforest zone Tall evergreen trees found in Kilimanjaro’s montane forest.
Kniphofia thomsonii, the Red Hot Poker flower, growing on Mount Kilimanjaro | Kili Quests
A burst of fire in the mist — Red Hot Poker adds striking color to Kilimanjaro’s slopes.
Camphor wood tree (Ocotea usambarensis) in the lower montane rainforest of Mount Kilimanjaro | Kili Quests
Towering with a quiet scent — camphor wood trees stand tall in Kilimanjaro’s misty rainforest.

Conservation and Climate Concerns on Kilimanjaro

Kilimanjaro’s ecosystems are sensitive because they change quickly with altitude, rainfall, temperature, and human pressure. The mountain’s glaciers have been shrinking, and changing weather patterns can affect vegetation, water sources, and the survival range of some plant species.
 
The rainforest zone is especially important because it helps capture moisture, supports biodiversity, and protects the lower mountain environment. Damage to trails, littering, careless camping, and disturbing plants or animals all weaken the mountain experience for future climbers.
 
Responsible trekking matters because every climber passes through fragile environments. Staying on trails, respecting wildlife, avoiding litter, and choosing responsible operators helps protect Kilimanjaro’s natural zones.
Various wildflowers growing across the natural zones of Mount Kilimanjaro | Kili Quests
From forest to summit, Kilimanjaro’s slopes are home to countless wildflowers — each adding color to the journey.
Wild daisy flower growing in the heath zone of Mount Kilimanjaro | Kili Quests
Simple and radiant — wild daisies bring charm to Kilimanjaro’s open slopes.

Best Kilimanjaro Routes for Wildlife and Plant Life

Some Kilimanjaro routes give better chances to experience the mountain’s ecological diversity than others. Wildlife sightings are never guaranteed, but routes with longer forest sections, quieter trails, and gradual movement through the zones often give a richer nature experience.
 
The Lemosho Route is one of the best options for scenery and ecological variety because it starts on the western side of the mountain and passes through beautiful forest before reaching the higher zones.
 
The Machame Route also offers strong landscape variety, with rainforest, moorland, alpine desert, and dramatic views as the climb progresses.
 
The Marangu Route passes through lush forest in the early section and can be good for seeing monkeys and forest plants, especially near the lower trail.
 
The Northern Circuit Route gives one of the most complete mountain experiences because it takes more time and crosses quieter areas of Kilimanjaro.
 
If wildlife, scenery, and ecological change matter to you, compare the main trail options in our Kilimanjaro routes guide before choosing your climb.

Tips for Wildlife and Plant Spotting

  • Be quiet in the rainforest for better sightings
  • Use binoculars in the moorland
  • Ask your guide — local knowledge is key
  • Avoid touching plants or disturbing animals
Your experience improves when you slow down and observe.
Tall Podocarpus tree in the lush montane forest of Mount Kilimanjaro | Kili Quests
Ancient and evergreen — Podocarpus trees guard the quiet paths of Kilimanjaro’s rainforest.
Cyathea tree fern unfolding in the lush rainforest of Mount Kilimanjaro | Kili Quests
Prehistoric elegance — tree ferns like Cyathea thrive in Kilimanjaro’s misty lower forests.

Frequently Asked Questions About Wildlife on Mount Kilimanjaro

What animals live on Mount Kilimanjaro?

Animals that live on Mount Kilimanjaro include black-and-white colobus monkeys, blue monkeys, bushbucks, duikers, small mammals, insects, and many bird species. Most wildlife is found in the rainforest and lower mountain zones.

Can you see animals while climbing Kilimanjaro?

Yes, climbers can sometimes see animals while climbing Kilimanjaro, especially during the early days of the trek in the rainforest zone. Monkey sightings are among the most common, while larger animals are less frequently seen.

Which Kilimanjaro zone has the most wildlife?

The rainforest zone has the most wildlife on Mount Kilimanjaro. It has more moisture, trees, food, and shelter than the higher zones, making it the richest area for animals, birds, insects, and plant life.

What plants are unique on Mount Kilimanjaro?

Unique and notable plants on Mount Kilimanjaro include Impatiens kilimanjari, giant groundsels, Lobelia deckenii, Protea kilimandscharica, everlasting flowers, and high-altitude shrubs adapted to cold nights and strong sunlight.

Are there animals near the summit of Kilimanjaro?

Very few animals live near the summit of Kilimanjaro because the environment is extremely cold, dry, windy, and low in oxygen. Birds such as white-necked ravens may sometimes be seen in higher areas, but animal life is very limited near the summit.

Is Kilimanjaro wildlife dangerous for climbers?

Kilimanjaro wildlife is usually not dangerous for climbers on the main trekking routes. Most animals avoid people, and sightings are usually brief. Trekkers should still respect wildlife, keep distance, and follow guide instructions

Experience Kilimanjaro Beyond the Summit

Mount Kilimanjaro is more than a summit goal. It is a journey through rainforest, moorland, alpine desert, rare plants, birdlife, and some of the most dramatic ecological changes in East Africa.
 
At Kili Quests, we help climbers experience the mountain fully, not just reach the top. Our local guides explain the landscapes, plants, wildlife, routes, and mountain conditions that make Kilimanjaro such a unique trek.
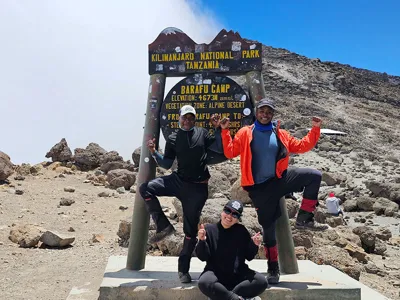
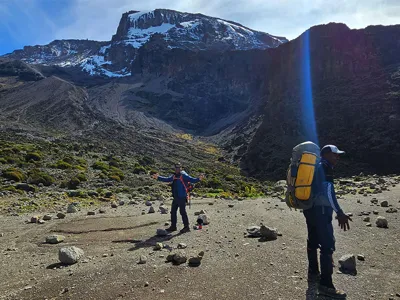
 
Contact us to plan a Kilimanjaro climb with experienced local guides who help you understand the mountain from forest to summit.

Related Articles