Plan Your Kilimanjaro Itinerary
The right preparation makes your climb safer, easier, and more successful.
- Choose the right route for your goals
- Build a safe acclimatization plan
- Climb with experienced local guides
Plan Your Climb the Right Way
The itinerary is just one part of your journey ,make sure everything is planned correctly.
OUR CATEGORIES
What to Expect Each Day on Kilimanjaro
Climbing Mount Kilimanjaro is not just one long hike. It is a multi-day journey through changing landscapes, rising altitude, camp routines, guide briefings, health checks, and the final summit push to Uhuru Peak.
One of the most common questions climbers ask before booking is simple: what does each day on Kilimanjaro actually feel like?
This guide explains the normal daily rhythm of a Kilimanjaro climb, from your first day at the park gate to summit night and the final descent. Exact camps, distances, and hiking times depend on your route, but the overall experience follows a similar pattern on most Kilimanjaro climbs.
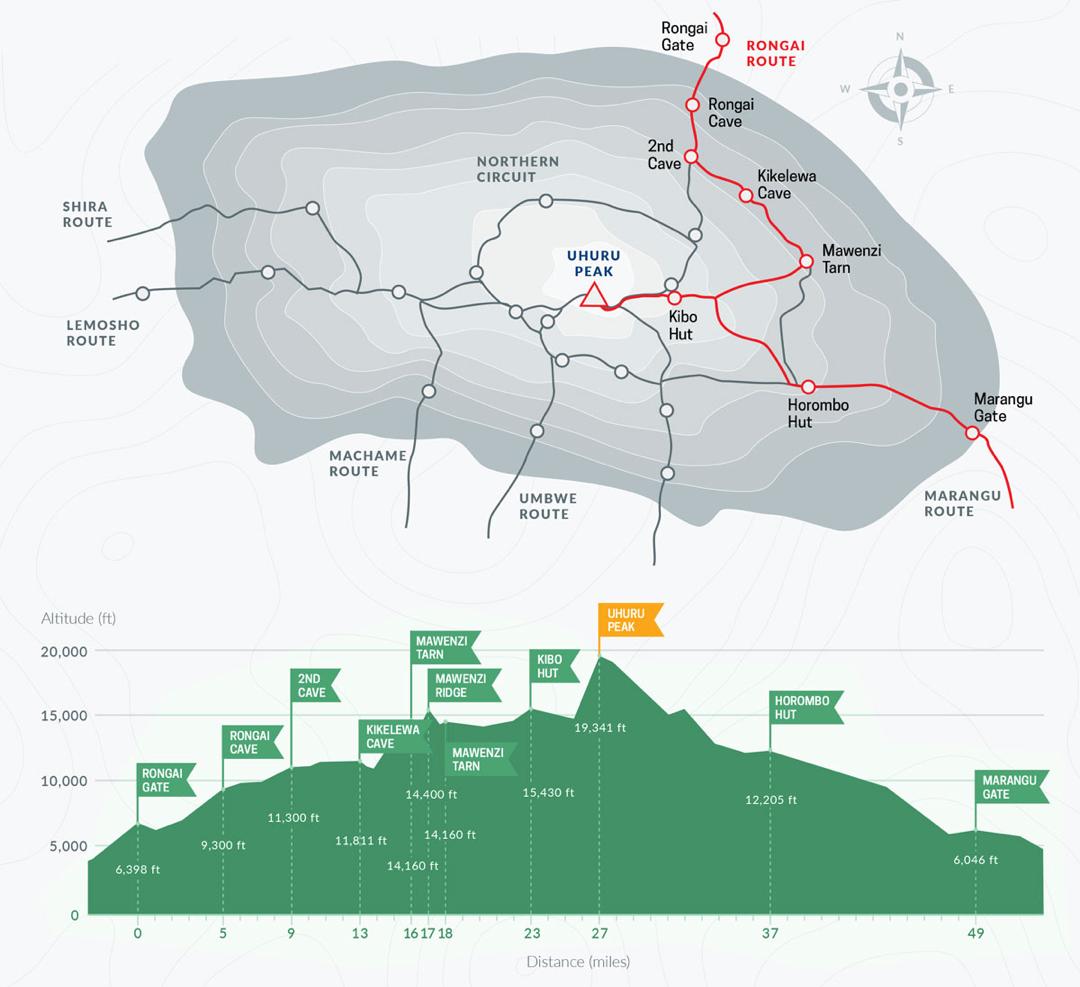
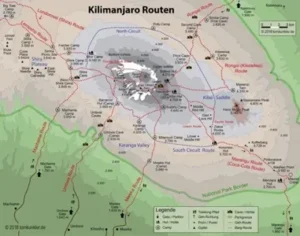
Before choosing your itinerary, compare the main options in our Kilimanjaro routes comparison guide so you understand how route length, scenery, difficulty, and acclimatization affect your climb.
Quick Answer: What Should You Expect Each Day on Kilimanjaro?
Each day on Kilimanjaro usually includes an early wake-up, breakfast, several hours of hiking, rest breaks, lunch, arrival at camp, health checks, dinner, and sleep. The pace is slow because your body needs time to adjust to altitude.
The first days usually feel manageable as you move through forest and moorland. The middle days become more serious as altitude increases. Summit night is the hardest part, with a cold midnight climb toward the crater rim and Uhuru Peak before a long descent.
Kilimanjaro Daily Routine Overview
| Part of the Day | What Usually Happens |
|---|---|
| Morning | Wake up, pack your day items, eat breakfast, and prepare for the day’s hike. |
| During the hike | Walk slowly with your guides, take breaks, drink water, eat snacks, and adjust to altitude. |
| Lunch | Depending on the route and day, lunch may be served on the trail or at camp. |
| Afternoon | Reach camp, rest, change layers, hydrate, and prepare for the evening routine. |
| Evening | Dinner, health checks, briefing for the next day, and early sleep. |
| Summit night | Wake around midnight, climb slowly in cold conditions, reach the crater rim, continue to Uhuru Peak, then descend. |
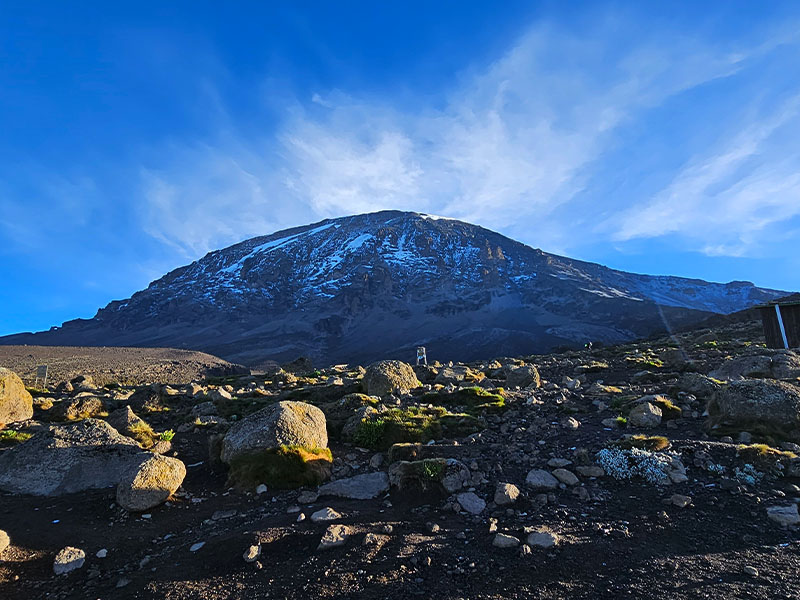
Table of Contents
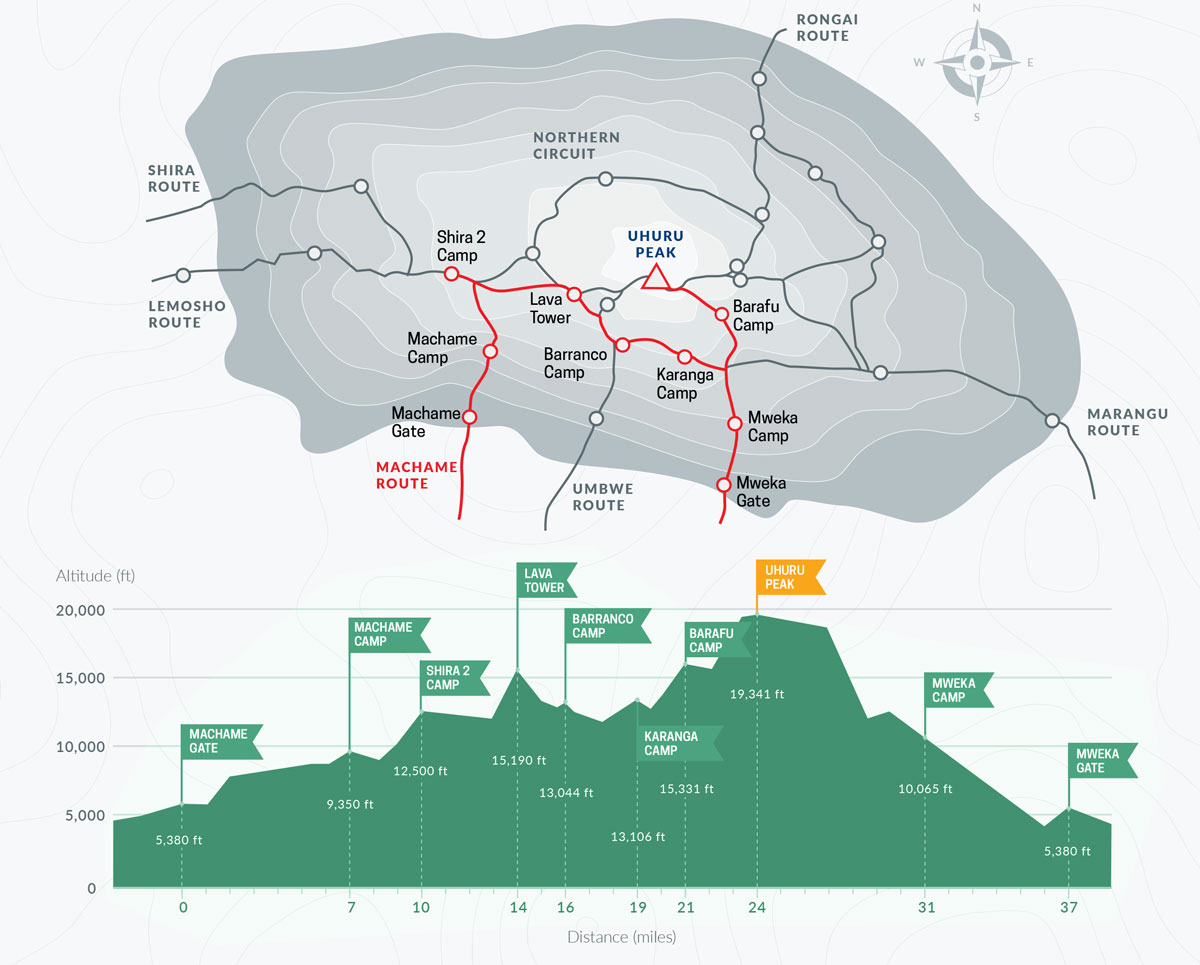
What Is a Typical Kilimanjaro Itinerary Like?
Most Kilimanjaro climbs take between 6 and 9 days, depending on the route you choose. Each day follows a similar structure, but the environment, altitude, and difficulty gradually change as you move higher on the mountain.
You will usually:
- Wake up early with tea or coffee
- Trek for several hours at a slow pace
- Take breaks for rest, water, and meals
- Arrive at camp in the afternoon
- Eat dinner and rest for the next day
As the days go on, the altitude increases, and your body begins to feel the effects. This is why pacing, acclimatization, and choosing the right number of days are so important.
The number of days also affects price. Longer itineraries cost more because they require more park-fee days, crew support, meals, and logistics. Before choosing a shorter climb only to save money, read Kilimanjaro Climb Cost to understand how itinerary length affects your full budget.
How This Guide Is Different from a Route Itinerary
This guide explains what a typical Kilimanjaro day feels like, including hiking rhythm, altitude changes, camp life, meals, health checks, and summit-night expectations.
It is not a route-specific itinerary. Each Kilimanjaro route has different camps, distances, scenery, and acclimatization profiles. For exact day-by-day route plans, read the detailed itinerary for your chosen route or compare options in our Kilimanjaro routes comparison guide.
What to Expect Day by Day on Kilimanjaro
Day 1: Park Gate, Registration, and First Hike
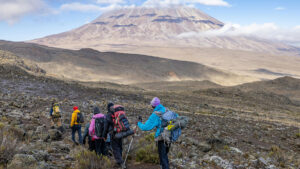
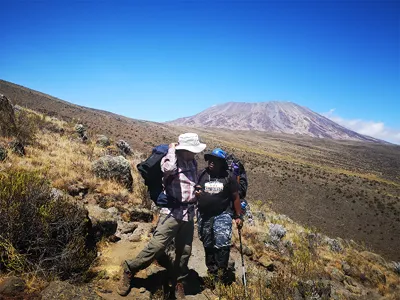
Your climb begins at the park gate, where your guide team completes registration before you start walking. Most routes begin in the rainforest or lower mountain zone, where the trail is green, humid, and shaded.
The first day usually feels exciting and manageable. The pace should still be slow from the beginning because good acclimatization starts early, not only when altitude symptoms appear.
Day 2: Settling Into the Mountain Routine
By the second day, you begin to understand the rhythm of Kilimanjaro: wake up early, eat, walk slowly, take breaks, arrive at camp, rest, eat dinner, and sleep.
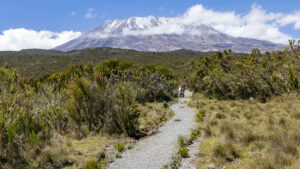
The landscape usually starts to open up as you move from forest toward moorland. You may begin to notice cooler air, stronger sun, and a slower walking pace.
Day 3: Altitude Becomes More Noticeable
Around the middle of the climb, altitude becomes more noticeable for many climbers. You may feel mild headaches, reduced appetite, slower movement, or tiredness.
This is where acclimatization becomes important. Some routes include a “climb high, sleep low” day, where you hike to a higher point during the day and sleep lower at night to help your body adjust.
Read our Kilimanjaro acclimatization guide to understand why this matters.
Day 4: Higher Camps and Thinner Air
As you move higher, the landscape becomes drier, colder, and more exposed. The air feels thinner, and simple tasks like walking, packing, or changing layers can feel harder than usual.
This stage is not about speed. It is about conserving energy, drinking regularly, eating enough, and following your guide’s pace.
Day 5 :High Camp and Summit Preparation
Before summit night, climbers usually reach a high camp such as Barafu, Kibo Hut, or another route-specific base camp. This day is often shorter, but it is important because your body needs rest before the summit attempt.
You will eat early, prepare warm layers, check your headlamp, refill water, and receive a summit briefing from your guides. Sleep may be difficult because of altitude and excitement, but resting still helps.
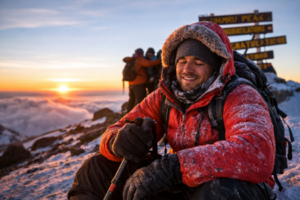
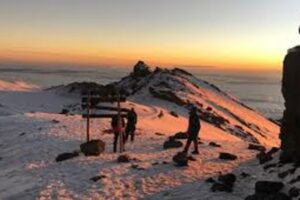
Summit Night: The Hardest Part of Kilimanjaro
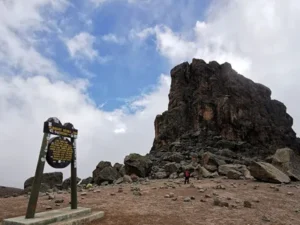
Summit night usually begins around midnight. Climbers move slowly in the dark, often in very cold conditions, toward the crater rim. From there, the final goal is Uhuru Peak, the highest point in Africa.
This is usually the hardest part of the climb because of altitude, cold, fatigue, and long walking hours. After reaching the summit, climbers descend to a lower camp the same day.
Read our Kilimanjaro summit day gear guide before your climb so you know what to prepare.
Final Day: Descent and Exit Gate
The final day is usually a descent through lower mountain zones back to the exit gate. As you lose altitude, breathing becomes easier and many climbers feel stronger again.
At the gate, successful climbers sign out and receive their Kilimanjaro certificate before returning to Moshi or Arusha.

What You’ll Experience Along the Way
Kilimanjaro changes every day. You may start in humid rainforest, pass through moorland and alpine desert, then reach cold summit conditions near the crater rim.
You will also experience a simple mountain routine: early mornings, slow hiking, meals prepared by the crew, guide briefings, health checks, and quiet evenings at camp.
The climb tests both body and mind. Some days feel comfortable, while others require patience, especially as altitude increases. Good preparation, steady pacing, and guide support make the experience more manageable.
For more preparation, read our Kilimanjaro training plan and Kilimanjaro ecological zones guide.
What Guides Check Each Day
Your guides do more than lead the trail. They monitor how you are adjusting to altitude and how your body is responding to the climb.
Daily checks may include:
- how you slept
- appetite
- headache or nausea
- energy level
- hydration
- walking pace
- oxygen level when needed
Be honest with your guides. Hiding symptoms is one of the worst mistakes climbers can make on Kilimanjaro.
Be Prepared for the Journey, Not Just the Summit
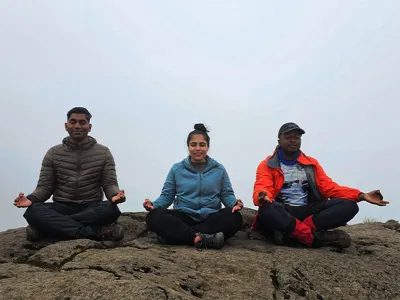
Climbing Kilimanjaro is not just about reaching Uhuru Peak , it’s about the entire journey.
Each day brings new challenges, new landscapes, and new achievements. By understanding what to expect, you can prepare properly and enjoy the experience to the fullest.
Frequently Asked Questions About Kilimanjaro Itinerary
What does a normal day on Kilimanjaro look like?
A normal day usually includes waking early, eating breakfast, hiking for several hours, taking rest breaks, arriving at camp, having dinner, completing health checks, and sleeping early. The pace is slow to help with acclimatization.
How many hours do you hike each day on Kilimanjaro?
Most trekking days are around 4 to 7 hours, depending on the route and camp location. Summit day is much longer and can take 10 to 14 hours or more including the descent.
What is the hardest day on Kilimanjaro?
Summit night is usually the hardest part of the climb. Climbers start around midnight, walk in cold and thin air, reach the crater rim, continue to Uhuru Peak, then descend for several more hours.
What is camp life like on Kilimanjaro?
Camp life is simple but organized. You rest, eat meals, change layers, refill water, attend guide briefings, complete health checks, and prepare for the next day’s hike.
Do all Kilimanjaro routes have the same daily schedule?
No. The general routine is similar, but each route has different hiking hours, camp locations, scenery, and acclimatization patterns. Longer routes usually feel less rushed and give the body more time to adjust.
Start Your Kilimanjaro Journey with Confidence
Knowing what to expect each day makes Kilimanjaro feel less intimidating and easier to prepare for. The climb is still challenging, but the right route, steady pacing, good acclimatization, and experienced guides make a major difference.
At Kili Quests, we help you choose the right Kilimanjaro itinerary based on your fitness, experience, travel dates, and safety needs.
Contact us today to start planning your Kilimanjaro climb with trusted local guides.
Related Articles
Is Climbing Kilimanjaro Dangerous? Safety Guide
April 6, 2026
No Comments
Plan Your Kilimanjaro Climb Climb safely with the right preparation and expert support. Choose the safest route Prepare for altitude properly Climb with experienced local
Kilimanjaro Deaths Explained: Statistics, Causes & Real Risk
April 6, 2026
No Comments
Plan Your Kilimanjaro Climb Climb with the right preparation, support, and safety strategy. Choose the safest route Prepare for altitude properly Climb with expert local

Kilimanjaro Climb Cost: Full Price Breakdown | Kili Quests
March 19, 2026
1 Comment
Plan Your Kilimanjaro Climb Budget Climbing Kilimanjaro is a major investment choosing the right route and support team makes all the difference.At Kili Quests, we