How to Acclimatize on Mount Kilimanjaro & Avoid Altitude Sickness

Plan Your Kilimanjaro Climb Safely

Altitude is the biggest challenge on Kilimanjaro — the right route and preparation can make the difference between turning back and reaching the summit.

Choose Your Route

Your acclimatization depends on your route choice. Explore the best Kilimanjaro routes for your goals.

OUR CATEGORIES

How to Properly Acclimatize on Mount Kilimanjaro (Complete Guide for Safe Summit Success)

Climbing Mount Kilimanjaro is one of the most rewarding adventures in the world  but altitude is the single biggest factor that determines whether you reach the summit or turn back early. Many climbers underestimate how quickly altitude affects the body, and even strong, fit hikers can struggle if they don’t acclimatize properly.Understanding how your body reacts to altitude, choosing the right route, and following proven acclimatization strategies can make the difference between failure and standing on Uhuru Peak.
 
Before diving into the strategies, it’s important to understand how altitude sickness on Kilimanjaro develops and why acclimatization is your strongest defense.
Arrival at Barafu Camp — the final base before the summit push

Understanding Acclimatization: What You Need to Know

Kilimanjaro acclimatization guide infographic showing altitude risks and tips for avoiding altitude sickness on the climb
Acclimatization on Kilimanjaro – Understanding altitude and adjusting gradually is the key to reaching Uhuru Peak safely.

Table of Contents

What Is Acclimatization and Why It Matters on Kilimanjaro

What Happens to Your Body at High Altitude

As you climb higher on Kilimanjaro, oxygen levels decrease significantly. At the summit (5,895 meters), there is roughly half the oxygen available compared to sea level. Your body must adapt to this change through several physiological responses:
  • Breathing becomes faster and deeper
  • Heart rate increases to circulate oxygen more efficiently
  • The body produces more red blood cells over time
  • Energy levels drop as oxygen becomes limited

This adaptation process is called acclimatization. If your body does not have enough time to adjust, symptoms of altitude sickness begin to appear.

To fully understand how altitude impacts your body, it’s helpful to read our detailed guide on altitude sickness on Kilimanjaro, including symptoms and prevention.

Why Acclimatization Is Critical for Summit Success

Altitude sickness is the main reason climbers fail to reach the summit. It does not depend on fitness, age, or experience  anyone can be affected.Common symptoms include:
  • Persistent headache
  • Nausea or loss of appetite
  • Fatigue and dizziness
  • Difficulty sleeping
In more serious cases, conditions like High Altitude Pulmonary Edema (HAPE) or High Altitude Cerebral Edema (HACE) can occur, which require immediate descent.
 

Proven Acclimatization Strategies on Kilimanjaro

Climb High, Sleep Low

One of the most effective techniques used on Kilimanjaro is the “climb high, sleep low” strategy. During the day, you ascend to a higher elevation, then descend slightly to sleep at a lower altitude.This allows your body to adapt without excessive stress and significantly reduces the risk of altitude sickness. Routes that naturally include this profile tend to have much higher success rates.

Walk Slowly and Maintain a Steady Pace

Speed is not your friend on Kilimanjaro. Moving too quickly reduces your body’s ability to adapt.
  • Walk slowly and consistently
  • Focus on breathing rhythm
  • Avoid rushing to camp
Guides often use the phrase “pole pole” (slowly, slowly) ,and following this advice is one of the most important things you can do.If you’re preparing physically, following a structured Kilimanjaro training plan will help your body handle long trekking days more efficiently.
 
Proper physical preparation also plays a role, and following a structured Kilimanjaro training plan can make it easier for your body to adapt during the climb.

Use Acclimatization Walks at Camp

Short acclimatization hikes after reaching camp are extremely effective. These are usually 100–200 meters above camp and done at a relaxed pace.
These walks:
  • Encourage your body to adapt faster
  • Improve oxygen efficiency
  • Prepare you for the next day’s elevation gain
This strategy is commonly used on well-designed routes and plays a major role in improving summit success.

Stay Hydrated and Eat Properly

Hydration is essential at altitude. As you climb, your body loses fluids more quickly through breathing and exertion.
  • Drink 3–4 liters of water per day
  • Eat high-carbohydrate meals for energy
  • Maintain protein intake for recovery
Poor hydration and nutrition can significantly increase your risk of altitude sickness.

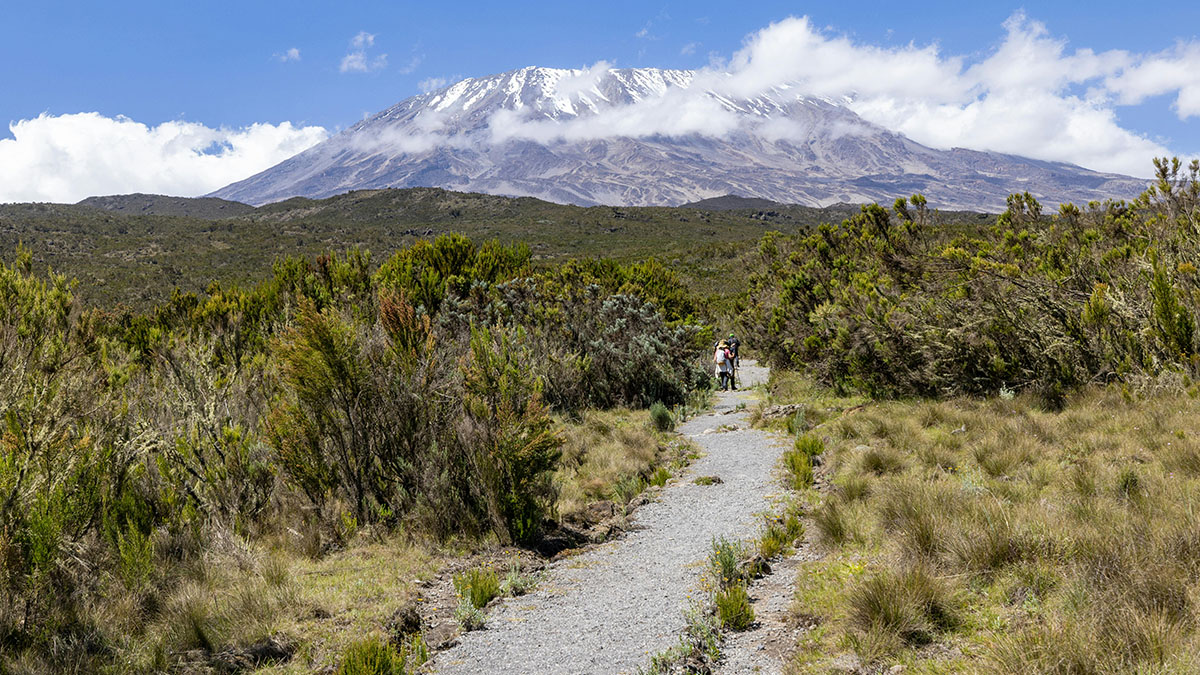
Choosing the Right Route for Better Acclimatization

Not all Kilimanjaro routes are equal. Some are short and steep, while others are longer and designed to allow gradual adaptation.Choosing the right route is one of the most important decisions you will make. If you haven’t already, read the full Kilimanjaro routes comparison guide to understand how each route differs.
 
If you’re unsure which route fits your goals, our Kilimanjaro routes comparison guide explains the differences in difficulty, duration, and success rates.

Best Routes for Acclimatization

The following routes provide the best acclimatization profiles:
  • Lemosho Route (7–8 days) – gradual ascent, excellent success rate
  • Northern Circuit Route (9–10 days) – longest route with maximum adaptation time
  • Machame Route (6–7 days) – good balance of challenge and acclimatization
Shorter routes like Marangu or Umbwe give less time for adjustment and are associated with lower success rates.
 
The success of acclimatization is strongly influenced by timing, so choosing the best time to climb Kilimanjaro can improve your overall experience.

Recognizing Altitude Sickness Early

Understanding symptoms early can prevent serious complications.

Early Warning Signs

  • Headache that doesn’t go away
  • Loss of appetite
  • Light-headedness
  • Fatigue

What You Should Do Immediately

  • Inform your guide right away
  • Rest and hydrate
  • Avoid further ascent until symptoms improve
  • Descend if symptoms worsen

Your guide plays a critical role in monitoring your condition and making decisions that keep you safe.

Understanding these symptoms early is critical, which is why every climber should read about altitude sickness symptoms and treatment on Kilimanjaro before the trek.
Stella Point in ice — standing where time stands still and the summit is just within reach.

Why Experienced Guides Make a Difference

Climbing Kilimanjaro is not just about physical strength , it’s about making the right decisions at the right time.
Professional guides:

  • Monitor your oxygen levels and symptoms daily
  • Adjust pace and schedule when needed
  • Plan acclimatization walks strategically
  • Make critical decisions about ascent or descent

At Kili Quests, our team is trained to prioritize safety while maximizing your chances of reaching the summit.

Experienced guides play a major role in your success, especially when combined with a well-planned itinerary like those outlined in our Kilimanjaro climbing packages.

Infographic showing durations of Kilimanjaro routes: Lemosho (6–8 days), Machame (6–7), Marangu (6–7), Rongai (6–7), Umbwe (5–7), and Northern Circuit (8–9 days)
Kilimanjaro Route Durations – Compare how many days each route takes so you can choose the one that fits your schedule and acclimatization needs.

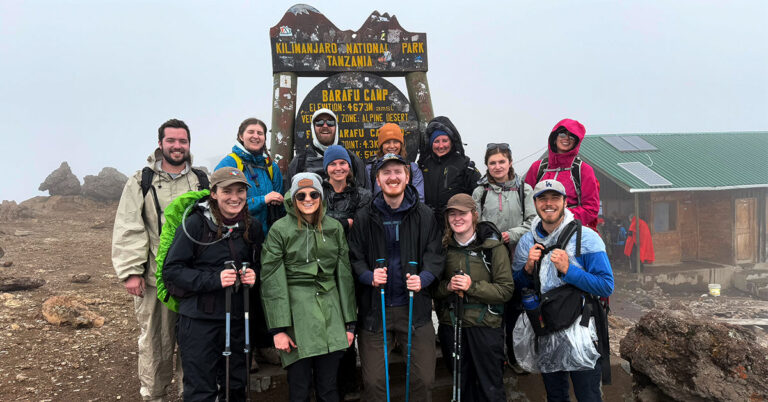
Acclimatization Is the Key to Reaching Uhuru Peak

Reaching the summit of Kilimanjaro is not about speed or strength  it’s about patience, preparation, and proper acclimatization.To give yourself the best chance of success:

  • Choose a longer route with gradual ascent
  • Follow “climb high, sleep low” principles
  • Walk slowly and stay hydrated
  • Listen to your body and your guide

When these factors come together, your chances of standing on Uhuru Peak increase dramatically.

Frequently Asked Questions About Acclimatization on Kilimanjaro

How do you acclimatize properly on Mount Kilimanjaro?

Proper acclimatization on Kilimanjaro involves gaining altitude gradually while allowing your body time to adjust to lower oxygen levels. This is achieved by choosing longer routes, maintaining a slow and steady pace, staying hydrated, and following the “climb high, sleep low” principle. Trekkers who follow these strategies give their bodies enough time to adapt, significantly improving their chances of reaching the summit.

How many days do you need to acclimatize on Kilimanjaro?

Most successful Kilimanjaro climbs take between 6 and 9 days, depending on the route. Longer itineraries such as the Lemosho Route or Northern Circuit Route provide more time for acclimatization and result in higher summit success rates. Shorter climbs may save time but increase the risk of altitude sickness.

What is the best route for acclimatization on Kilimanjaro?

Routes like the Lemosho Route and Northern Circuit Route are considered the best for acclimatization because they offer gradual elevation gain and extra trekking days. These routes allow your body to adjust naturally, reducing the risk of altitude sickness and increasing the likelihood of reaching Uhuru Peak.

How much water should you drink while acclimatizing?

Climbers are generally advised to drink between 3 and 4 liters of water per day while on the mountain. Proper hydration supports circulation, improves oxygen delivery, and helps reduce the effects of altitude. Dehydration can worsen symptoms of altitude sickness, making hydration a critical part of acclimatization.

Can you prevent altitude sickness completely?

Altitude sickness cannot be completely prevented, but it can be significantly reduced with proper acclimatization strategies. Choosing the right route, ascending slowly, staying hydrated, and listening to your guide all play a major role in minimizing risk.

Plan Your Kilimanjaro Climb with Confidence

Acclimatization is one of the most important parts of your Kilimanjaro journey  and having the right support makes all the difference.At Kili Quests, we design every climb with your safety, comfort, and success in mind. From choosing the best route to guiding you step by step on the mountain, we ensure you are fully prepared for altitude.If you’re still planning your trip, understanding the best time to climb Kilimanjaro and the cost of climbing Kilimanjaro will help you make informed decisions.
 
Understanding the cost of climbing Kilimanjaro and preparing at the right time can make a significant difference.


Related Articles

How to Charge Devices on Mount Kilimanjaro (Power & Solar Tips)

Table of Contents

How to Charge Your Devices on Mount Kilimanjaro: Power Tips for Trekkers | Kili Quests

 If you’re heading to Mount Kilimanjaro, one of the most common questions is:
How will I charge my phone or camera on the mountain?”

Since there’s no standard electricity on Kilimanjaro, staying powered up requires preparation. Whether it’s capturing summit moments, navigating offline maps, or staying in touch, here’s how to keep your devices charged during your trek with Kili Quests.
 
Internet Access – Staying online depends on both your power supply and coverage — learn how to manage both.
3D-style infographic showing power bank, smartphone, and battery-saving tips for Kilimanjaro.
No charging stations on the mountain — bring a power bank and use airplane mode.

Is There Electricity on Mount Kilimanjaro?

There is no public electricity or grid on the mountain. Camps are remote and lack outlets — but that doesn’t mean you’ll be without power completely.
Here’s what’s available:
 
Charging Services at Camps (Limited)
  • Some high camps (e.g., Barafu Camp) may offer charging via solar or generator
  • Usually available for a fee
  • Devices may need to be left for a few hours
Solar-Powered Lights
  • A few camps have solar lighting
  • Charging small items may be possible (not guaranteed)
  • Ask Kili Quests about your specific route for updated info

Best Ways to Charge Your Devices on the Mountain

 1. Power Banks (Portable Chargers)
The most reliable option.
  • Recommended Capacity: At least 20,000mAh (more for multi-device use)
  • How Many? Bring 1–2 depending on device usage
  • Tip: Charge fully before departure; store in warm layers to protect battery life
2. Solar Chargers
Optional backup if you prefer to recharge on the go.
  • Works Best: During clear sunny days while hiking
  • Limitations: Less effective at high altitude or in cloudy weather
  • Tip:Mount panels on your backpack to collect sunlight while walking
3. Charge During Rest Stops (If Available)
Some camps have shared solar systems or small generators.
  • You may be able to charge during meals or long stops
  • Charging speed is slow
  • Availability is not guaranteed on all routes
Recharged Solar Power Bank
Power Bank

Smart Battery Management Tips

 Even with backup power, conserving energy is critical. Use these tips to extend your battery life:
  •  Turn off: Wi-Fi, Bluetooth, GPS, and background apps
  •  Lower brightness: Especially during summit night
  •  Use Airplane Mode: Your signal won’t work anyway at high altitudes
  •  Limit usage: Use only when needed to preserve charge
  •  Keep warm: Cold reduces battery performance — store devices inside warm clothing at night
Gear Rentals Guide – Need a power bank or solar charger? See what you can rent locally.

Alternative Power-Free Solutions

Don’t want to worry about charging at all? Here are a few reliable offline solutions:
  • Digital Camera + Extra Batteries: Great for photography without draining phone power
  • Offline Maps: Use apps like Maps.me or download Google Maps offline
  • Pen & Journal: Record your adventure the old-school way
  • Spare Phone: Carry a basic feature phone as a backup communication device
Summit Day Gear Checklist – Know what gear is essential for the coldest and longest day of your trek.

Stay Connected the Smart Way

While Mount Kilimanjaro doesn’t offer traditional charging stations, it is still possible to keep your devices powered up with smart planning. Bring power banks, use solar as backup, and manage battery life wisely.
 
Night Temperatures Guide – Extreme cold affects battery life — be prepared with the right setup.

Frequently Asked Questions

Can you charge your phone on Mount Kilimanjaro?

Charging options on Mount Kilimanjaro are limited because there is no regular electricity on the mountain. Some camps may offer solar or generator charging for a small fee, but the most reliable way to keep devices powered is by bringing a fully charged power bank.

What is the best way to charge devices during a Kilimanjaro trek?

The best solution is to bring high-capacity power banks (around 20,000mAh or more). Many trekkers carry one or two power banks to charge phones, cameras, and headlamps throughout the trek.

Do Kilimanjaro camps have charging stations?

Most camps on Kilimanjaro do not have public charging stations. Occasionally, some high camps may provide limited charging through solar panels or generators, but availability is not guaranteed and charging can take several hours.

Can solar chargers work on Mount Kilimanjaro?

Solar chargers can work on clear sunny days and are sometimes attached to backpacks while hiking. However, they should be used as a backup option because weather conditions and altitude can reduce charging efficiency.

How can cold temperatures affect phone batteries on Kilimanjaro?

Cold temperatures at high altitude can drain batteries quickly. To protect battery life, keep your devices and power banks inside warm clothing or sleeping bags at night.

How can trekkers save battery power during the climb?

Trekkers can extend battery life by using airplane mode, lowering screen brightness, turning off Wi-Fi and Bluetooth, and limiting phone use. Downloading maps, documents, and music before the trek also helps reduce power consumption.

Ready to Climb with Power?

 Book your Kilimanjaro trek with Kili Quests today and get expert advice on gear, packing, and device charging.
 Contact us for personalized route guidance and power tips for your adventure.

Related Articles